Blog

  • Woodworking Outdoor Furniture: Crafting Beauty for Your Backyard

    Woodworking Outdoor Furniture: Crafting Beauty for Your Backyard

    Are you passionate about creating stunning and functional pieces with your own hands? If so, woodworking outdoor furniture might be the perfect project for you. This activity not only allows you to enjoy the satisfaction of building something beautiful and practical but also provides a wonderful way to enhance your outdoor living space. In this article, we’ll explore the ins and outs of woodworking outdoor furniture, from selecting the right materials to mastering essential techniques.

    For your “Free” Outdoor Projects Plan – Click Here.

    Introduction to Woodworking Outdoor Furniture

    Woodworking outdoor furniture is a rewarding hobby that combines creativity, craftsmanship, and practicality. Whether you’re a seasoned woodworker or a beginner, building outdoor furniture can be a fun and fulfilling project. The best part? You get to enjoy the fruits of your labor every time you relax in your backyard.

    Why Choose Woodworking Outdoor Furniture?

    Why should you consider woodworking outdoor furniture for your next project? Here are a few reasons:

    • Customization: You can tailor your furniture to fit your specific needs and tastes.
    • Quality: When you build your own furniture, you have control over the materials and construction methods, ensuring higher quality.
    • Satisfaction: There’s a unique sense of accomplishment that comes from creating something with your own hands.
    • Cost-Effective: Building your own furniture can often be more affordable than purchasing high-quality pieces.

    Selecting the Right Wood for Outdoor Furniture

    Choosing the right wood is crucial for the longevity and durability of your outdoor furniture. Here are some popular choices:

    • Teak: Known for its natural resistance to weather and insects, teak is a top choice for outdoor furniture.
    • Cedar: Cedar is lightweight, easy to work with, and naturally resistant to decay.
    • Redwood: Like cedar, redwood is resistant to moisture and insects, making it ideal for outdoor use.
    • Acacia: Acacia wood is durable and offers a beautiful finish, though it may require regular maintenance.

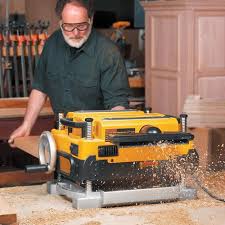
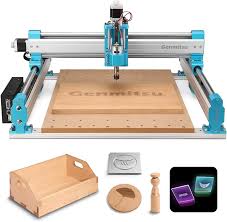
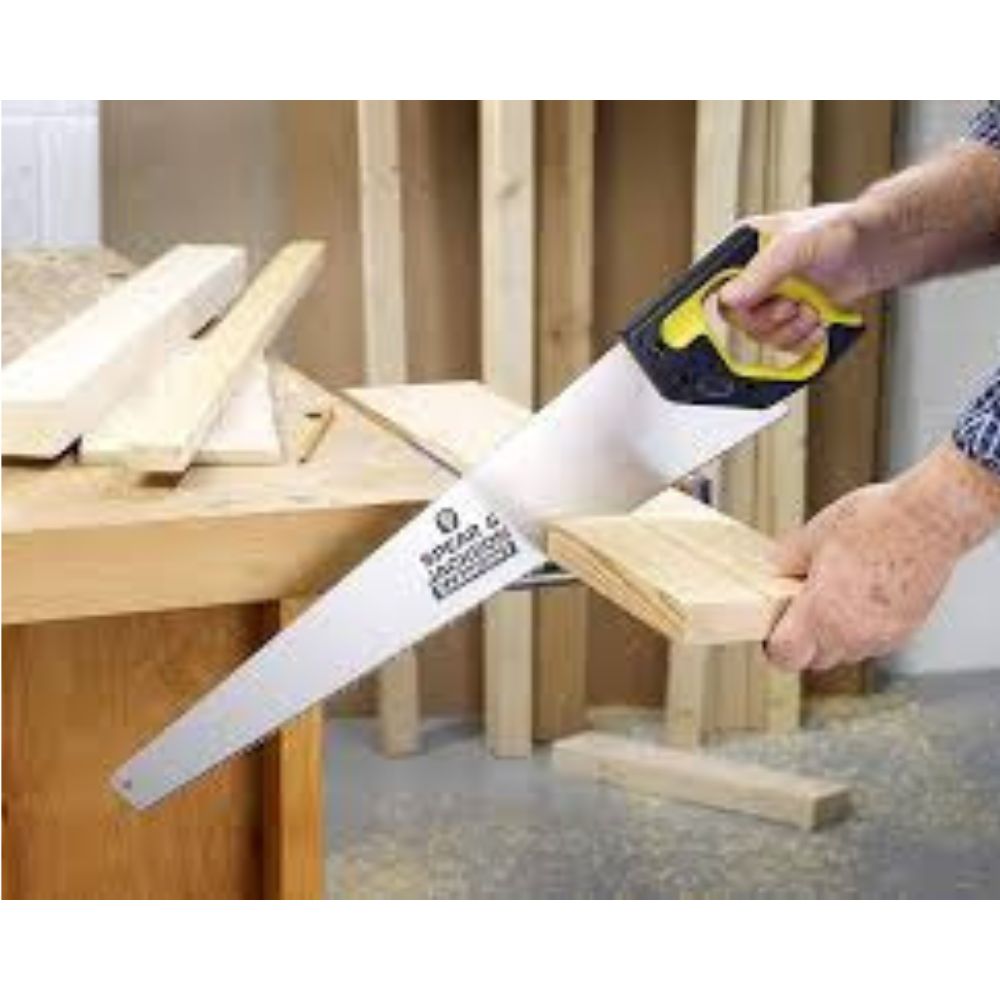
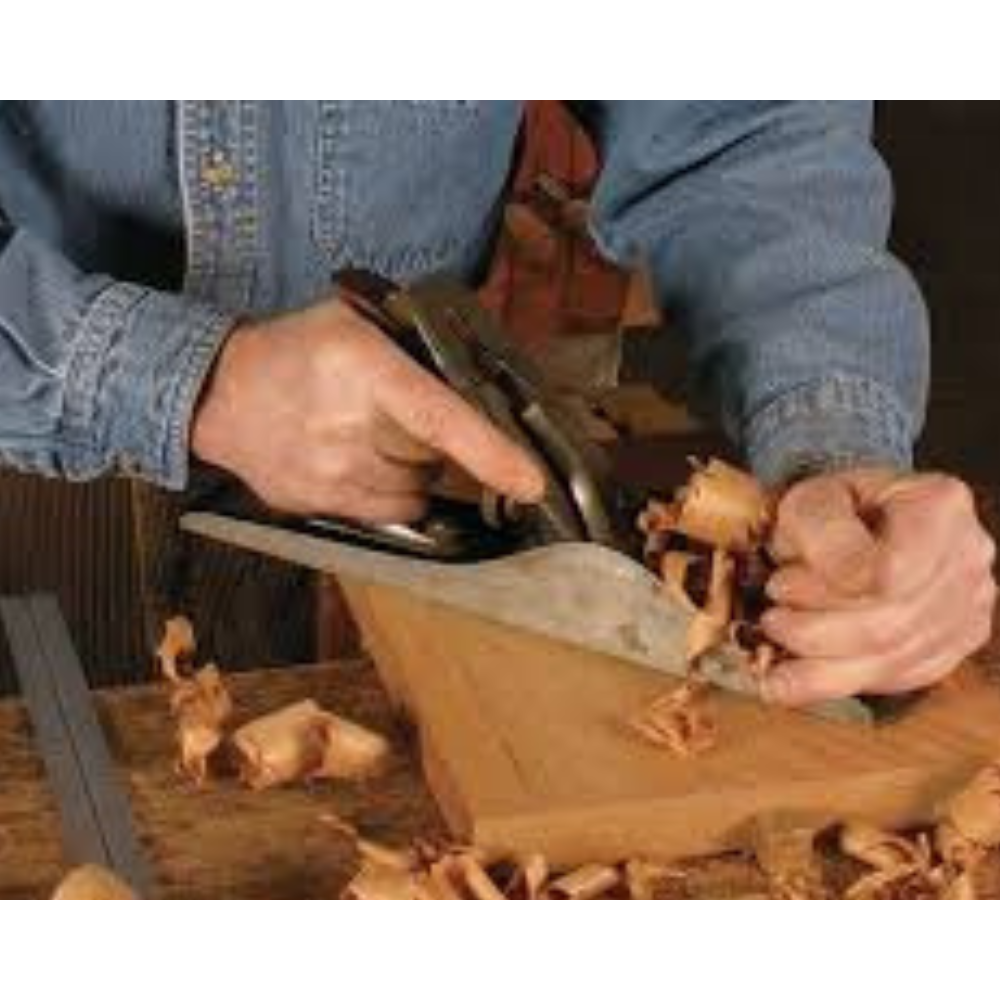
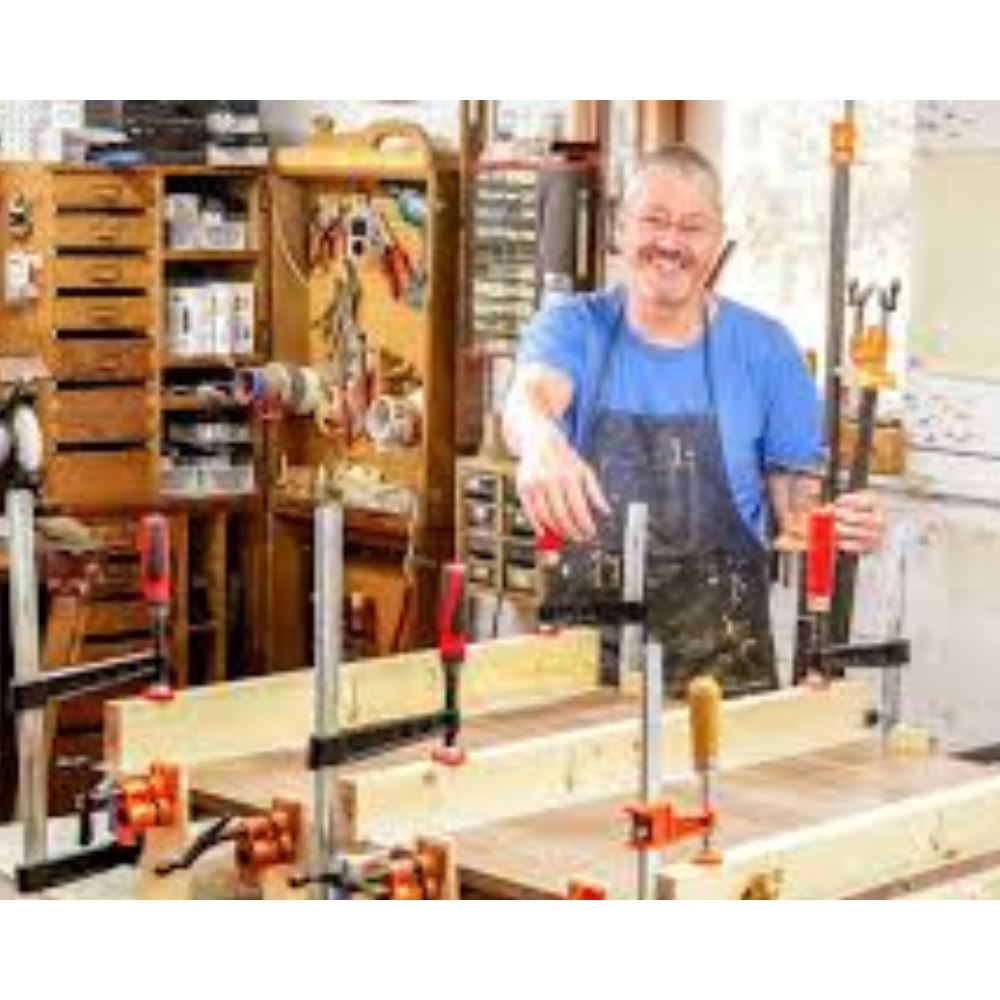
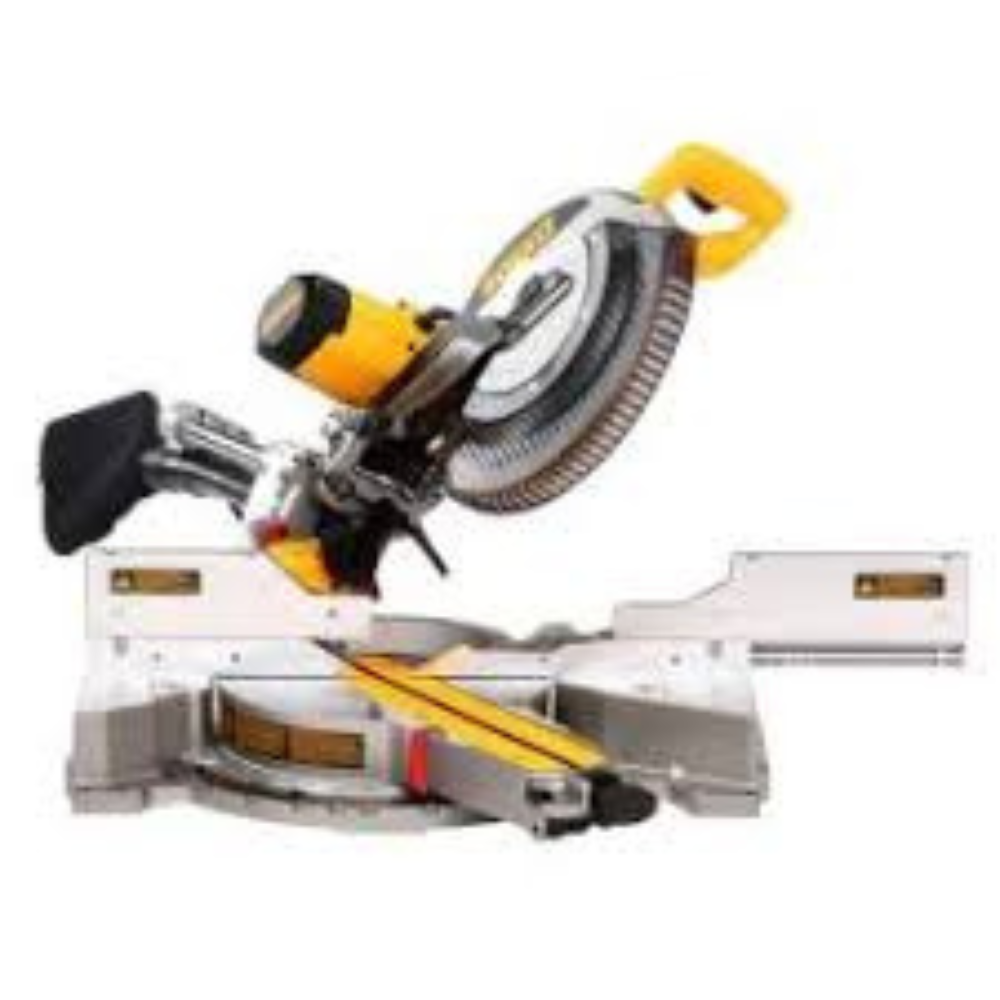
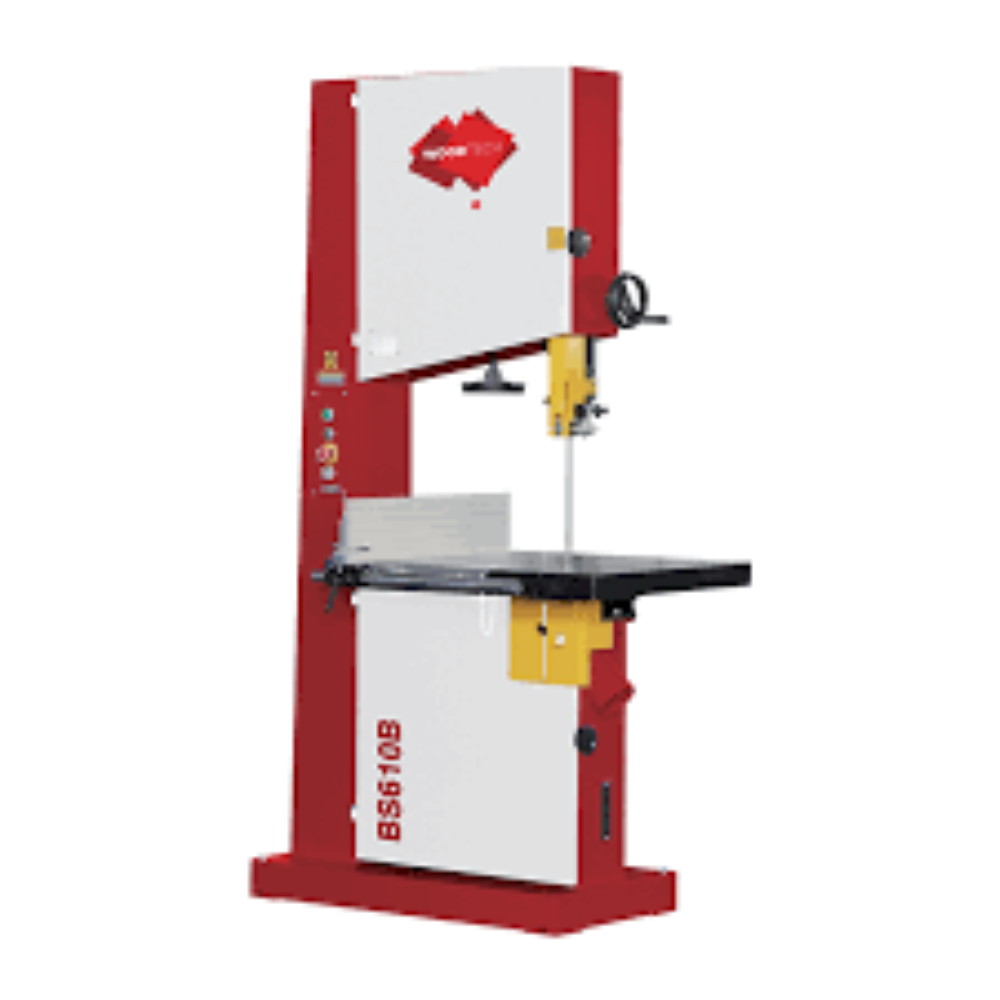
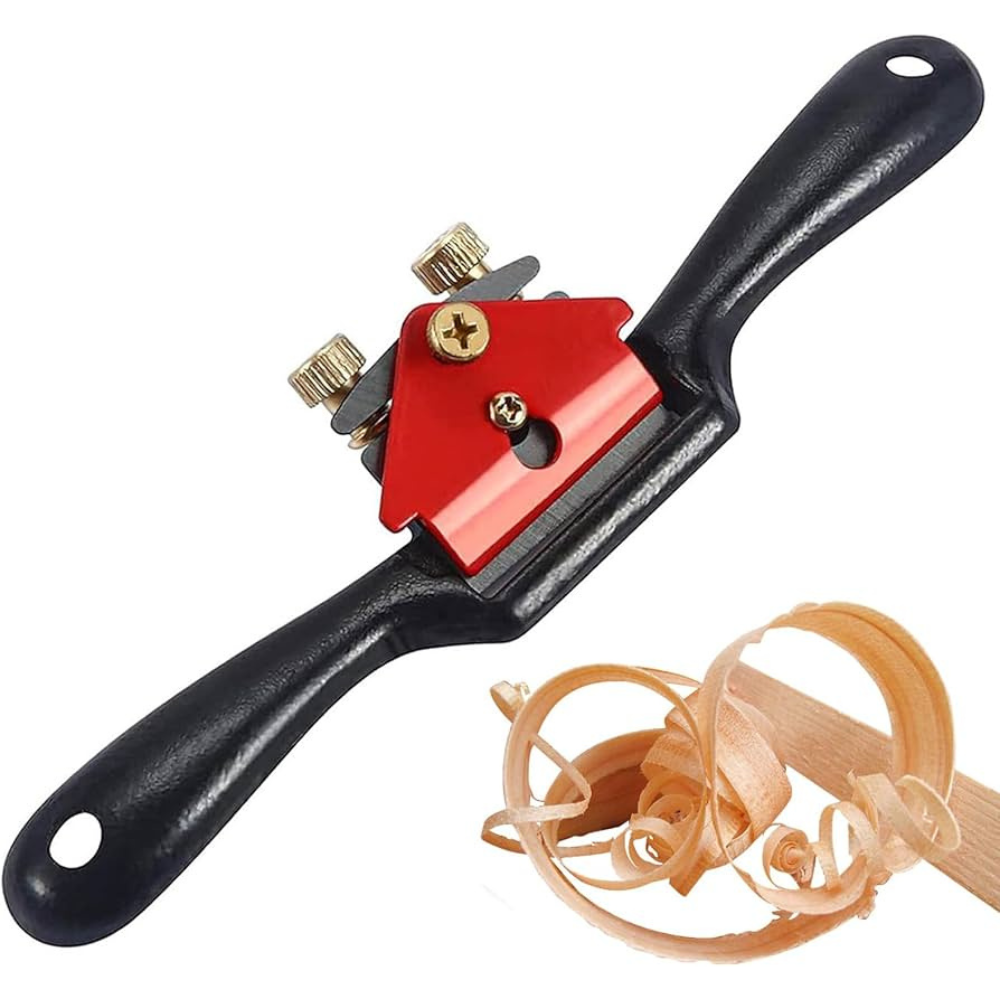
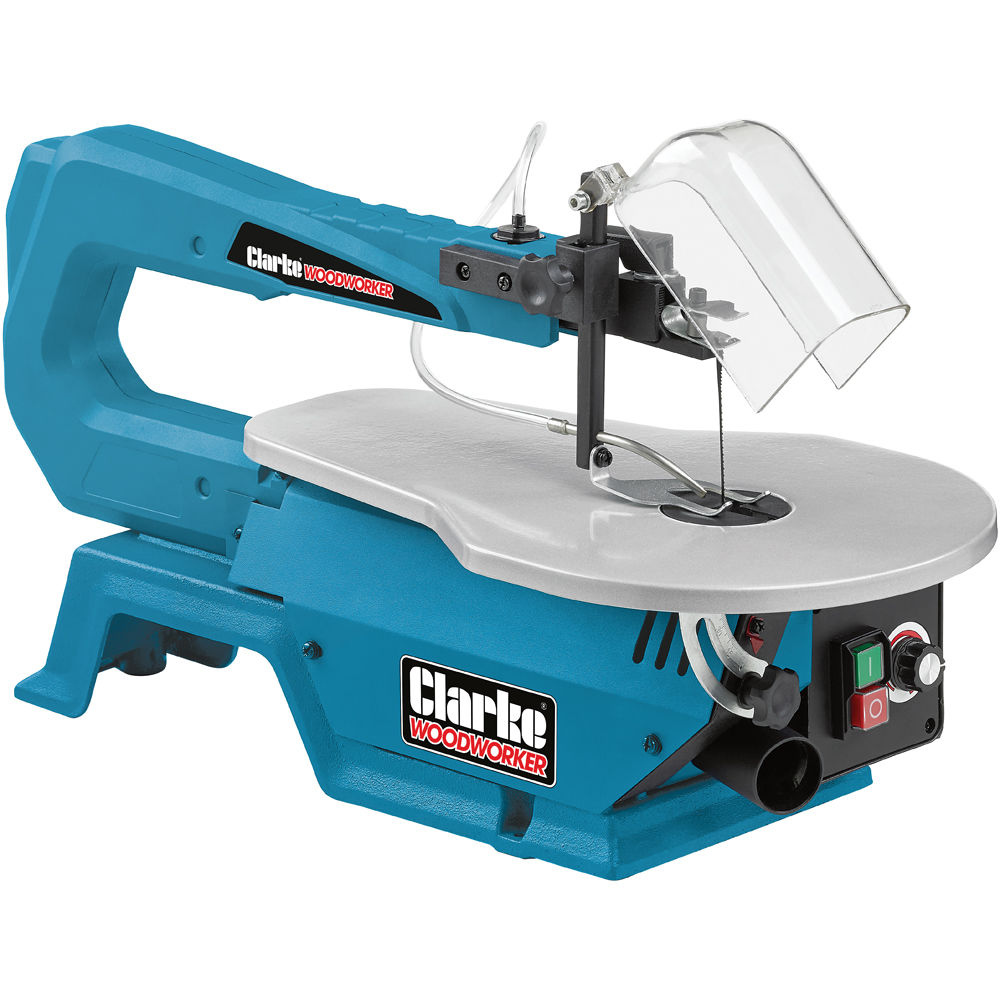
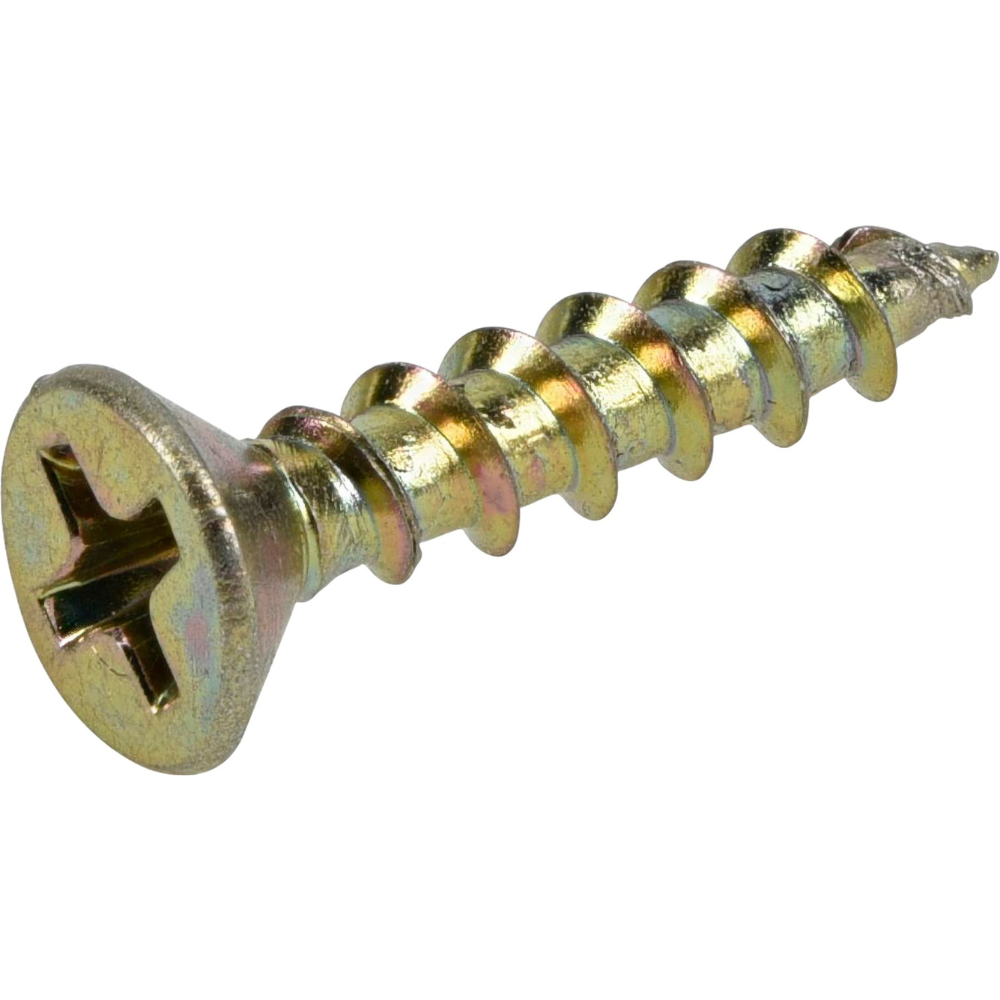
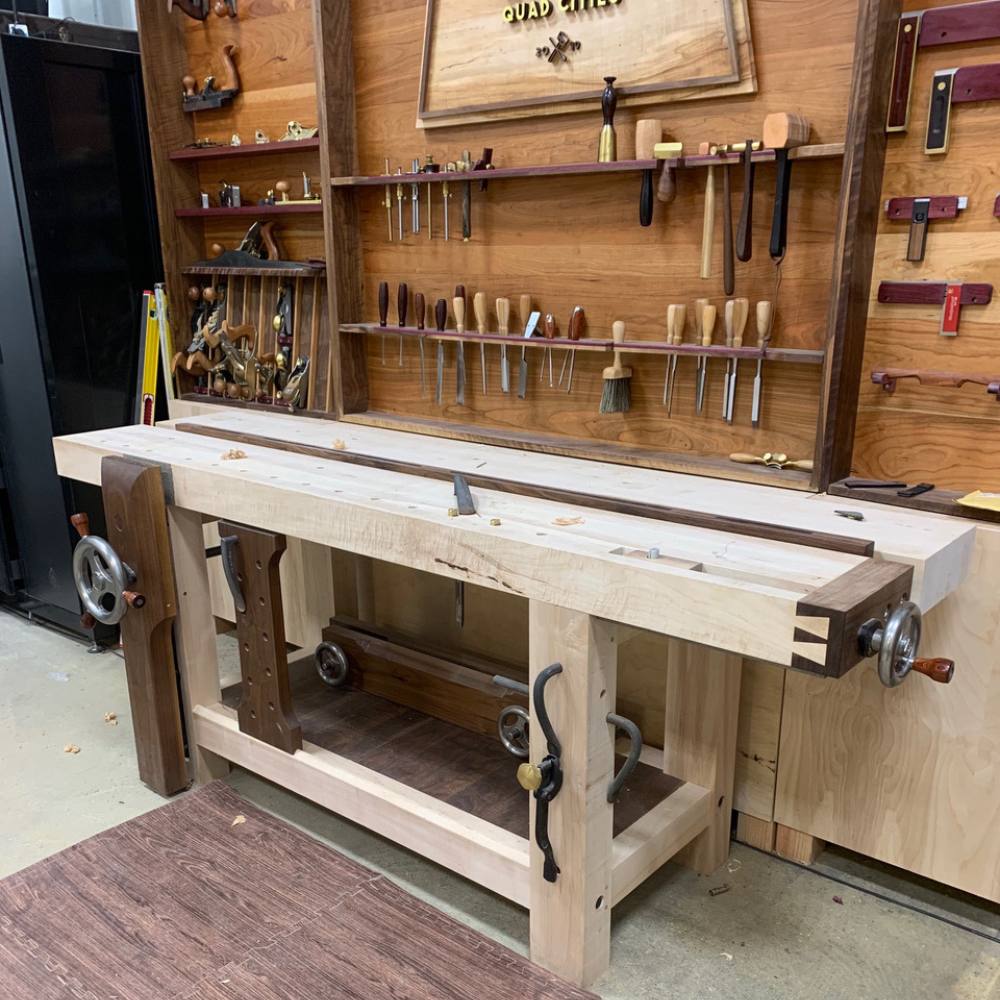
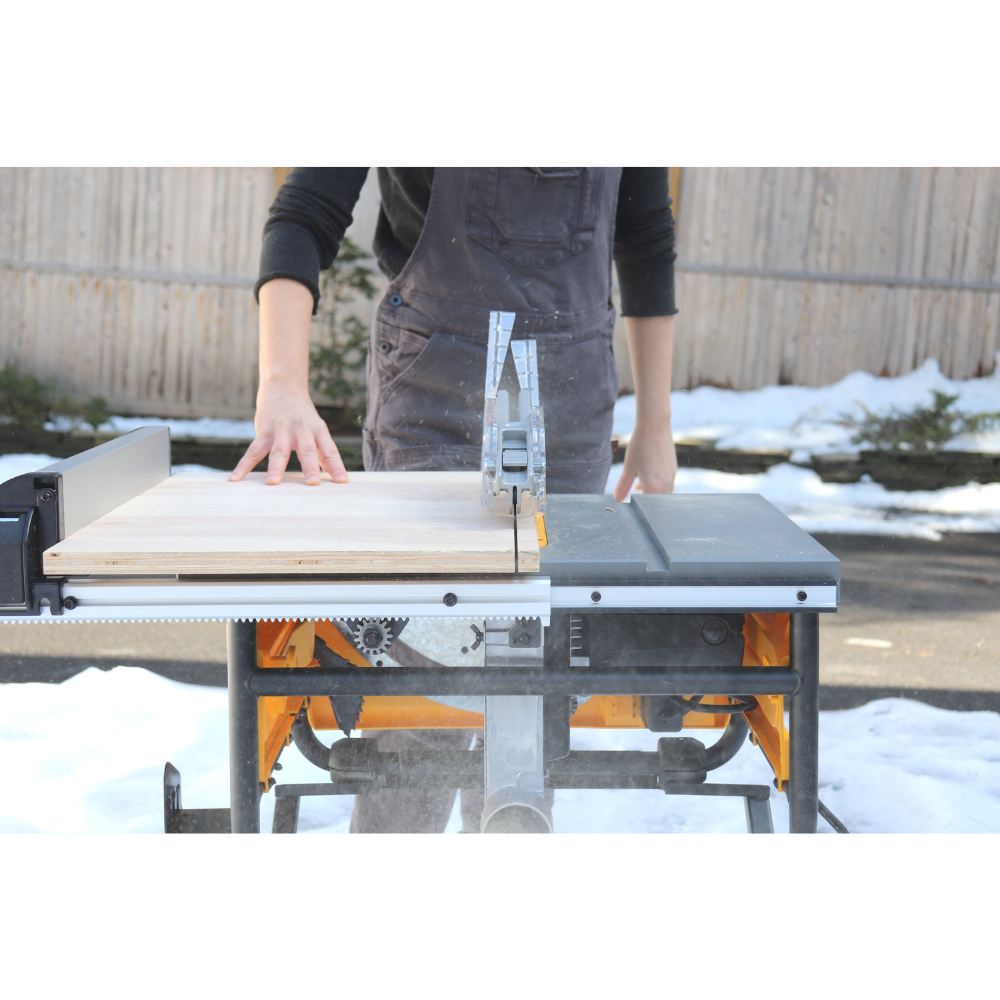
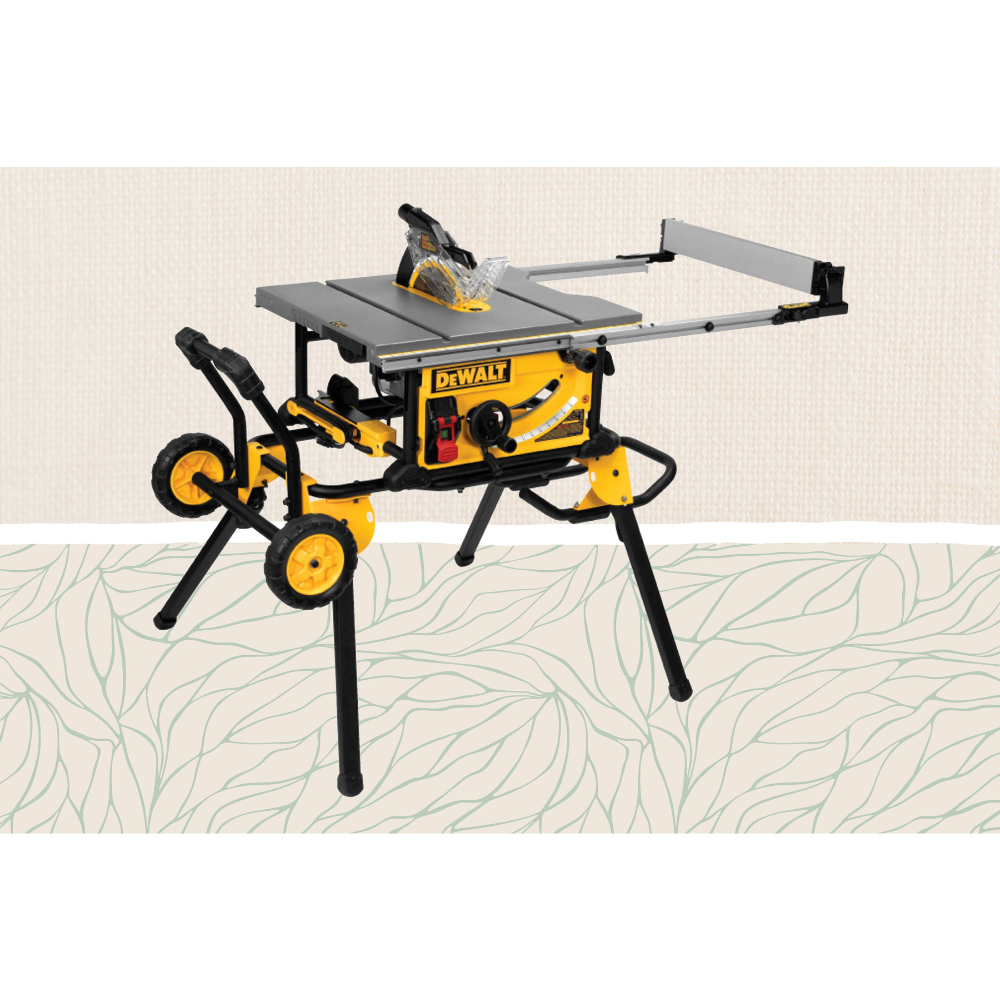
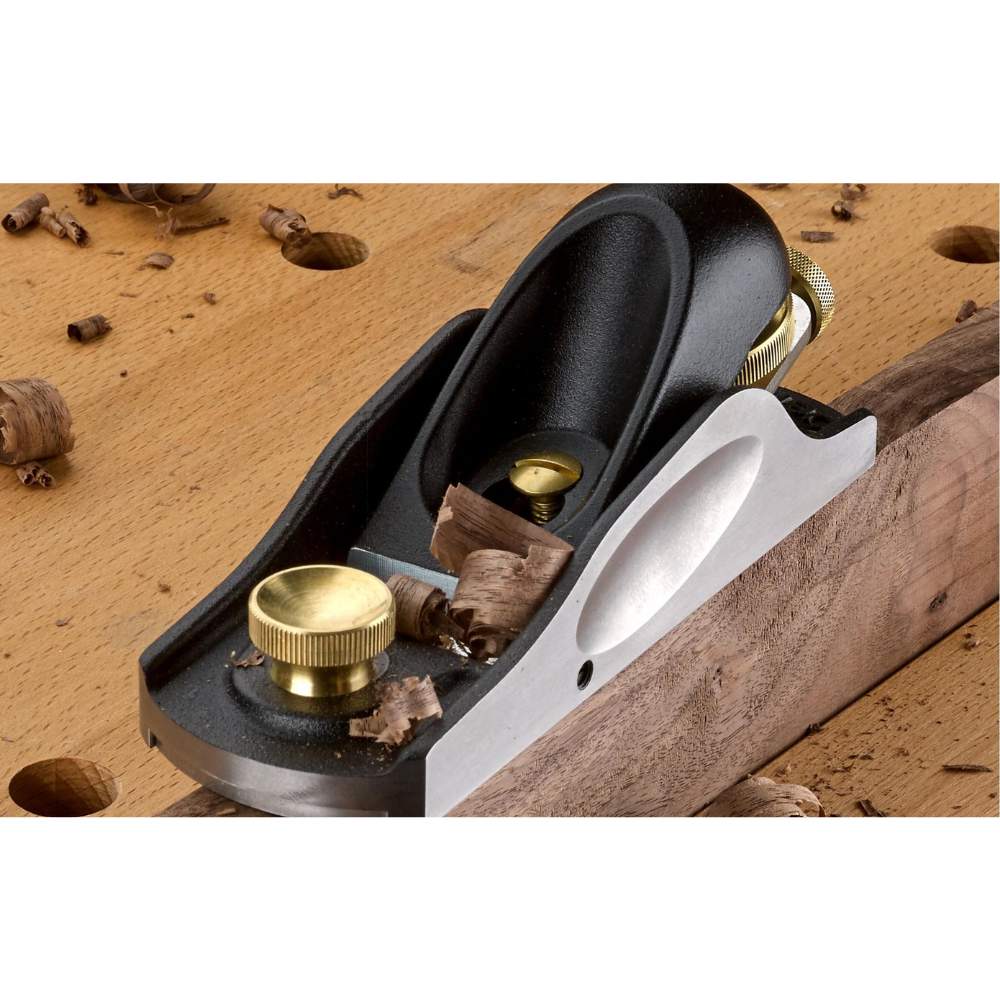
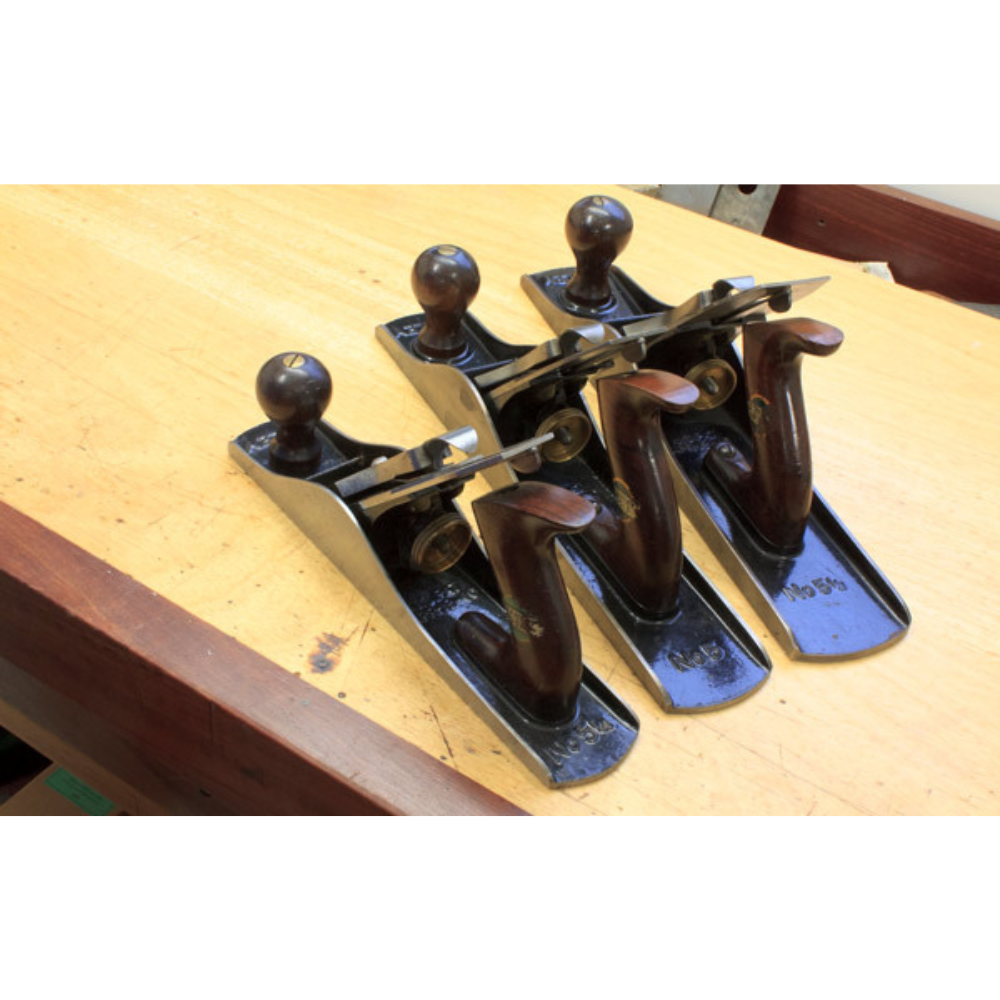
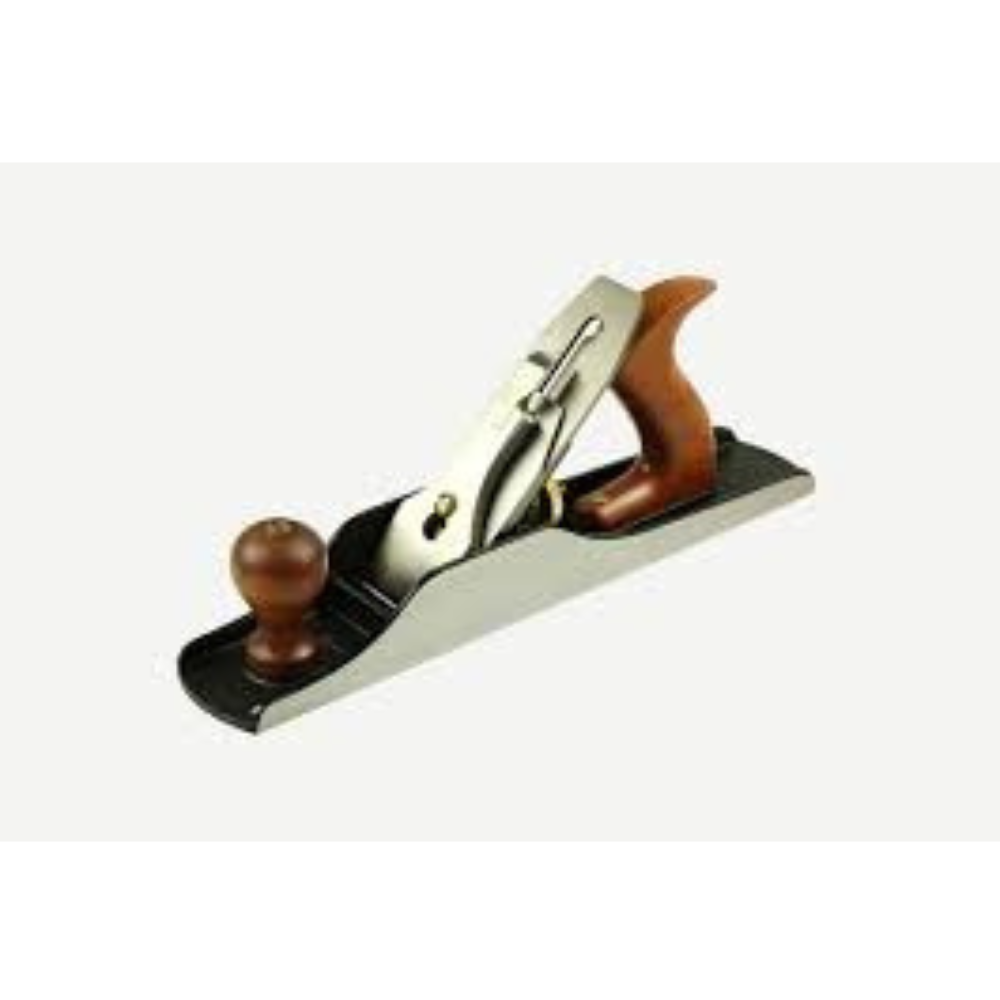
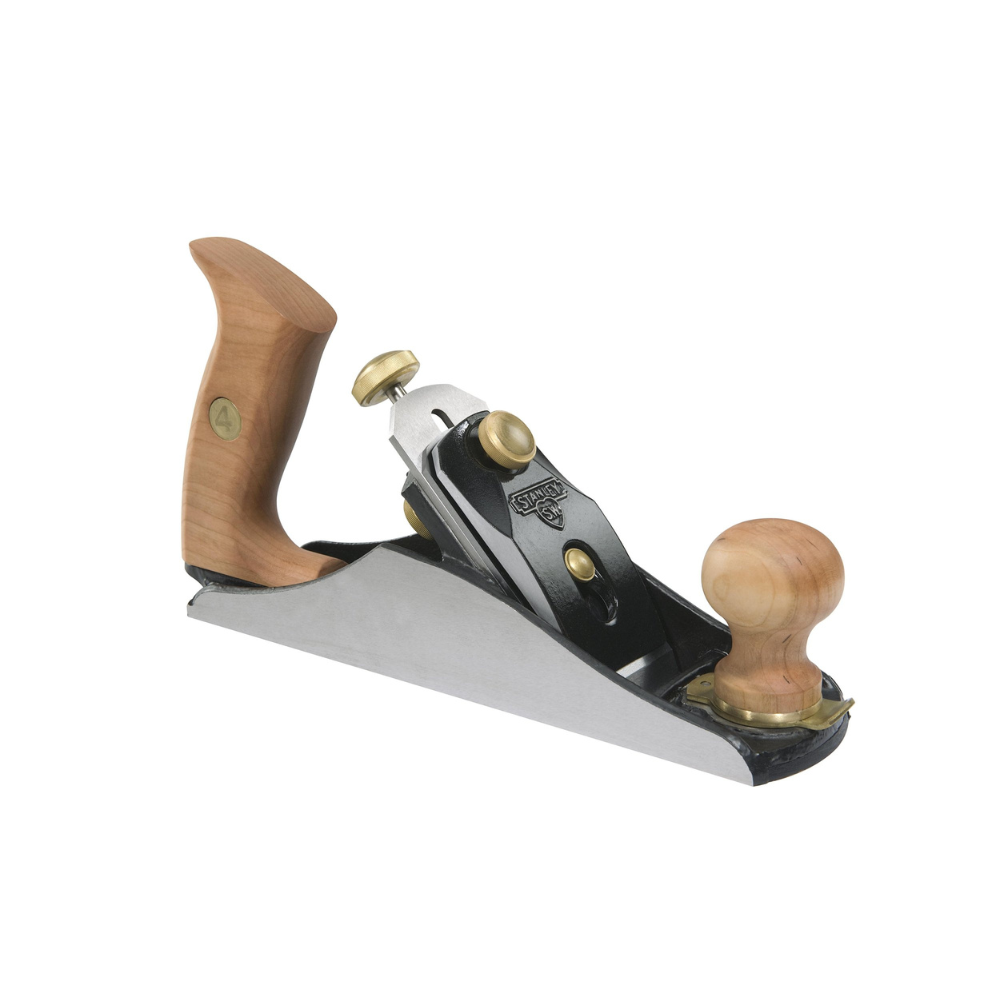
    Essential Tools for Woodworking Outdoor Furniture

    Before you start building, make sure you have the right tools. Here are some must-haves:

    • Measuring Tape: Accurate measurements are crucial for a successful project.
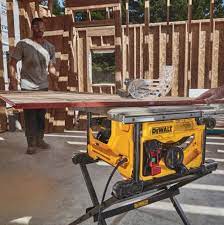
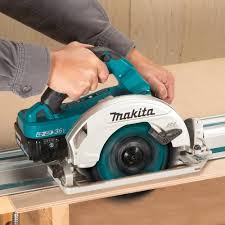
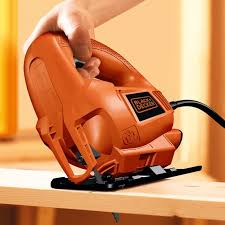
    • Saw: A good saw, whether it’s a hand saw, circular saw, or miter saw, is essential for cutting wood to size.
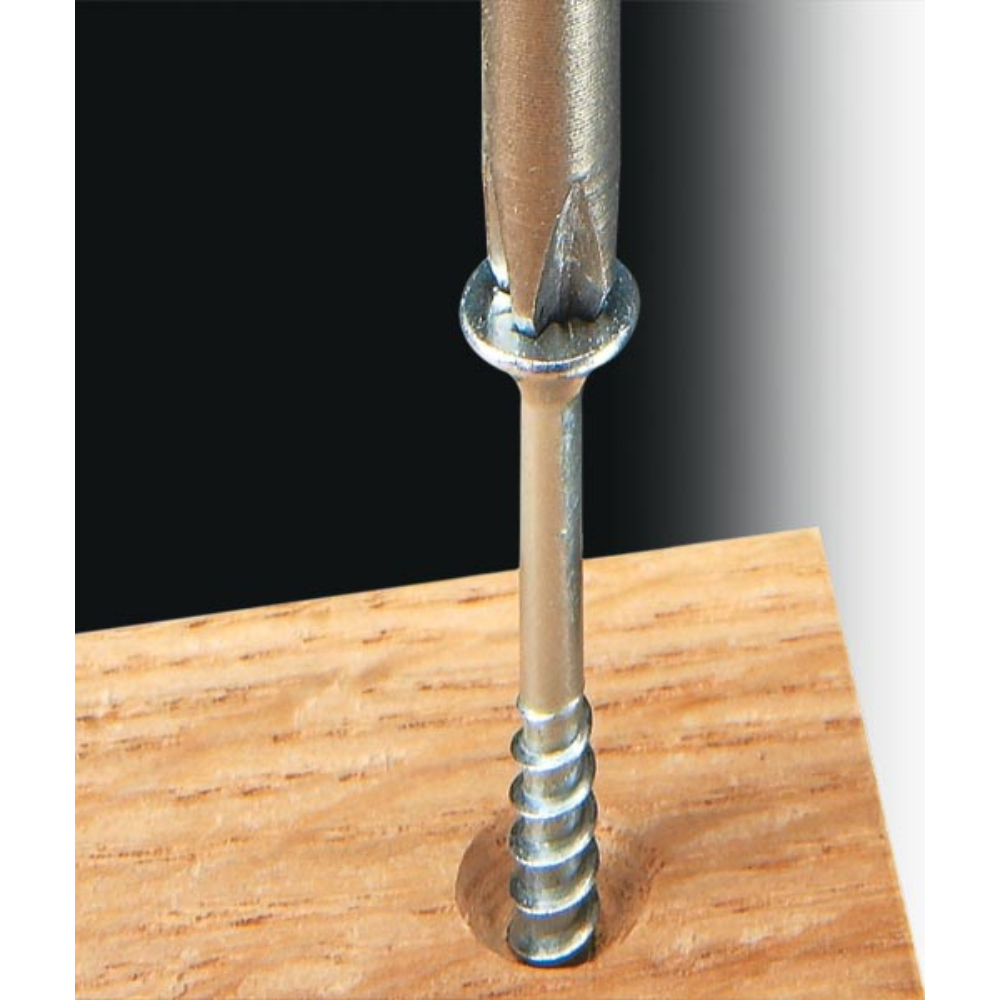
    • Drill: A drill is necessary for creating holes and driving screws.
    • Sander: A sander helps you achieve a smooth finish on your pieces.
    • Clamps: Clamps hold your pieces together securely while the glue dries.

    Safety Tips for Woodworking

    Safety should always be a priority when working with tools and wood. Here are some tips:

    • Wear Safety Gear: Always wear safety glasses, ear protection, and a dust mask.
    • Keep Your Work Area Clean: A cluttered workspace can lead to accidents.
    • Use Tools Properly: Read the manuals and understand how to use each tool safely.
    • Take Your Time: Rushing can lead to mistakes and injuries.

    Designing Your Outdoor Furniture

    Designing your own furniture allows you to create pieces that fit your style and needs perfectly. Here are some design tips:

    • Consider the Space: Measure your outdoor area to ensure your furniture fits well.
    • Think About Functionality: Decide how you want to use the space and design your furniture accordingly.
    • Incorporate Comfort: Add cushions, armrests, and other features to make your furniture comfortable.
    • Choose a Style: Whether you prefer modern, rustic, or traditional designs, choose a style that complements your outdoor space.

    Building a Simple Outdoor Chair

    Let’s start with a simple project: an outdoor chair. Here’s a step-by-step guide:

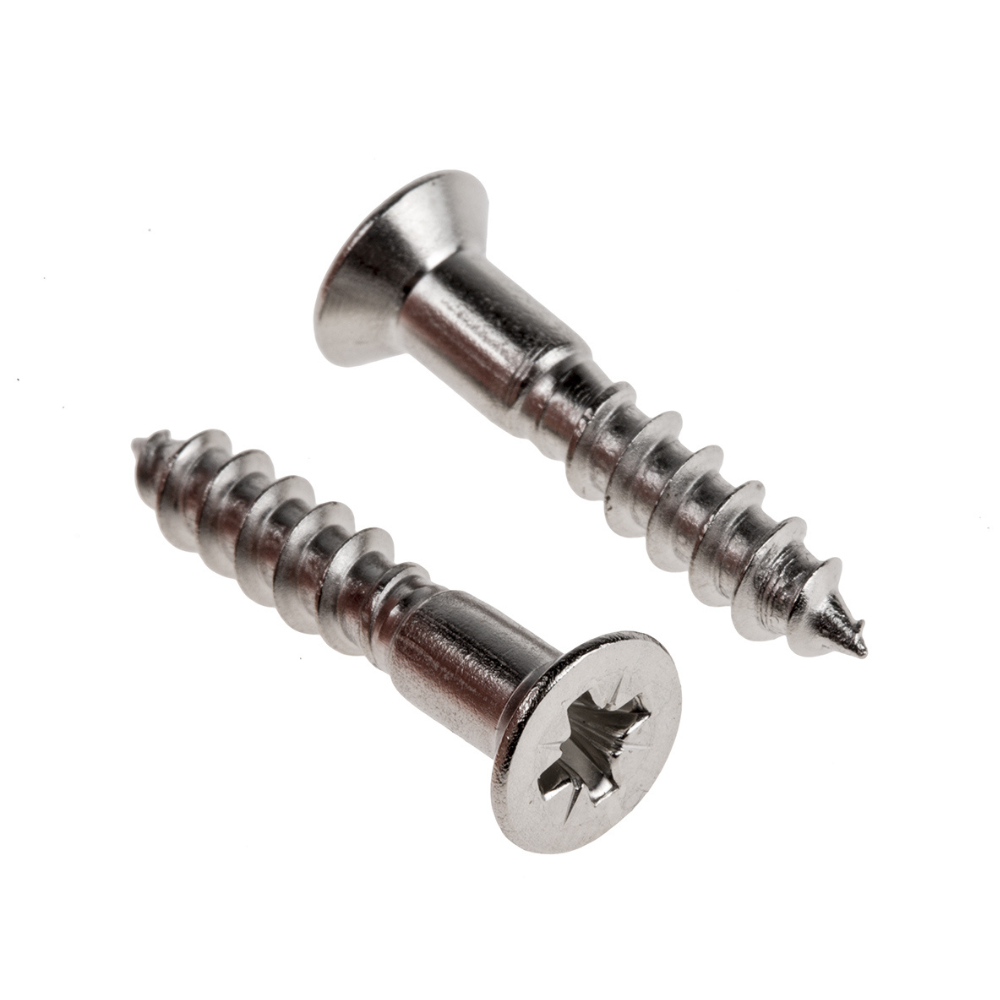
    1. Gather Materials: You’ll need wood (cedar or redwood is ideal), screws, wood glue, and outdoor finish.
    2. Cut the Pieces: Measure and cut the wood pieces for the seat, backrest, and legs.
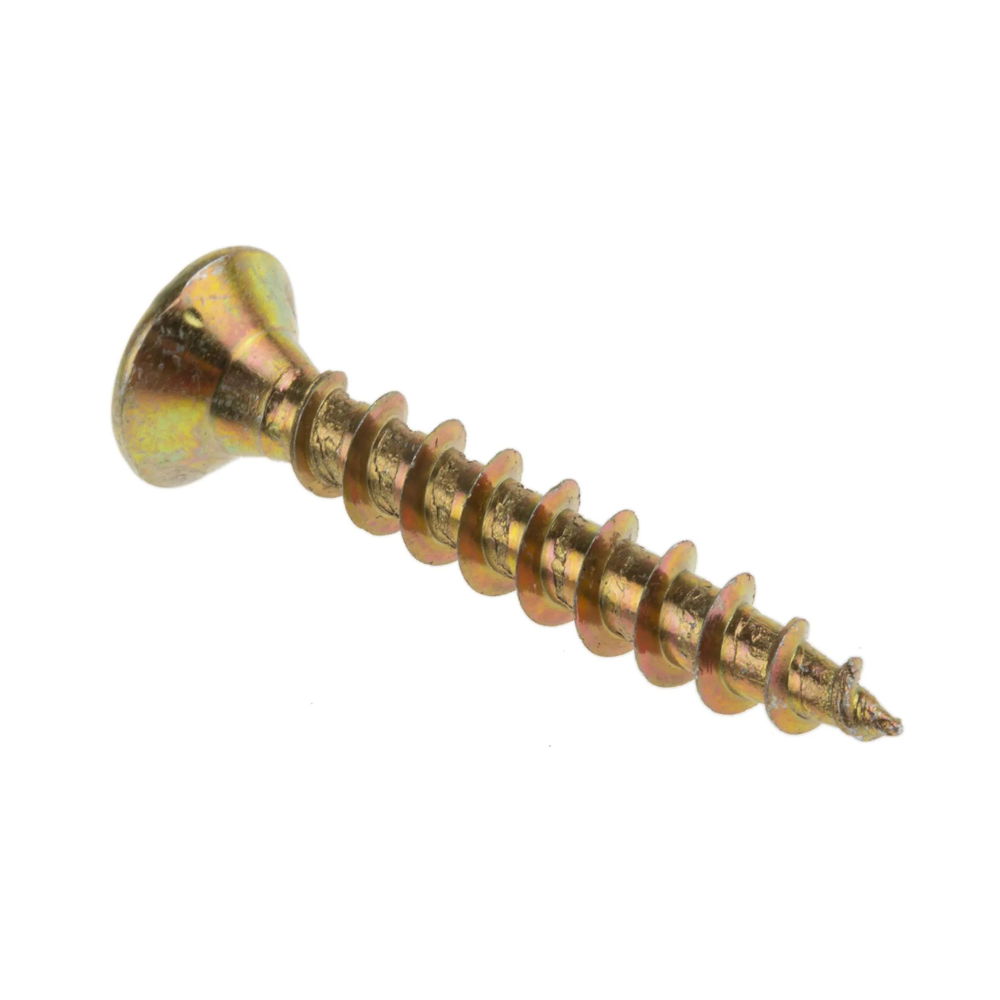
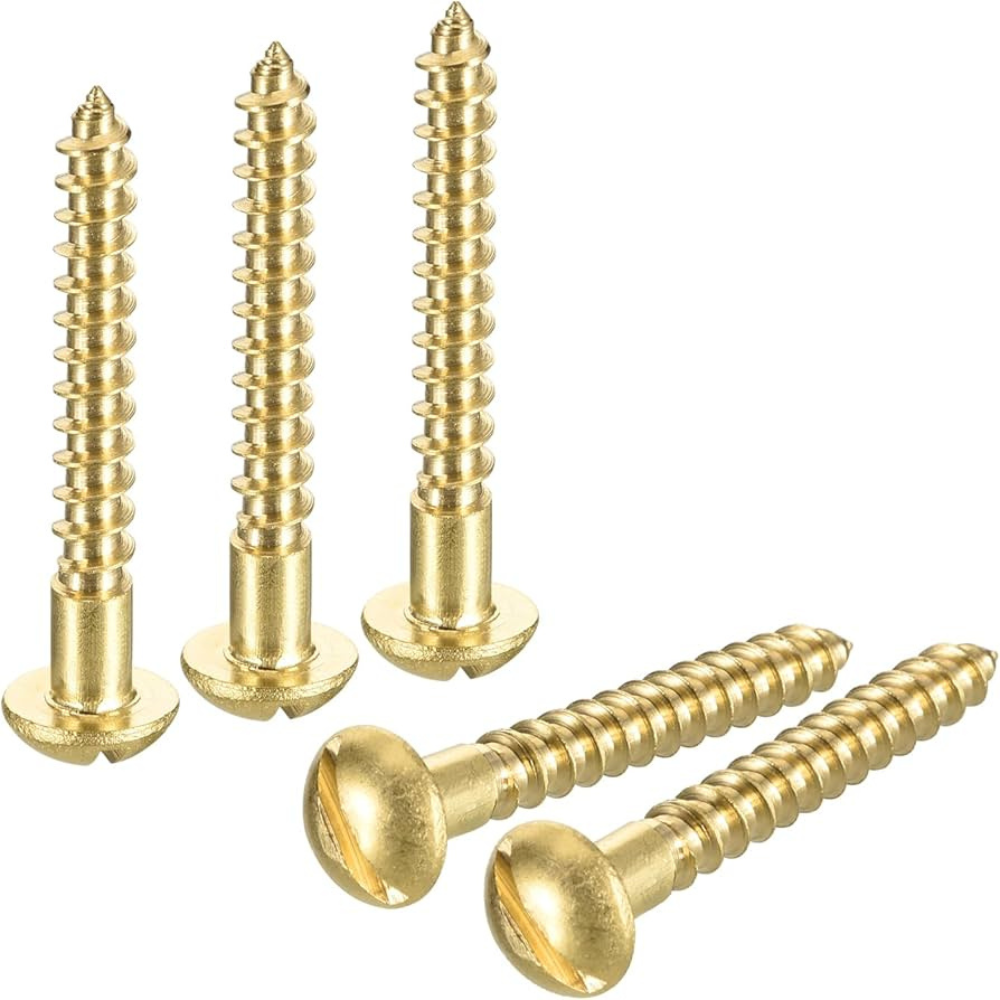
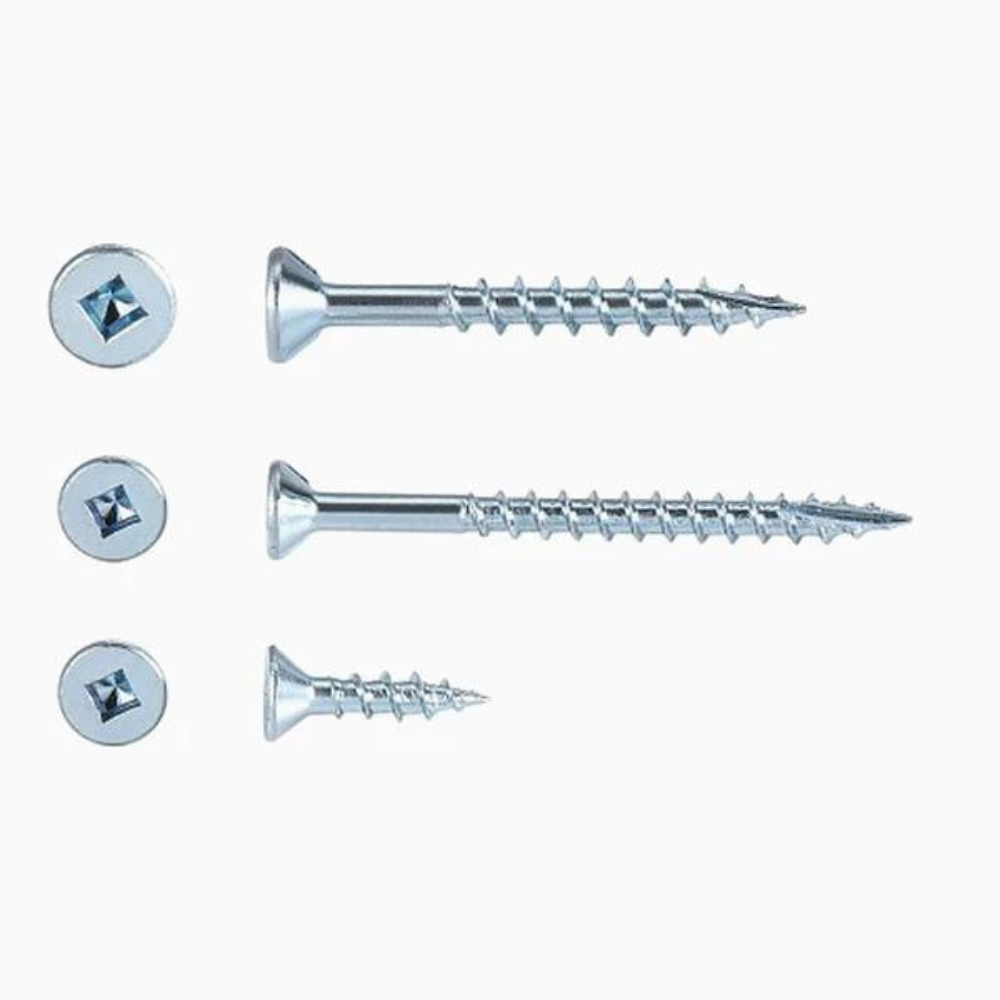
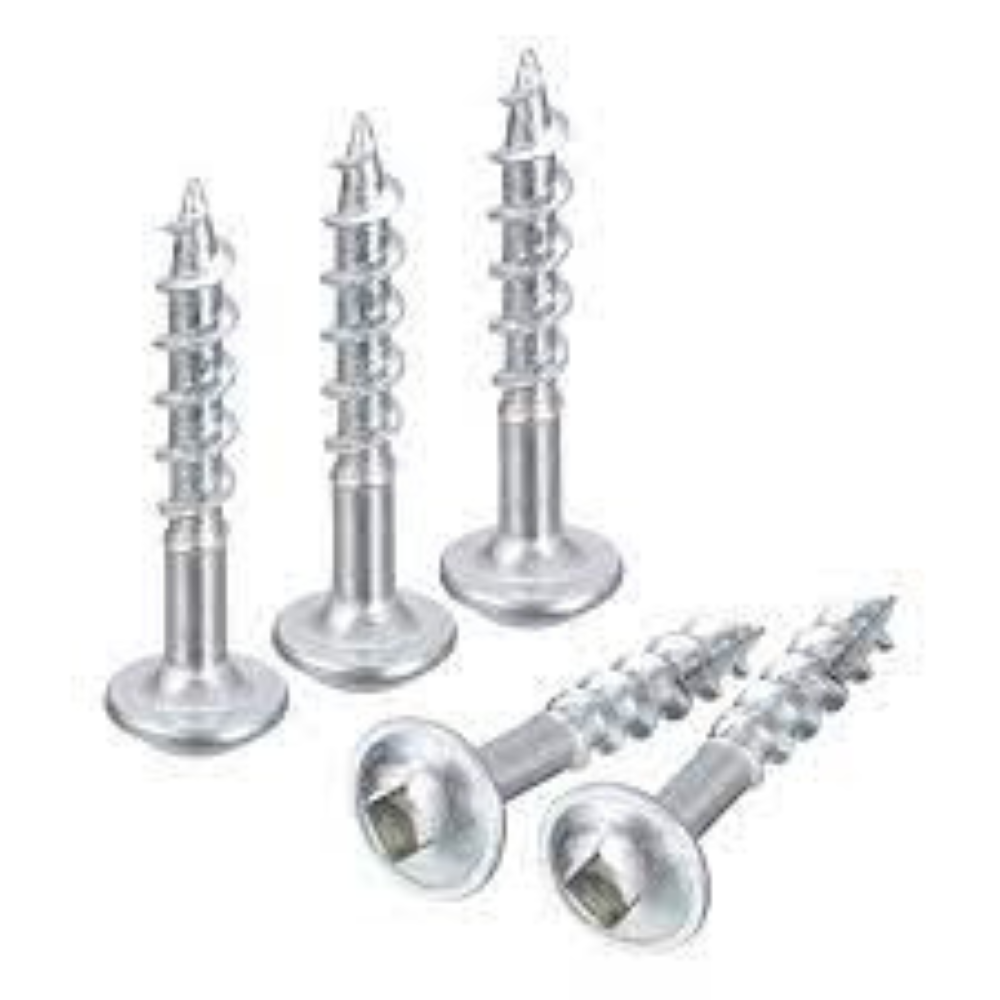
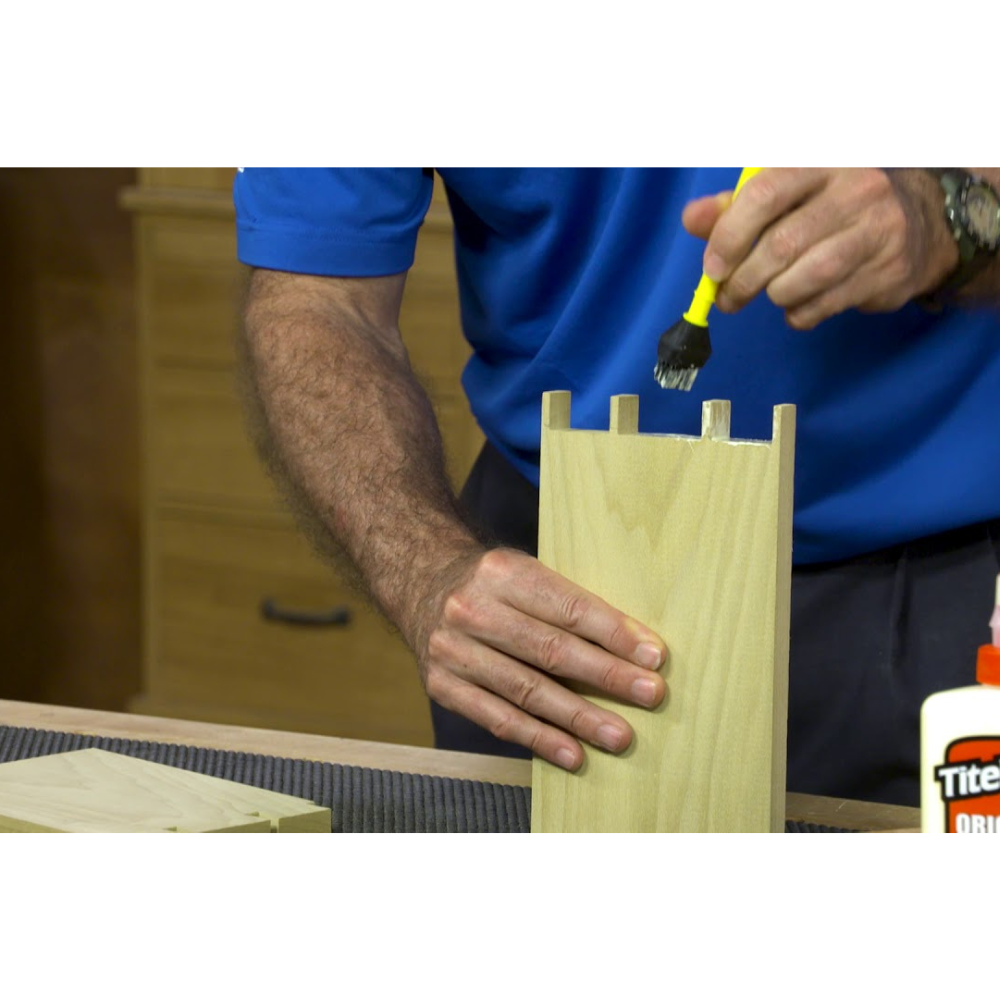
    3. Assemble the Frame: Use screws and wood glue to assemble the chair frame.
    4. Attach the Seat and Backrest: Secure the seat and backrest to the frame.
    5. Sand and Finish: Sand the entire chair and apply an outdoor finish to protect the wood.

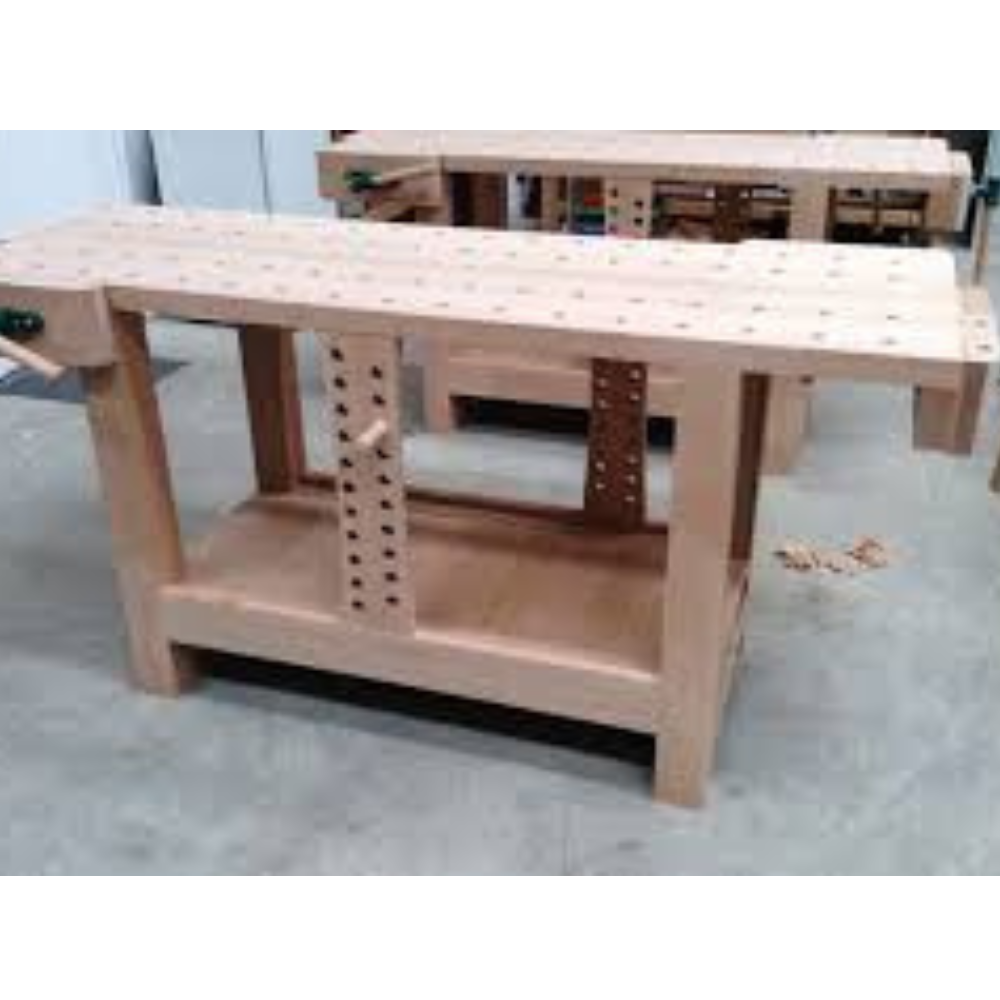
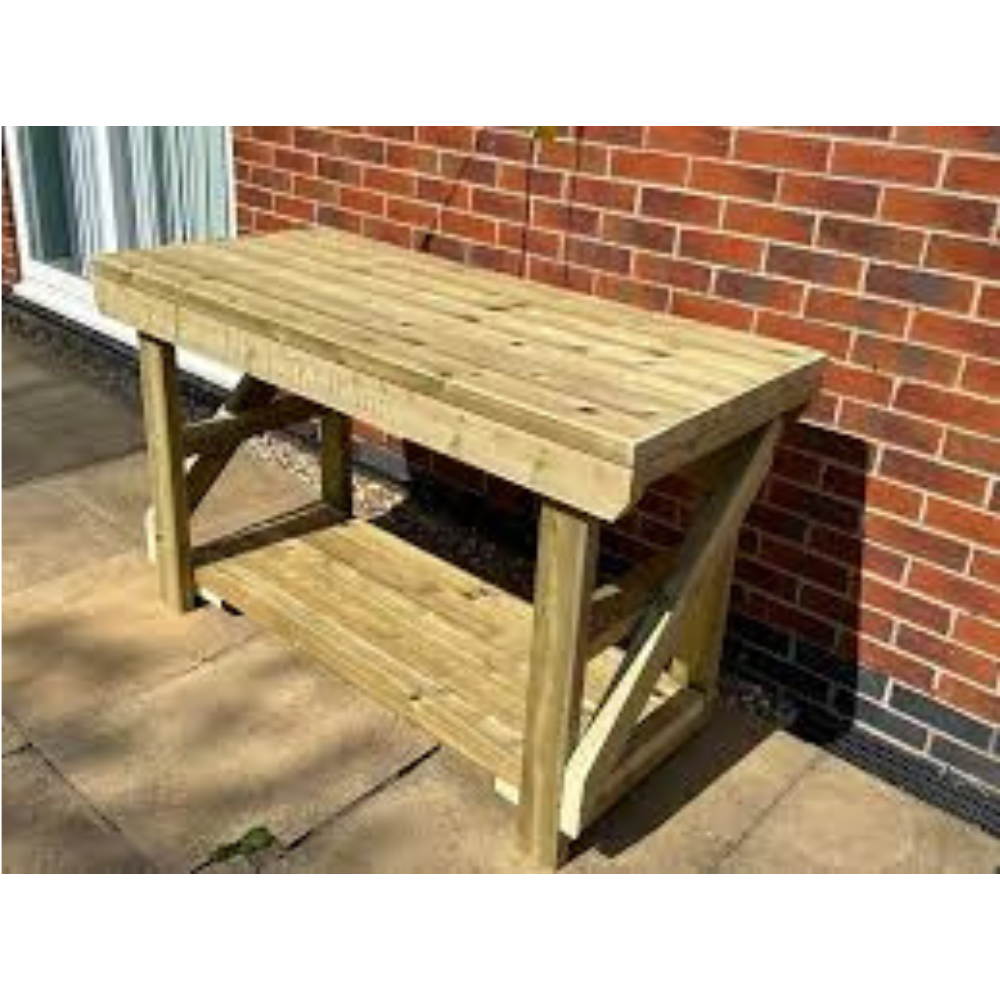
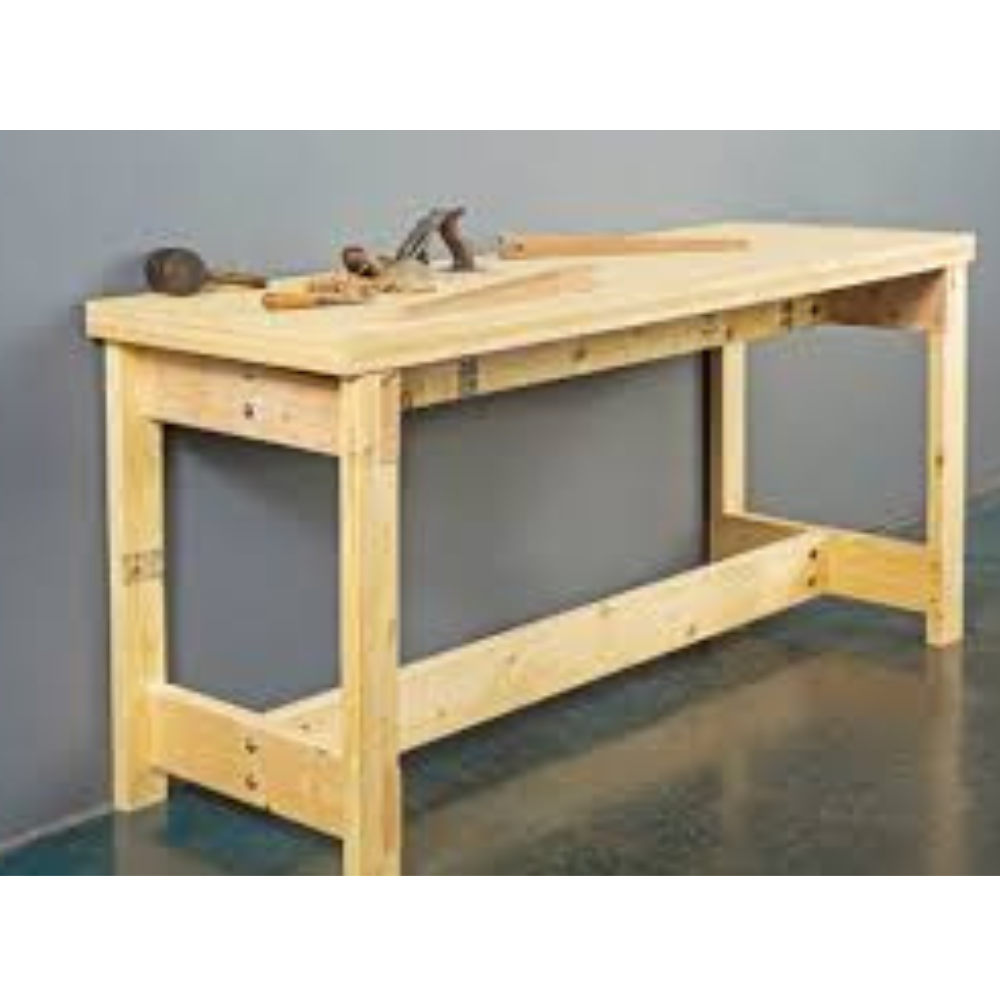
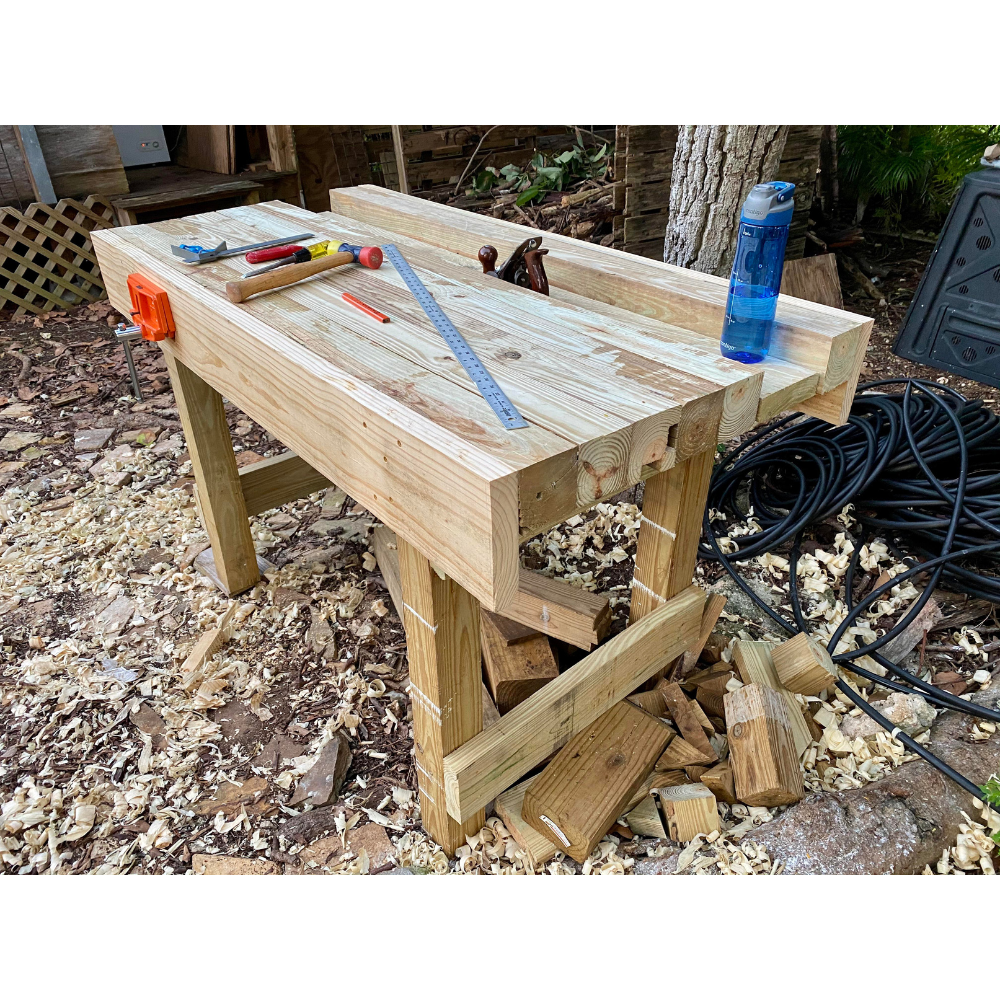
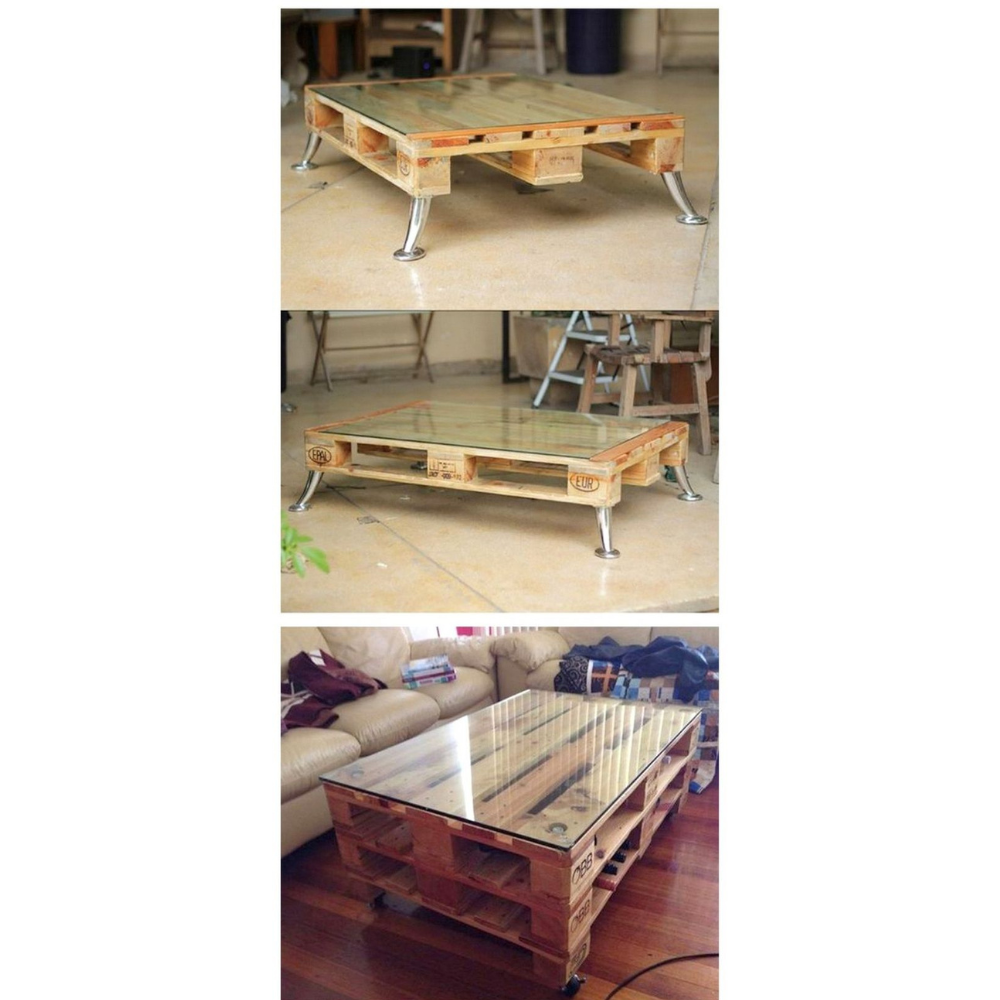
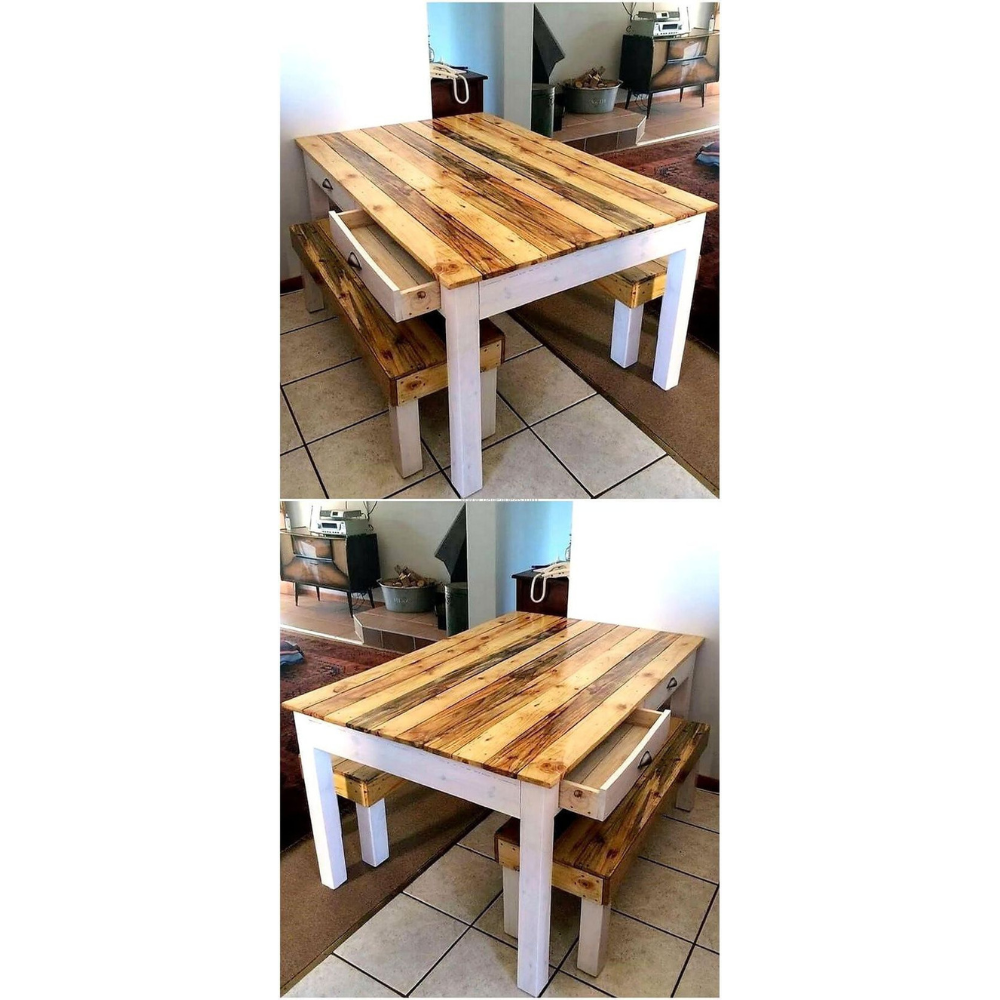
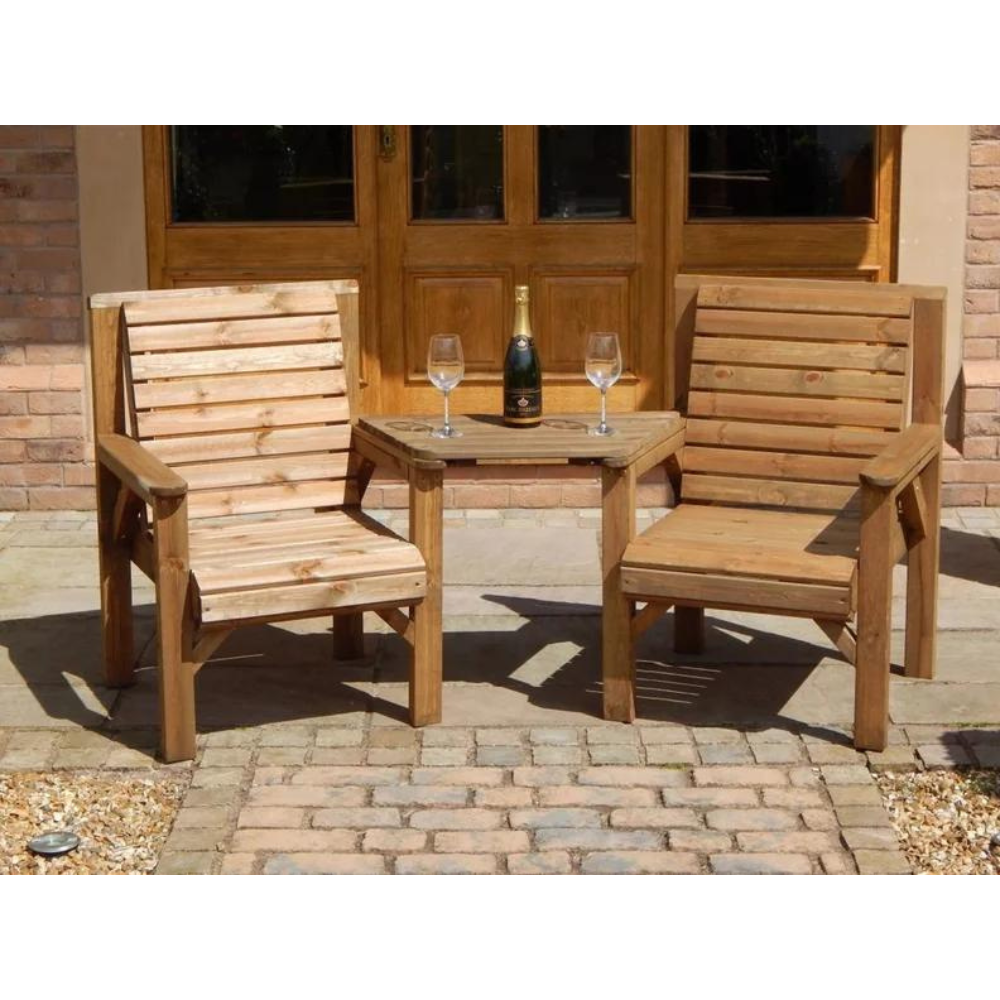
    Creating a Sturdy Outdoor Table

    An outdoor table is another great project. Here’s how to build one:

    1. Select Your Wood: Teak or acacia are excellent choices.
    2. Cut the Tabletop Pieces: Measure and cut the pieces for the tabletop.
    3. Build the Frame: Assemble the table frame using screws and wood glue.
    4. Attach the Tabletop: Secure the tabletop to the frame.
    5. Finish the Table: Sand the table and apply a weather-resistant finish.

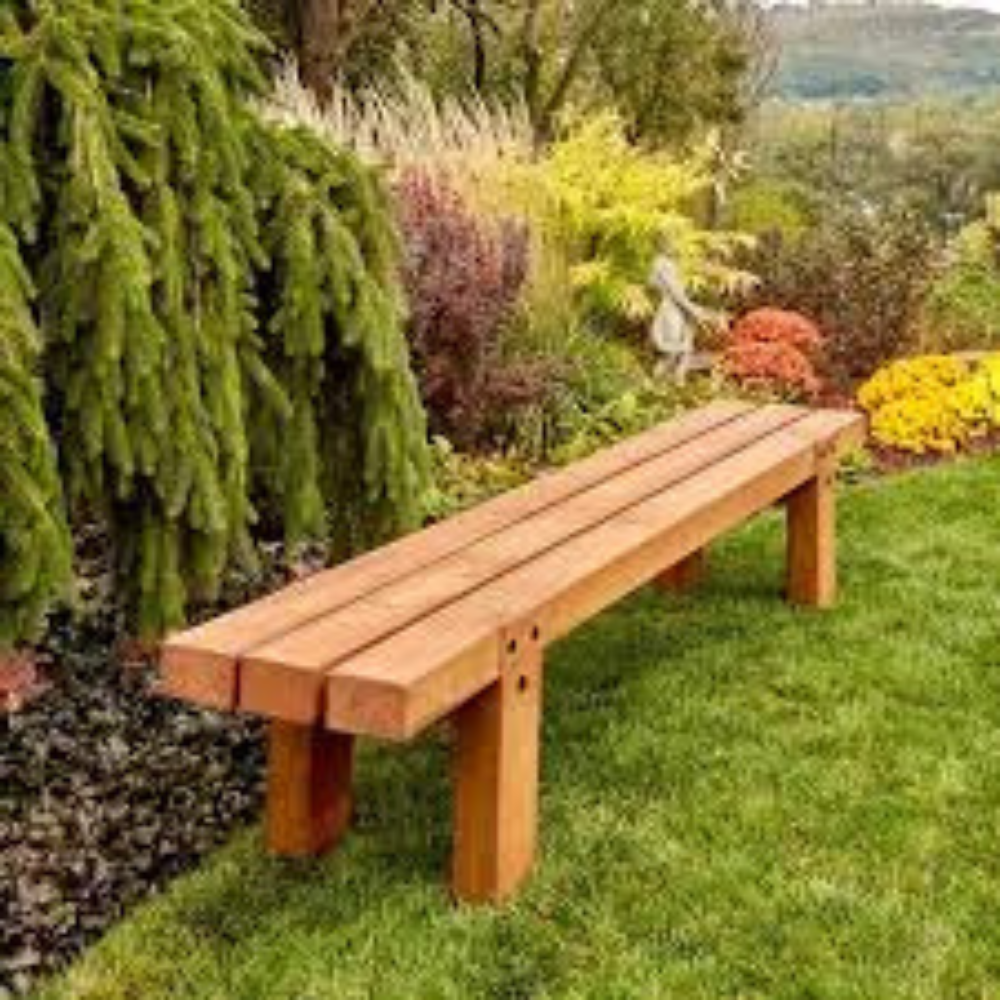
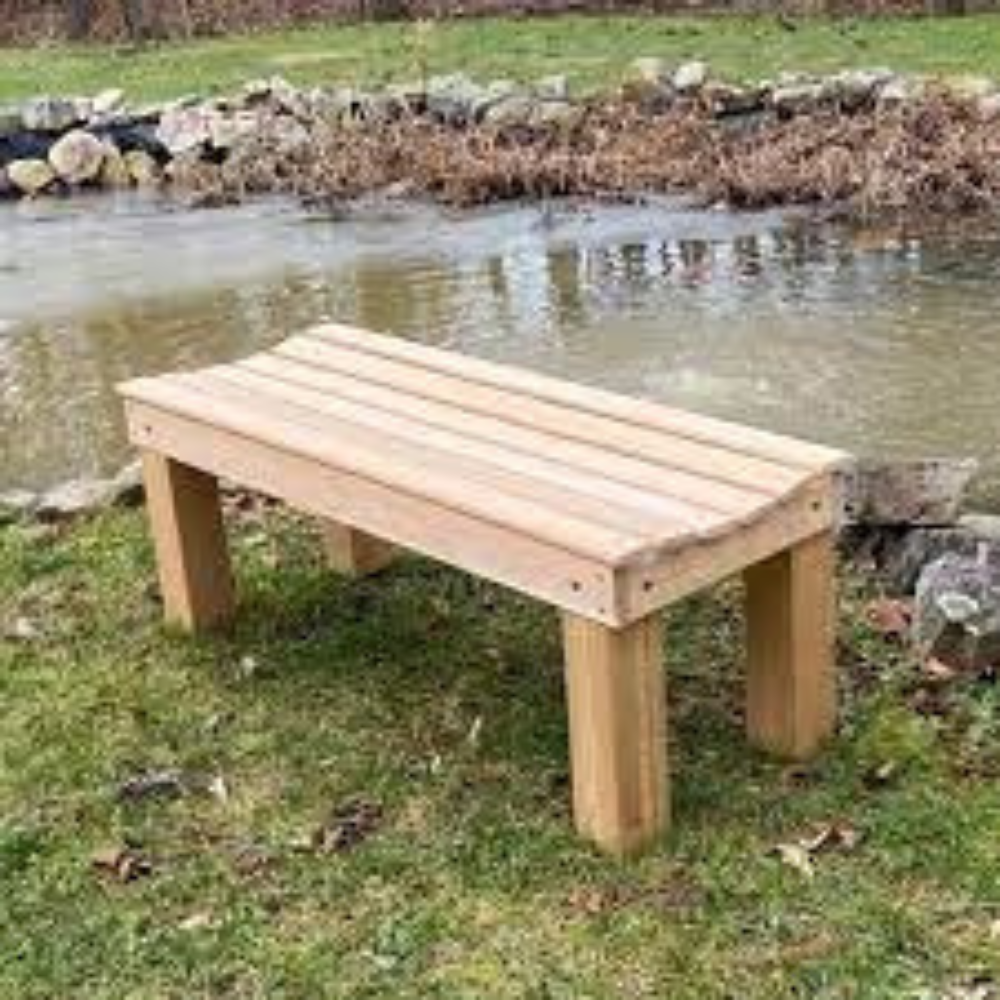
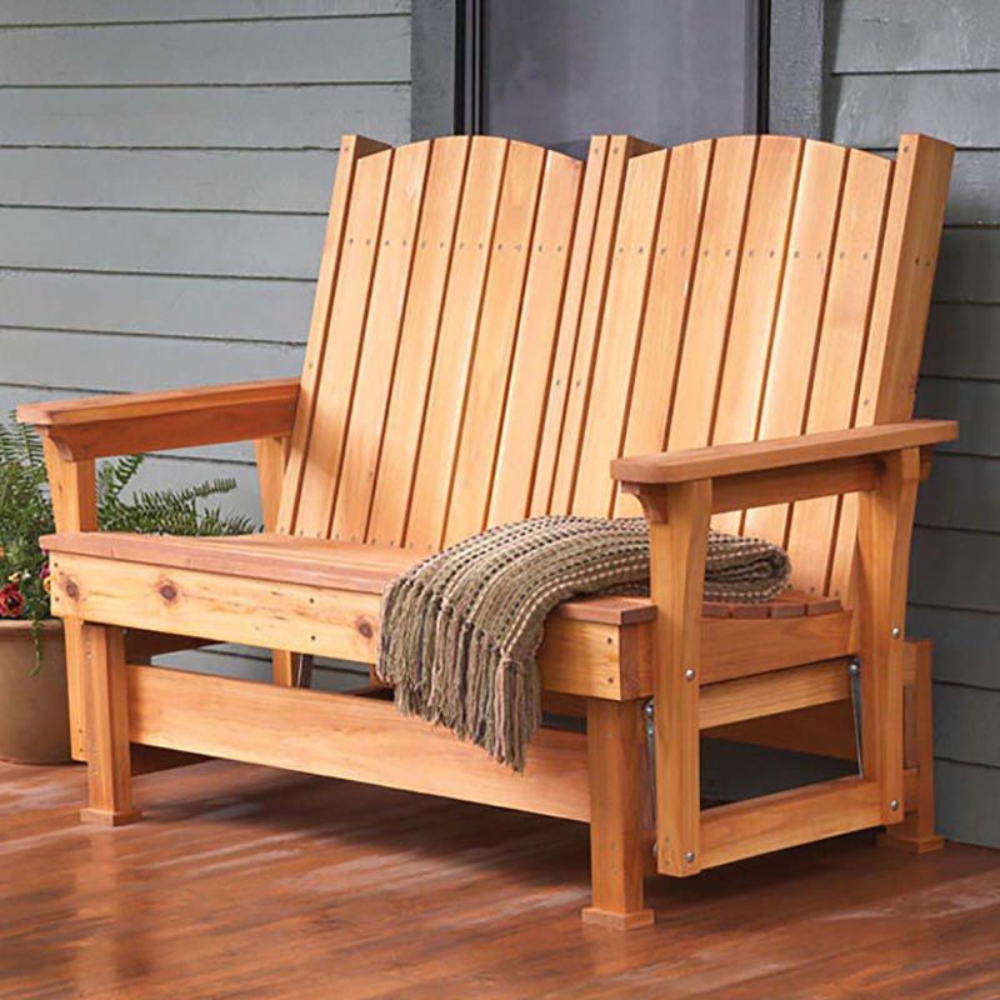
    Building a Beautiful Garden Bench

    A garden bench can be a beautiful addition to your outdoor space. Follow these steps:

    1. Choose Your Wood: Cedar or redwood works well for benches.
    2. Cut the Bench Pieces: Measure and cut the pieces for the seat, backrest, and legs.
    3. Assemble the Frame: Use screws and wood glue to build the bench frame.
    4. Attach the Seat and Backrest: Secure the seat and backrest to the frame.
    5. Sand and Finish: Sand the bench and apply an outdoor finish.

    For your “Free” Outdoor Projects Plan – Click Here.

    Maintaining Your Outdoor Furniture

    Proper maintenance can extend the life of your woodworking outdoor furniture. Here are some tips:

    • Clean Regularly: Wipe down your furniture with a damp cloth to remove dirt and debris.
    • Reapply Finish: Depending on the wood and finish, you may need to reapply a protective finish every few years.
    • Store During Winter: If possible, store your furniture indoors during the winter to protect it from harsh weather.

    Decorating Your Outdoor Space

    Once you’ve built your furniture, it’s time to decorate your outdoor space. Here are some ideas:

    • Add Cushions: Cushions add comfort and a pop of color to your furniture.
    • Use Outdoor Rugs: Outdoor rugs can define your space and add a cozy feel.
    • Incorporate Lighting: String lights, lanterns, and solar lights can create a warm ambiance.
    • Include Plants: Potted plants and flowers can enhance the natural beauty of your space.

    Personalizing Your Outdoor Furniture

    Personalizing your furniture can make it feel uniquely yours. Consider these options:

    • Paint or Stain: Add a splash of color or a rich stain to match your style.
    • Carving: If you’re skilled with a chisel, add decorative carvings to your pieces.
    • Engraving: Personalize your furniture with engravings of your initials, a favorite quote, or a special date.

    Troubleshooting Common Issues

    Encountering problems during your woodworking outdoor furniture project is normal. Here are some common issues and solutions:

    • Warped Wood: Ensure your wood is properly dried before use and store it in a dry place.
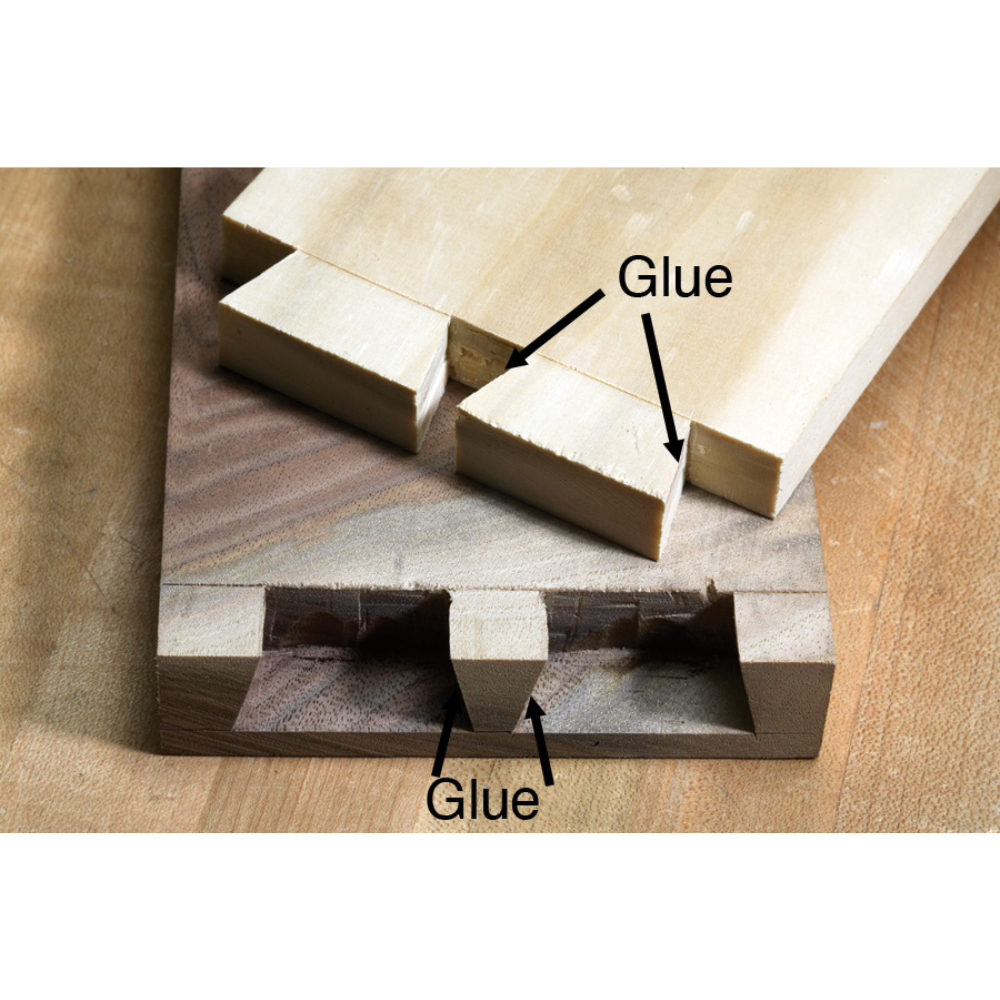
    • Loose Joints: Use quality wood glue and clamps to secure joints tightly.
    • Rough Edges: Sand thoroughly and use finer sandpaper for a smooth finish.

    Advanced Techniques for Experienced Woodworkers

    If you’re an experienced woodworker, consider trying these advanced techniques:

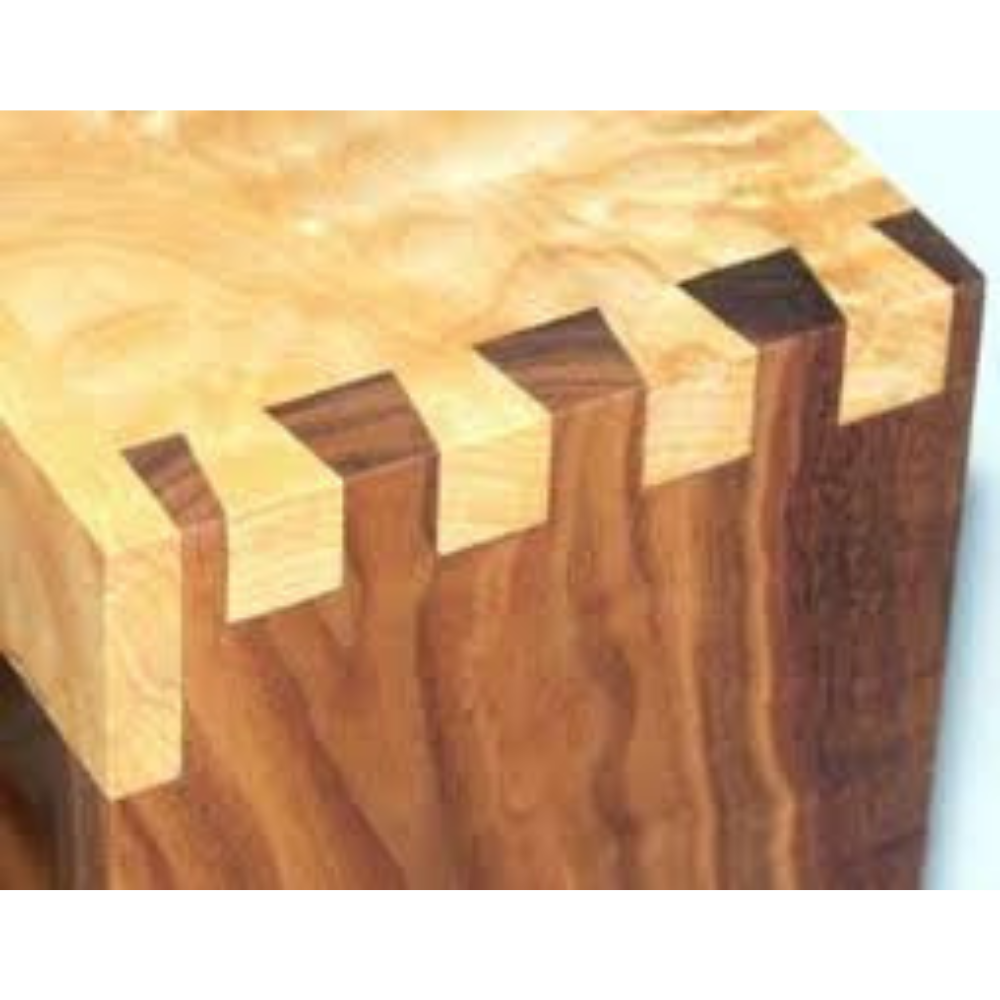
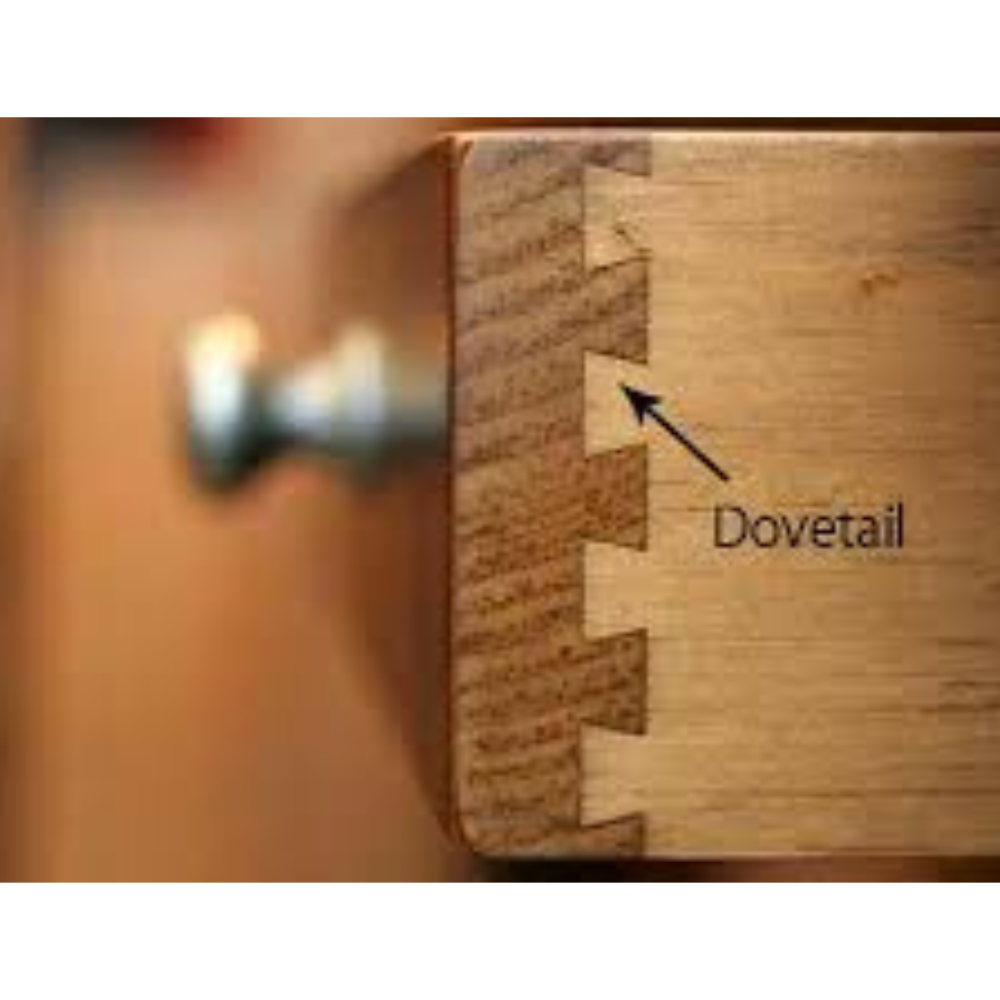
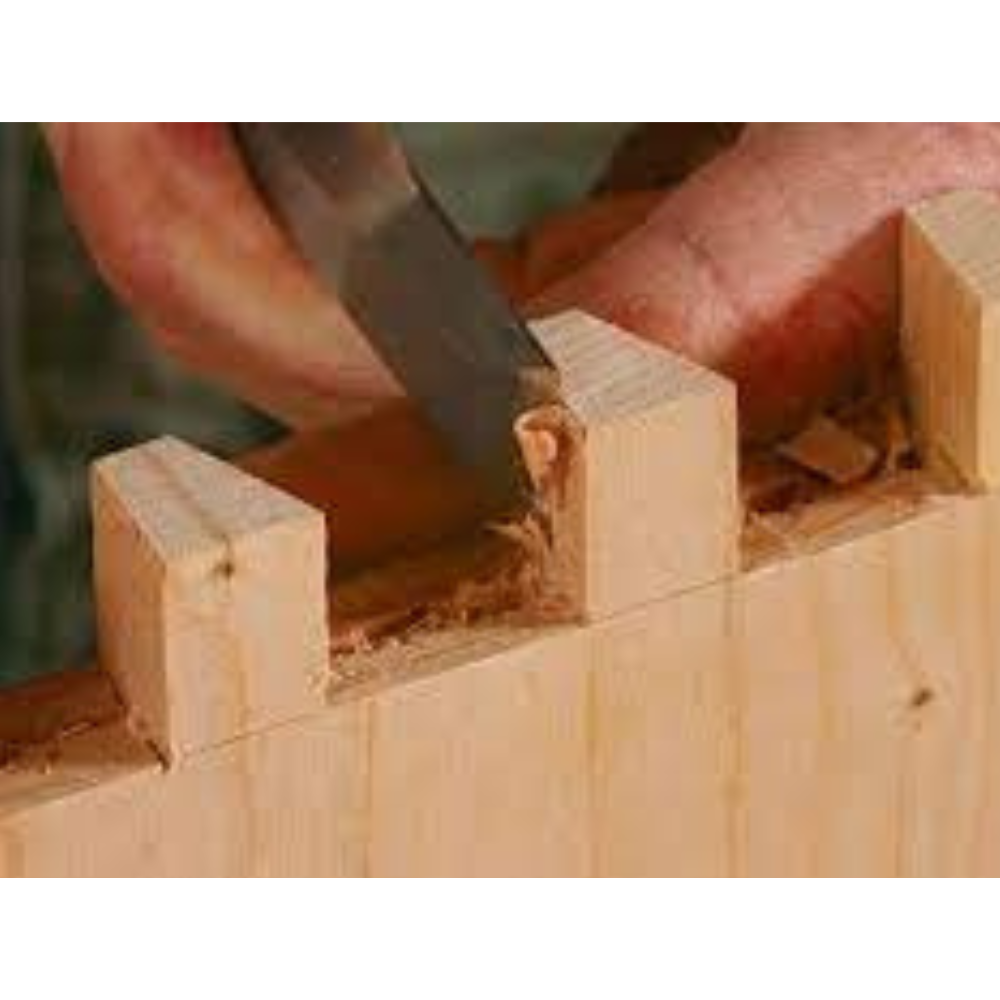
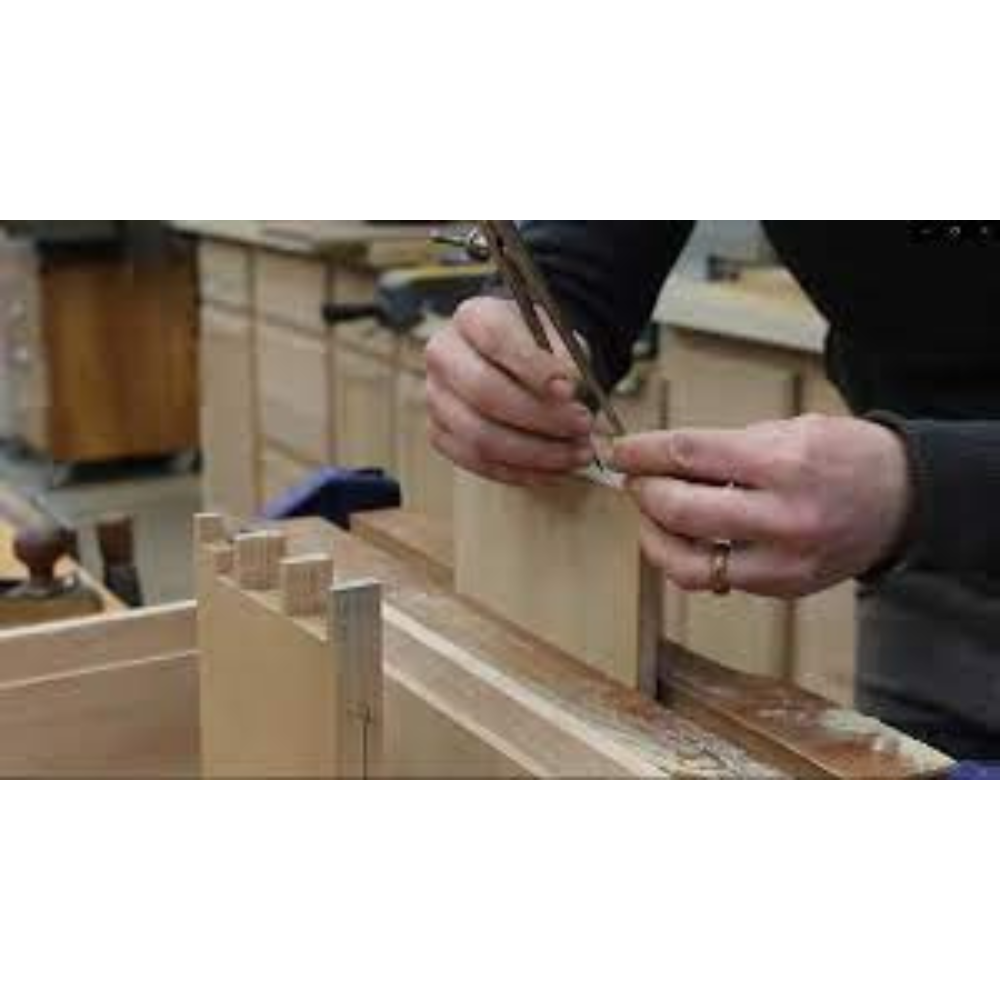
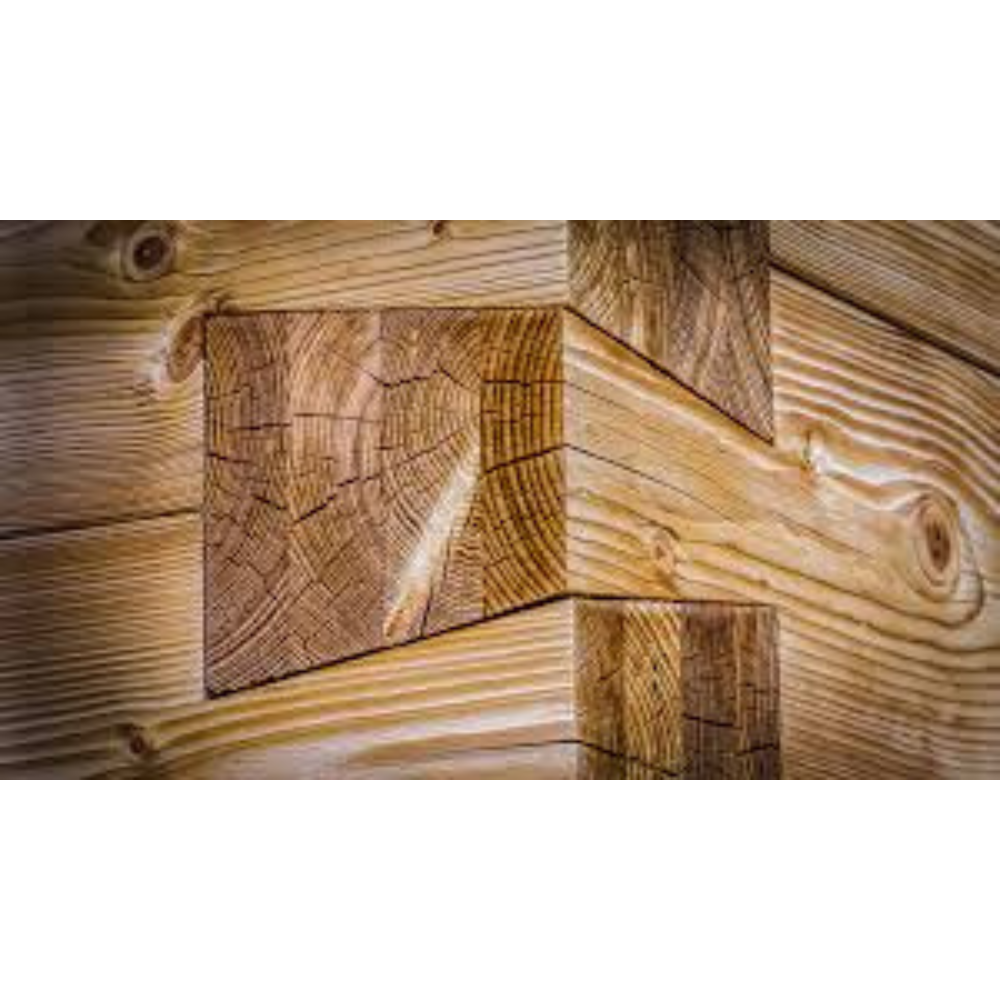
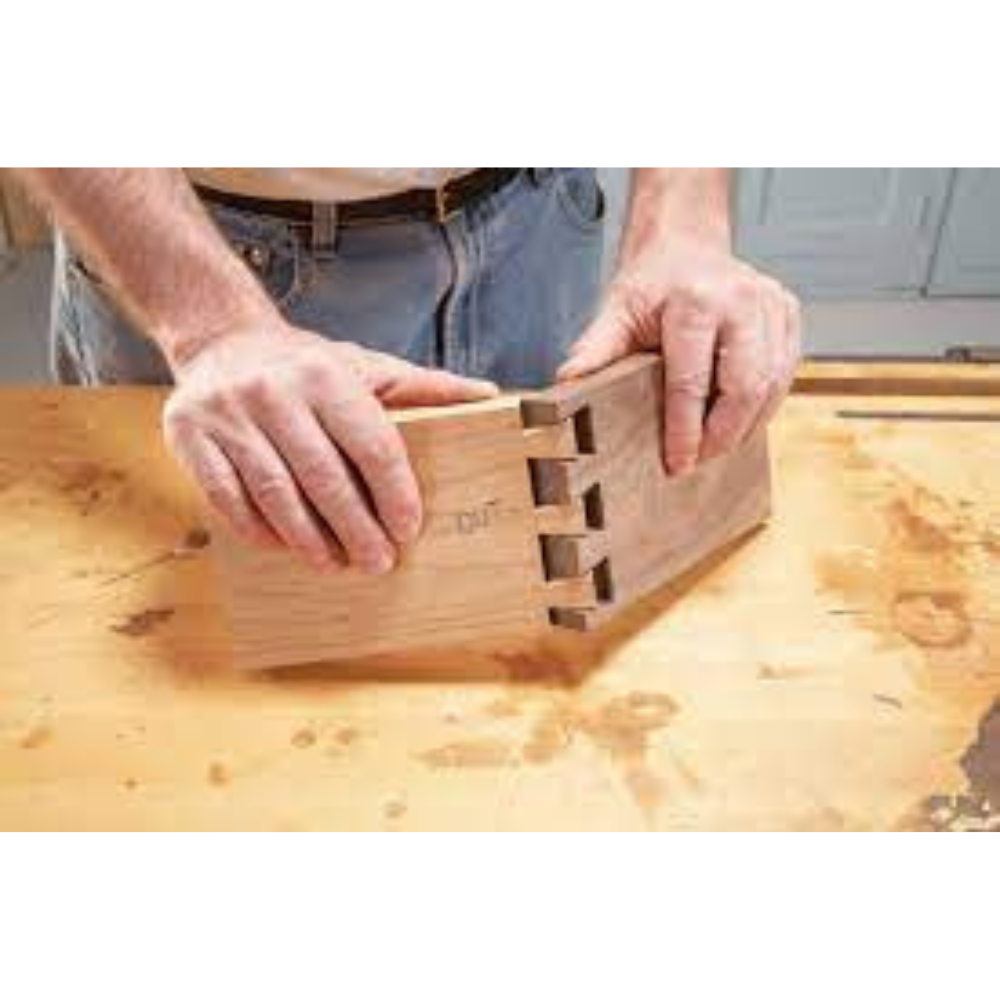
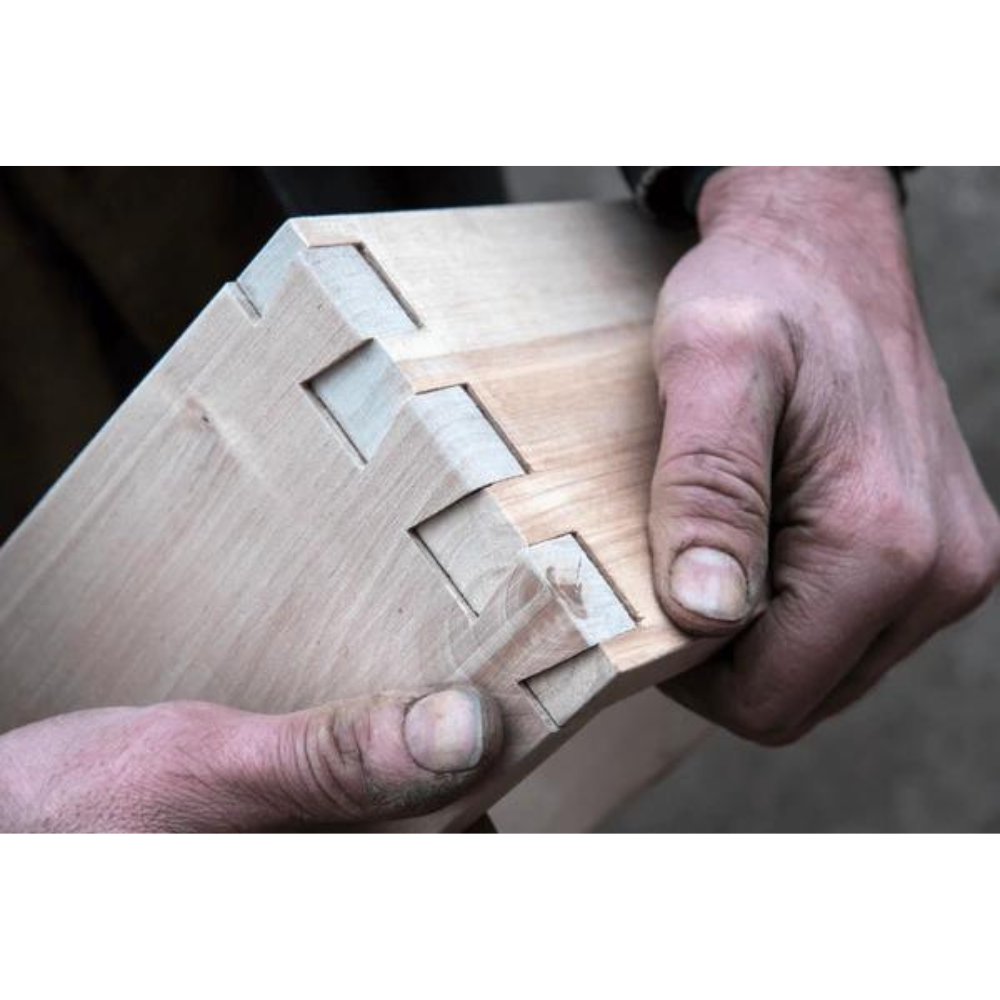
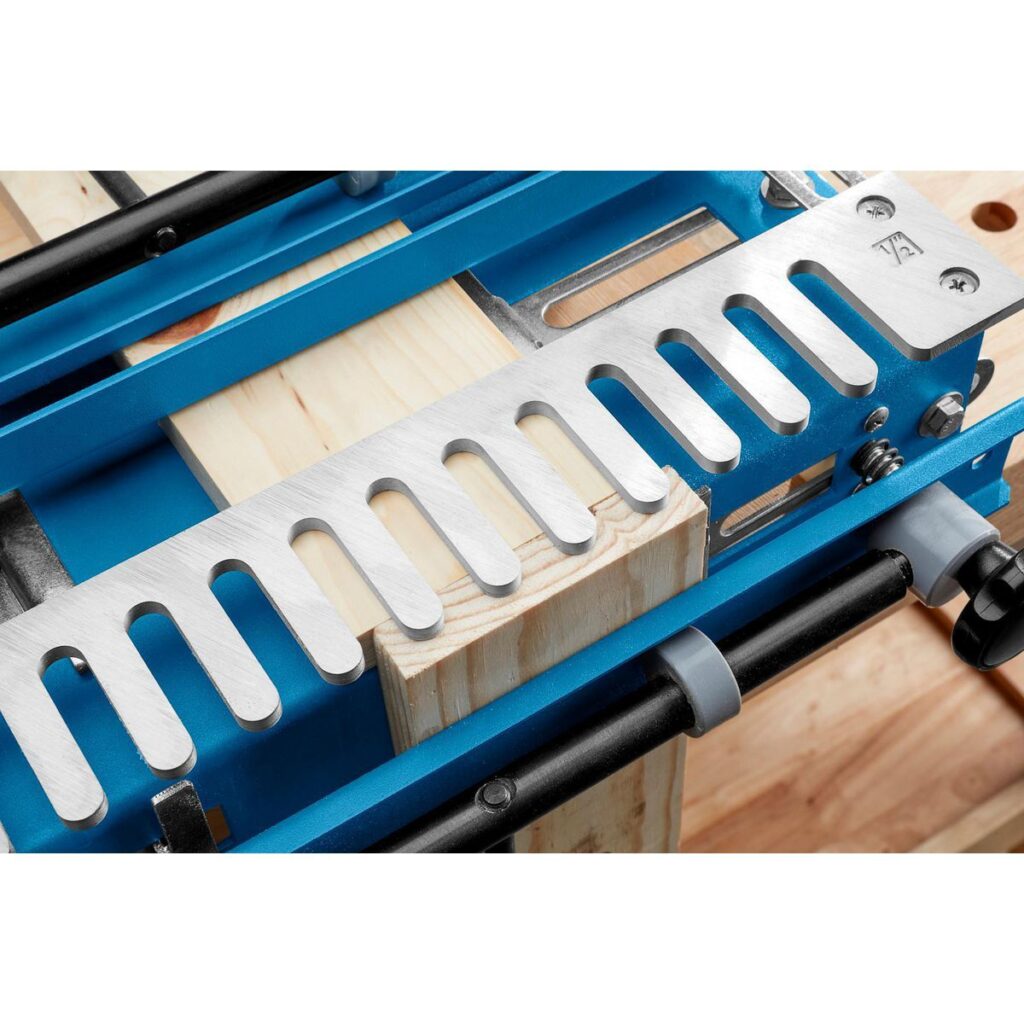
    • Joinery: Techniques like dovetail, mortise and tenon, and finger joints can add strength and beauty to your furniture.
    • Bending Wood: Steam bending or laminating thin strips can create curved designs.
    • Inlay: Add decorative inlays using contrasting wood or materials like metal or stone.

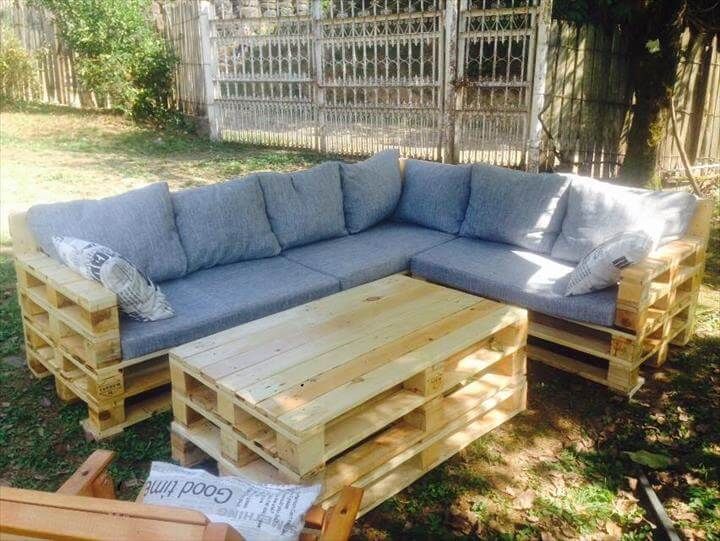
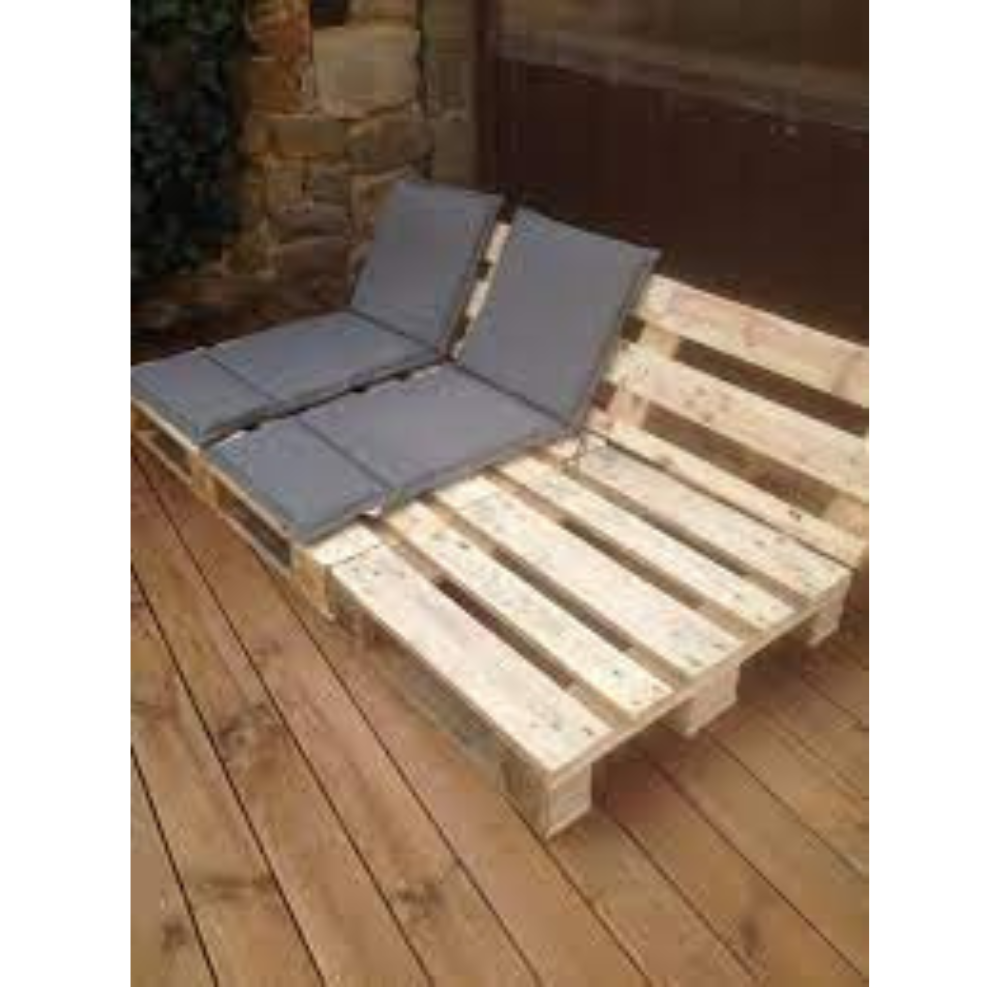
    The Benefits of DIY Outdoor Furniture

    Building your own outdoor furniture has many benefits:

    • Creativity: You can design pieces that are uniquely yours.
    • Skill Development: Each project helps you improve your woodworking skills.
    • Sustainability: Using sustainable wood and eco-friendly finishes can make your project environmentally friendly.
    • Community: Sharing your creations with friends and family can inspire others to start woodworking.

    For your “Free” Outdoor Projects Plan – Click Here.

    Conclusion

    Woodworking outdoor furniture is a fulfilling and practical hobby that allows you to create beautiful, functional pieces for your outdoor space. From choosing the right wood and tools to mastering essential techniques and advanced methods, there’s always something new to learn and create. Whether you’re building a simple chair, a sturdy table, or a beautiful garden bench, the possibilities are endless.

    FAQs about Woodworking Outdoor Furniture

    1. What is the best wood for outdoor furniture?

    Teak, cedar, redwood, and acacia are excellent choices for outdoor furniture due to their natural resistance to weather and insects.

    2. How do I protect my outdoor furniture from the elements?

    Applying a weather-resistant finish, such as outdoor varnish or sealant, and storing your furniture indoors during harsh weather can protect it from the elements.

    3. Can beginners build outdoor furniture?

    Yes, beginners can start with simple projects like chairs or small tables. There are many resources and tutorials available to help you get started.

    4. How do I maintain my outdoor furniture?

    Regular cleaning, reapplying protective finishes, and storing furniture indoors during the winter are key maintenance practices.

    5. What tools do I need to start woodworking outdoor furniture?

    Essential tools include a measuring tape, saw, drill, sander, and clamps. Safety gear like safety glasses, ear protection, and a dust mask are also important.

    By following these tips and techniques, you can create stunning woodworking outdoor furniture that will enhance your outdoor living space and provide you with a great sense of accomplishment. So, grab your tools and get started on your next woodworking adventure!

  • Must Have Woodworking Tools: Your Essential Guide

    Must Have Woodworking Tools: Your Essential Guide

    Woodworking is a craft that combines precision, creativity, and skill. Whether you’re a seasoned carpenter or a beginner, having the right tools is crucial to bringing your projects to life. This article will walk you through the must have woodworking tools that every woodworker should consider adding to their collection. We’ll cover everything from basic hand tools to advanced machinery, ensuring you have all the information you need to get started or upgrade your toolkit.

    For your “Free” 2 in 1 Folding Picnic Table Bench Plan – Click Here.

    Introduction: Why Must Have Woodworking Tools Matter

    When diving into woodworking, the first thing you need to understand is the importance of the right tools. Having the must have woodworking tools in your arsenal can make the difference between a frustrating project and a masterpiece. These tools not only make your work easier but also ensure accuracy and safety, allowing you to focus on the art of woodworking itself.

    1. The Foundation: Measuring and Marking Tools

    Before you even think about cutting or shaping wood, you need to measure and mark your materials accurately. Essential tools in this category include:

    • Tape Measure: An absolute must for any woodworker, providing precise measurements.
    • Combination Square: Useful for marking and measuring right angles and ensuring your cuts are square.
    • Marking Gauge: Ideal for scribing lines parallel to the edge of your workpiece.

    2. Cutting Tools: Precision at Its Best

    Cutting tools are at the heart of woodworking. Without them, turning raw wood into a piece of art would be impossible. Here are some must haves:

    • Hand Saw: A versatile tool for making quick cuts.
    • Coping Saw: Perfect for intricate cuts and curves.
    • Back Saw: Essential for fine, precise cuts, particularly in joinery.

    3. Power Tools: Taking Your Woodworking to the Next Level

    Power tools can save you time and effort, making complex tasks simpler and quicker. Key power tools include:

    • Table Saw: The workhorse of any woodworking shop, perfect for ripping large boards.
    • Circular Saw: Great for making long, straight cuts.
    • Jigsaw: Ideal for cutting curves and complex shapes.

    4. Shaping Tools: Sculpting Your Masterpiece

    Once you’ve made your cuts, shaping tools help refine and perfect your pieces. These tools are indispensable for any serious woodworker:

    • Chisels: Essential for detailed carving and joinery work.
    • Rasps and Files: Perfect for smoothing rough edges and shaping wood.
    • Spokeshave: Used for creating smooth, curved surfaces.

    5. Drilling Tools: Creating Holes with Precision

    Drilling tools are necessary for making holes for screws, dowels, and other joinery techniques. Some of the must have drilling tools are:

    • Drill Press: Offers precision and control for drilling accurate holes.
    • Hand Drill: A versatile tool for drilling in tight spaces or for small projects.
    • Countersink Bits: Used to create a recess for screw heads, ensuring a flush finish.

    6. Sanding Tools: Achieving the Perfect Finish

    Sanding is a critical step in woodworking, helping to smooth and finish your pieces. Essential sanding tools include:

    • Random Orbital Sander: Provides a smooth finish with minimal effort.
    • Belt Sander: Great for removing material quickly and leveling surfaces.
    • Hand Sanding Blocks: Useful for detail work and finishing touches.

    7. Clamping Tools: Holding It All Together

    Clamps are crucial for holding your workpieces in place while you cut, shape, or glue them. Some essential clamping tools are:

    • Bar Clamps: Versatile and strong, perfect for larger projects.
    • C-Clamps: Ideal for smaller, more detailed work.
    • Spring Clamps: Quick and easy to use for temporary holding.

    8. Joinery Tools: Building Strong Connections

    Joinery is the art of connecting pieces of wood to create a stable structure. Must have woodworking tools for joinery include:

    • Dovetail Jig: Helps create precise dovetail joints.
    • Mortise and Tenon Tools: Essential for traditional joinery techniques.
    • Biscuit Joiner: Makes quick and strong joints using biscuits.

    9. Sharpening Tools: Keeping Your Edge

    Sharp tools are safer and more effective. Keeping your tools sharp is a must for any woodworker. Essential sharpening tools include:

    • Sharpening Stones: Used for sharpening chisels and plane blades.
    • Honing Guide: Ensures a consistent angle while sharpening.
    • Strop: Polishes and hones the edge of your tools.

    For your “Free” Outdoor Projects Plan – Click Here.

    10. Safety Gear: Protecting Yourself

    Safety should always be a priority in woodworking. Essential safety gear includes:

    • Safety Glasses: Protect your eyes from dust and debris.
    • Hearing Protection: Guards against loud power tools.
    • Dust Masks: Prevent inhalation of sawdust and other particles.

    11. Workbench: The Heart of Your Workshop

    A solid workbench is the foundation of any woodworking shop. It provides a stable and reliable surface for all your projects. Features to look for include:

    • Sturdy Construction: Ensure it can handle heavy work.
    • Vices and Clamps: For holding your workpieces securely.
    • Storage: Drawers and shelves for organizing your tools.

    12. Finishing Tools: Adding the Final Touches

    After constructing your project, finishing tools help add the final touches. These tools include:

    • Paint Brushes and Rollers: For applying finishes and paint.
    • Spray Gun: Offers a smooth, professional finish.
    • Buffer and Polisher: Helps achieve a high-gloss finish.

    13. Advanced Tools: For the Experienced Woodworker

    For those looking to take their woodworking to the next level, advanced tools can open up new possibilities. Consider adding these to your collection:

    • Router: Perfect for creating decorative edges and joinery.
    • Planer: Useful for flattening and smoothing rough lumber.
    • CNC Machine: Allows for precision cutting and engraving.

    14. Must Have Woodworking Tools for Beginners

    If you’re just starting out, here are some must have woodworking tools that will help you build a solid foundation:

    • Basic Hand Tools: Start with a good set of chisels, saws, and a hammer.
    • Power Drill: Versatile and essential for drilling and driving screws.
    • Sanding Tools: Begin with a simple sanding block and progress to power sanders as needed.

    15. Must Have Woodworking Tools for Professionals

    For professional woodworkers, having a comprehensive set of tools is essential. Here are some advanced tools to consider:

    • Bandsaw: Ideal for cutting curves and resawing lumber.
    • Drum Sander: Provides a smooth, even finish on large pieces.
    • Edge Jointer: Ensures perfectly straight and square edges.

    16. Maintenance of Must Have Woodworking Tools

    Taking care of your tools is crucial to ensure they last and perform well. Regular maintenance tips include:

    • Cleaning: Keep your tools free of dust and debris.
    • Sharpening: Regularly sharpen blades and bits.
    • Oiling: Prevent rust and ensure smooth operation.

    17. Must Have Woodworking Tools for Specific Projects

    Different projects require different tools. Here are some specialized tools for specific woodworking tasks:

    • Cabinetmaking: Requires precision measuring tools, clamps, and finishing tools.
    • Furniture Building: Needs joinery tools, sanders, and a reliable workbench.
    • Woodcarving: Essential tools include carving knives, gouges, and a mallet.

    18. Budget-Friendly Must Have Woodworking Tools

    You don’t need to break the bank to get started in woodworking. Here are some budget-friendly options:

    • Used Tools: Look for quality used tools at garage sales or online.
    • Starter Kits: Many manufacturers offer starter kits that provide good value.
    • DIY Solutions: Sometimes you can make your own tools or modify existing ones.

    19. Must Have Woodworking Tools for Small Workshops

    If you have limited space, you’ll need to be selective about your tools. Consider these space-saving options:

    • Multi-Function Tools: Tools that serve multiple purposes can save space.
    • Compact Workbench: Look for foldable or wall-mounted options.
    • Portable Tools: Tools like cordless drills and compact saws can be stored easily.

    20. Must Have Woodworking Tools for Outdoor Projects

    Outdoor woodworking projects have unique requirements. Here are some tools that can handle the elements:

    • Cordless Tools: Battery-powered tools are convenient and versatile.
    • Weather-Resistant Materials: Use tools that can work with treated lumber and other outdoor materials.
    • Portable Workbench: A collapsible workbench can be taken to different sites.

    21. Eco-Friendly Must Have Woodworking Tools

    For those interested in sustainability, consider these eco-friendly tools and practices:

    • Hand Tools: Reduce your carbon footprint by using manual tools when possible.
    • Reclaimed Wood: Tools that can work with reclaimed materials help reduce waste.
    • Eco-Friendly Finishes: Look for non-toxic, water-based finishes.

    22. Conclusion: Building Your Collection of Must Have Woodworking Tools

    Embarking on your woodworking journey is exciting, and having the right tools will make all the difference. By investing in these must have woodworking tools, you’ll be well-equipped to tackle any project with confidence and precision. Remember, quality tools are an investment in your craft, and with proper care, they will serve you for many years to come.

    For your “Free”Guide to 13 Wood Joinery Types – Click Here.

    FAQs About Must Have Woodworking Tools

    Q1: What are the most essential woodworking tools for beginners? A: For beginners, essential tools include a tape measure, hand saw, power drill, chisels, and a sanding block.

    Q2: How do I maintain my woodworking tools? A: Regular maintenance involves cleaning, sharpening blades, oiling moving parts, and storing tools properly to prevent rust.

    Q3: Can I start woodworking with a limited budget? A: Yes, you can start with basic, budget-friendly tools and gradually expand your collection. Look for used tools and starter kits to save money.

    Q4: What safety gear should I use in woodworking? A: Essential safety gear includes safety glasses, hearing protection, and dust masks to protect yourself from potential hazards.

    Q5: How do I choose the right tool for a specific project? A: Consider the requirements of your project, such as the type of wood, precision needed, and the specific tasks involved. Research and invest in tools that will best suit your needs.

    By following this guide and investing in the must have woodworking tools, you’ll be well on your way to mastering the art of woodworking. Happy crafting!

  • Tools for Woodworking: A Comprehensive Guide

    Tools for Woodworking: A Comprehensive Guide

    Woodworking is a craft that combines creativity, precision, and skill. Whether you are a beginner or a seasoned woodworker, the right tools are essential to bring your projects to life. In this article, we will delve into the various tools for woodworking that you need to create beautiful, functional pieces. From hand tools to power tools, we’ll cover everything you need to know to set up your woodworking workshop. Let’s get started on this journey into the world of woodworking tools.

    For your “Free” Outdoor Projects Plan – Click Here.

    Introduction to Tools for Woodworking

    Every woodworking enthusiast understands the importance of having the right tools. Tools for woodworking are not just instruments; they are extensions of your hands and imagination. Without the proper tools, even the most creative ideas can be challenging to execute. In this guide, we’ll explore the essential tools for woodworking, helping you understand their uses, benefits, and how they can enhance your craft.

    1. Essential Hand Tools for Woodworking

    Hand tools are the backbone of any woodworking workshop. They offer precision and control, which are crucial for detailed work. Some of the must-have hand tools include:

    • Chisels: Used for carving and cutting wood with precision.
    • Hand Saws: Essential for making straight cuts in wood.
    • Planes: Smoothens and flattens wood surfaces.
    • Clamps: Hold pieces of wood together firmly during gluing or assembly.
    • Mallets: Used to strike chisels or adjust parts without damaging them.

    These tools may seem basic, but they are indispensable for both beginners and experts.

    2. Power Tools for Woodworking

    Power tools have revolutionized woodworking by making tasks faster and easier. Here are some essential power tools for woodworking:

    • Table Saw: Ideal for making precise cuts quickly.
    • Circular Saw: Versatile and portable, perfect for cutting large boards.
    • Jigsaw: Excellent for cutting curves and intricate shapes.
    • Router: Used for hollowing out an area in the surface of wood.
    • Drill Press: Provides accuracy and power for drilling holes.

    These tools are vital for efficiency and precision in modern woodworking.

    3. Measuring and Marking Tools

    Accurate measurement is critical in woodworking. Even a slight error can ruin a project. Essential measuring and marking tools include:

    • Tape Measure: A must-have for measuring lengths.
    • Combination Square: Useful for measuring and marking 90-degree angles.
    • Marking Gauge: Helps in marking out lines parallel to the edge of the wood.
    • Calipers: Measure the thickness and diameter of wood pieces.

    Having these tools ensures that your measurements are spot-on.

    4. Cutting Tools for Woodworking

    Cutting is a fundamental aspect of woodworking. The right cutting tools can make a significant difference in the quality of your work. Some crucial cutting tools are:

    • Japanese Pull Saw: Known for its precision and clean cuts.
    • Coping Saw: Great for intricate cuts and curves.
    • Miter Saw: Perfect for making accurate crosscuts and miters.
    • Band Saw: Versatile tool for making straight and curved cuts.

    Investing in high-quality cutting tools can significantly enhance your woodworking projects.

    5. Sharpening Tools

    Keeping your tools sharp is essential for safety and efficiency. Dull tools can be dangerous and make your work more difficult. Important sharpening tools include:

    • Sharpening Stones: Used for honing the edges of blades and chisels.
    • Honing Guides: Help maintain the correct angle while sharpening.
    • Diamond Plates: Provide a flat surface for sharpening tools.

    Regularly sharpening your tools ensures they perform at their best.

    6. Sanding and Finishing Tools

    The finishing touches can make or break a woodworking project. Sanding and finishing tools help you achieve a smooth, polished look. Key tools include:

    • Random Orbital Sander: Provides a smooth finish with minimal effort.
    • Belt Sander: Removes material quickly, great for rough sanding.
    • Hand Sanding Blocks: Perfect for detailed and precise sanding.
    • Finishing Brushes and Pads: Used for applying stains, varnishes, and finishes.

    These tools help you achieve a professional-quality finish on your projects.

    For your “Free” Guide to 13 Wood Joinery Types – Click Here.

    7. Joinery Tools for Woodworking

    Joinery is the art of connecting wood pieces together. The right joinery tools can ensure strong, durable connections. Essential joinery tools include:

    • Dovetail Jig: Helps create precise dovetail joints.
    • Pocket Hole Jig: Makes strong, hidden joints.
    • Biscuit Joiner: Used for joining pieces of wood with biscuits.
    • Mortise and Tenon Tools: For creating traditional joinery.

    Mastering joinery with these tools can elevate the quality of your woodworking projects.

    8. Safety Equipment for Woodworking

    Safety should always be a priority in woodworking. Using the right safety equipment can prevent accidents and injuries. Important safety gear includes:

    • Safety Glasses: Protect your eyes from dust and debris.
    • Ear Protection: Shields your ears from loud power tool noises.
    • Dust Masks and Respirators: Prevent inhalation of harmful dust particles.
    • Gloves: Protect your hands from sharp tools and splinters.

    Always prioritize safety by using the appropriate protective gear.

    9. Storage Solutions for Woodworking Tools

    Keeping your tools organized and accessible is crucial for efficiency. Effective storage solutions include:

    • Tool Chests and Cabinets: Provide ample storage for various tools.
    • Pegboards: Keep tools visible and easy to reach.
    • Toolboxes: Portable storage for tools on the go.
    • Drawer Organizers: Keep small tools and accessories sorted.

    Investing in good storage solutions can save you time and frustration.

    10. Workshop Setup and Layout

    The layout of your workshop can significantly impact your workflow. Consider the following when setting up your woodworking space:

    • Workbench: A sturdy workbench is essential for any woodworking shop.
    • Lighting: Good lighting helps you see details clearly.
    • Ventilation: Proper ventilation is important for safety and comfort.
    • Tool Placement: Arrange tools for easy access and efficiency.

    A well-organized workshop enhances productivity and safety.

    11. Specialty Tools for Advanced Woodworking

    As you advance in woodworking, you may need specialized tools for complex projects. Some specialty tools include:

    • Lathe: Used for turning wood to create round objects like bowls and spindles.
    • Scroll Saw: Perfect for intricate, detailed cuts.
    • Spokeshave: Used for shaping and smoothing curved surfaces.
    • Wood Burning Tools: For adding decorative details to wood.

    These tools can help you tackle more advanced and creative projects.

    12. Maintenance and Care for Woodworking Tools

    Proper maintenance extends the life of your tools and ensures they perform well. Tips for maintaining your tools include:

    • Regular Cleaning: Keep tools free of dust and debris.
    • Lubrication: Apply oil to moving parts to prevent rust and wear.
    • Proper Storage: Store tools in a dry, safe place.
    • Periodic Inspections: Check tools for damage or wear and repair as needed.

    Taking care of your tools will keep them in top condition for years to come.

    Conclusion: Mastering the Tools for Woodworking

    Having the right tools for woodworking is essential for any craftsman. These tools not only make your work easier but also improve the quality of your projects. From hand tools to power tools, measuring instruments to safety gear, each tool has a specific role in the woodworking process. By investing in high-quality tools and taking good care of them, you can enjoy a rewarding and fulfilling woodworking experience.

    For your “Free” 2 in 1 Folding Picnic Table Bench Plan – Click Here.

    FAQs About Tools for Woodworking

    1. What are the most essential tools for a beginner in woodworking? For beginners, the most essential tools include chisels, hand saws, a tape measure, a combination square, and clamps. These tools provide a solid foundation for basic woodworking tasks.

    2. How often should I sharpen my woodworking tools? It depends on the frequency of use and the type of wood you’re working with. However, a general rule is to sharpen your tools whenever you notice a decrease in performance or after every major project.

    3. What safety equipment should I always use in woodworking? Always use safety glasses, ear protection, dust masks or respirators, and gloves. Additionally, ensure your workspace is well-ventilated and free of hazards.

    4. Can I use power tools without any prior experience? While power tools can be used by beginners, it’s essential to read the manuals, understand the safety guidelines, and possibly get some hands-on instruction or training before using them.

    5. How do I maintain my woodworking tools? Regularly clean your tools, lubricate moving parts, store them in a dry place, and inspect them periodically for damage or wear. Proper maintenance will keep your tools in good working condition for a long time.

    Woodworking is a journey of learning and creativity. With the right tools and knowledge, you can create beautiful pieces that are both functional and artistic. Happy woodworking!

  • Woodworking Screws: Your Ultimate Guide to Fastening Success

    Woodworking Screws: Your Ultimate Guide to Fastening Success

    Woodwork screws are essential components in the world of woodworking, offering strength, durability, and ease of use. Whether you’re a seasoned woodworker or just starting out, understanding the various types of woodwork screws and their applications is crucial for creating high-quality, lasting projects. In this comprehensive guide, we’ll delve into everything you need to know about woodwork screws, from types and materials to tips and tricks for optimal use.

    For your “Free” Outdoor Projects Plan – Click Here.

    Introduction to Woodworking Screws

    When it comes to woodworking, screws are often the unsung heroes. These small but mighty fasteners hold your projects together, ensuring stability and longevity. Moreover, woodwork screws come in various shapes, sizes, and materials, each designed for specific tasks. By choosing the right screw for the job, you can enhance the strength and aesthetics of your work.

    Types of Woodwork Screws

    There are numerous types of woodwork screws, each with its unique features and applications. Here are some of the most common ones:

    1. Wood Screws

    Wood screws are the most commonly used screws in woodworking. They have a sharp, pointed tip that allows them to penetrate wood easily. Additionally, wood screws come in various lengths and diameters, making them versatile for different projects.

    2. Deck Screws

    Deck screws are designed specifically for outdoor projects, such as building decks and fences. They are made from corrosion-resistant materials, such as stainless steel or coated steel, to withstand the elements. Consequently, they are ideal for outdoor use.

    3. Drywall Screws

    Although primarily used for securing drywall, these screws are also handy in woodworking. Drywall screws have a bugle-shaped head that prevents the screw from tearing through the material, making them ideal for thin or delicate wood.

    4. Lag Screws

    Lag screws, also known as lag bolts, are heavy-duty screws used for structural applications. They have a hex head and require a wrench for installation. Therefore, lag screws are perfect for projects that need extra strength, such as securing large beams or posts.

    5. Pocket Hole Screws

    Pocket hole screws are specifically designed for pocket hole joinery. They have a self-tapping tip and a flat washer head, which helps draw the joint tight. Consequently, these screws are essential for creating strong, hidden joints.

    Materials Used when using Woodwork Screws

    The material of the screw is just as important as its type. The right material ensures durability and longevity, especially in challenging environments.

    6. Steel Screws

    Steel screws are the most common and affordable option. They are strong and versatile, suitable for most indoor woodworking projects. However, they may rust if exposed to moisture. Therefore, they are best for indoor use.

    7. Stainless Steel Screws

    Stainless steel screws are highly resistant to corrosion, making them ideal for outdoor and high-moisture environments. They are more expensive than regular steel screws but offer superior durability. Hence, they are a worthwhile investment for long-term projects.

    8. Brass Screws

    Brass screws are known for their aesthetic appeal, often used in decorative woodworking projects. They are softer than steel and stainless steel, so they require pre-drilling to avoid snapping. Nevertheless, their beauty makes them a favorite for fine woodworking.

    9. Zinc-Plated Screws

    Zinc-plated screws are coated with a layer of zinc to prevent rust. They offer a good balance between cost and corrosion resistance, suitable for both indoor and outdoor use. As a result, they are quite versatile.

    Choosing the Right Screw for Your Project

    Selecting the appropriate woodworking screw for your project involves considering several factors, such as the type of wood, the environment, and the load the joint will bear.

    10. Consider the Wood Type

    Different woods have varying densities and properties. For softwoods like pine, use screws with coarse threads to ensure a firm grip. For hardwoods like oak, fine-thread screws are preferable to avoid splitting the wood. Consequently, you’ll achieve better results.

    11. Think About the Environment

    For outdoor projects or high-moisture areas, choose screws made from corrosion-resistant materials like stainless steel or zinc-plated steel. This will prevent rust and ensure the longevity of your project. Thus, your work will withstand harsh conditions.

    12. Assess the Load

    For heavy-duty applications, such as securing structural components, use lag screws or other heavy-duty screws. For lighter tasks, wood screws or drywall screws may suffice. Therefore, always match the screw type to the task.

    Tips for Using Woodworking Screws

    Using woodworking screws effectively can make a significant difference in the quality and durability of your projects. Here are some tips to help you get the most out of your screws:

    13. Pre-Drill Pilot Holes

    Pre-drilling pilot holes helps prevent the wood from splitting and makes it easier to drive the screw. The pilot hole should be slightly smaller than the screw’s diameter. Consequently, this simple step can save you time and frustration.

    14. Use Countersink Bits

    Countersink bits create a recess for the screw head, allowing it to sit flush with or below the wood surface. This not only improves the appearance of your project but also prevents the wood from splitting. Therefore, your finished product will look more professional.

    15. Choose the Right Screw Length

    The length of the screw should be at least twice the thickness of the wood you’re joining. This ensures a strong, secure connection. Hence, always double-check the screw length before starting.

    16. Apply Steady Pressure

    When driving screws, apply steady, even pressure to avoid stripping the screw head. Use a screwdriver or drill with the appropriate bit for the screw type. As a result, you’ll achieve a more secure fit.

    For your “Free”Guide to 13 Wood Joinery Types – Click Here.

    Common Mistakes to Avoid

    Even experienced woodworkers can make mistakes when using screws. Here are some common pitfalls to watch out for:

    17. Over-Tightening Screws

    Over-tightening can strip the screw head or damage the wood. Therefore, tighten the screw just enough to secure the joint without causing damage. This will help maintain the integrity of your project.

    18. Using the Wrong Screw Type

    Using the wrong screw type can lead to weak joints or damaged wood. Always choose the right screw for the specific task and material. Consequently, your work will be stronger and more reliable.

    19. Neglecting Corrosion Resistance

    For outdoor projects, using non-corrosion-resistant screws can lead to rust and failure of the joint. Thus, always consider the environment when selecting screws. This simple step can significantly extend the life of your project.

    The Evolution of Woodworking Screws

    The design and materials of woodworking screws have evolved significantly over time. Modern screws offer improved strength, ease of use, and resistance to environmental factors.

    20. Early Woodworking Screws

    Early screws were handmade and often inconsistent in quality. They were typically made from iron and required pre-drilled holes. As a result, they were less reliable than today’s screws.

    21. Industrial Revolution and Mass Production

    The Industrial Revolution brought mass production techniques, making screws more affordable and consistent in quality. Consequently, the introduction of machine-made screws revolutionized woodworking.

    22. Modern Innovations

    Today’s screws are designed with advanced features, such as self-tapping tips and corrosion-resistant coatings. Consequently, these innovations make woodworking easier and more efficient.

    Woodworking Screws in Different Projects

    Woodworking screws play a crucial role in a variety of projects, from furniture making to large outdoor structures.

    23. Furniture Making

    In furniture making, screws are used to join pieces securely without visible fasteners. Pocket hole screws and dowel screws are popular choices for this purpose. Therefore, they are essential in crafting beautiful and durable furniture.

    24. Cabinetry

    Cabinet makers often use screws for assembling and mounting cabinets. Confirmat screws are specially designed for this task, providing a strong, tight joint. Consequently, they ensure the longevity and stability of cabinetry.

    25. Outdoor Structures

    For outdoor structures like decks and fences, corrosion-resistant screws are essential. Deck screws and lag screws provide the necessary strength and durability. As a result, your outdoor projects will withstand the test of time.

    Maintaining and Storing Woodworking Screws

    Proper maintenance and storage of your woodworking screws can extend their lifespan and keep them ready for use.

    26. Keep Screws Organized

    Organize your screws by type and size in a storage container with labeled compartments. This makes it easy to find the right screw for your project. Consequently, you’ll save time and reduce frustration.

    27. Store in a Dry Place

    Moisture can cause screws to rust, especially if they are not made from corrosion-resistant materials. Therefore, store your screws in a dry, climate-controlled environment. This will help maintain their integrity.

    28. Regularly Inspect Screws

    Inspect your screws regularly for signs of rust or damage. Discard any screws that are bent, stripped, or corroded. Consequently, you’ll ensure that you always have reliable screws on hand.

    For your “Free” Workspace Plans – Click Here.

    Conclusion: The Essential Role of Woodworking Screws

    Woodworking screws are indispensable in any woodworker’s toolkit. By understanding the different types, materials, and applications of these fasteners, you can choose the right screw for each project, ensuring strength, durability, and a professional finish. Remember to pre-drill pilot holes, use the correct screw length, and select screws based on the wood type and environment. With these tips in mind, you’ll be well on your way to mastering the art of using woodworking screws.

    FAQs about Woodworking Screws

    1. What is the best type of screw for outdoor woodworking projects?

    The best type of screw for outdoor projects is a corrosion-resistant screw, such as stainless steel or zinc-plated deck screws. These screws are designed to withstand the elements and prevent rust.

    2. How do I prevent wood from splitting when using screws?

    To prevent wood from splitting, pre-drill pilot holes slightly smaller than the screw’s diameter. Using a countersink bit can also help by allowing the screw head to sit flush with or below the wood surface.

    3. What is the difference between wood screws and drywall screws?

    Wood screws have a sharp, pointed tip and threads designed for wood, while drywall screws have a bugle-shaped head and are primarily used for securing drywall. However, drywall screws can also be used in woodworking for thin or delicate wood.

    4. Can I use brass screws for structural applications?

    Brass screws are generally softer than steel or stainless steel screws and are not recommended for structural applications. They are best suited for decorative projects where appearance is a priority.

    5. How do I choose the right screw length for my project?

    The screw length should be at least twice the thickness of the wood you’re joining. This ensures a strong, secure connection without compromising the integrity of the wood.

  • 2×4 Workbench Plans: Build a Sturdy Workstation

    2×4 Workbench Plans: Build a Sturdy Workstation

    Building your own workbench can be one of the most satisfying projects for any DIY enthusiast. With the right 2×4 workbench plans, you can create a robust and practical workspace tailored to your needs. In this comprehensive guide, we’ll walk you through everything you need to know to construct a dependable workbench using 2×4 lumber. Whether you’re a seasoned woodworker or just getting started, these plans are designed to be straightforward and easy to follow.

    For your “Free”Guide to 13 Wood Joinery Types – Click Here.

    Introduction to 2×4 Workbench Plans

    When you think about setting up a workshop, the first essential item that comes to mind is a sturdy workbench. The good news? You don’t need to spend a fortune. With basic 2×4 workbench plans, you can create a durable and functional workbench right in your garage or workshop. These plans are versatile, affordable, and perfect for various projects, making them a popular choice among DIYers.

    Why Choose 2×4 Workbench Plans?

    Affordability

    2×4 lumber is one of the most cost-effective materials available. It’s widely accessible, and even on a tight budget, you can build a solid workbench without breaking the bank.

    Durability

    Despite its affordability, 2×4 lumber is incredibly durable. A workbench constructed from 2x4s can withstand heavy use and last for years, making it a great investment for your workshop.

    Ease of Construction

    Even if you’re new to woodworking, 2×4 workbench plans are easy to follow. The simplicity of the design means you don’t need specialized tools or advanced skills to build a sturdy workbench.

    Versatility

    2×4 workbench plans are highly versatile. You can customize your workbench to suit your specific needs, whether you’re looking for additional storage, mobility, or a particular size.

    Essential Tools and Materials

    Before diving into the construction process, gather the necessary tools and materials. Here’s a checklist to get you started:

    Tools:

    • Tape measure
    • Circular saw or miter saw
    • Power drill and bits
    • Screwdriver
    • Clamps
    • Carpenter’s square
    • Safety gear (gloves, goggles, ear protection)

    Materials:

    • 2×4 lumber (quantity depends on the size of your workbench)
    • Plywood or MDF for the work surface
    • Screws or nails
    • Wood glue
    • Sandpaper or a sander
    • Wood finish (optional)

    Step-by-Step 2×4 Workbench Plans

    1. Planning Your Workbench

    Start by deciding on the dimensions of your workbench. Consider the available space in your workshop and the type of projects you’ll be working on. Common dimensions for a workbench are 60 inches long, 30 inches wide, and 34 inches high, but you can adjust these to fit your needs.

    2. Cutting the Lumber

    Using your tape measure and saw, cut the 2x4s according to your measurements. You’ll need pieces for the legs, the frame, and additional support structures. Label each piece to avoid confusion during assembly.

    3. Building the Frame

    Begin by assembling the frame of your workbench. Lay out the pieces for the front and back frames and attach them using screws and wood glue. Ensure that all joints are square using your carpenter’s square.

    For your “Free” Outdoor Projects Plan – Click Here.

    4. Adding the Legs

    Attach the legs to the frame, ensuring they are evenly spaced and securely fastened. Use clamps to hold the pieces in place while you drill and screw them together. This step is crucial for the stability of your workbench.

    5. Reinforcing the Structure

    To enhance the durability of your workbench, add additional supports. Place horizontal braces between the legs and the frame to distribute weight evenly and prevent wobbling.

    6. Installing the Work Surface

    Cut your plywood or MDF to fit the top of your frame. Secure it with screws, ensuring it’s flush with the edges of the frame. Sand the surface to remove any rough edges and apply a wood finish if desired.

    7. Adding Storage Options

    If you need extra storage, consider adding a lower shelf or drawers to your workbench. Use additional 2x4s to create a frame for the shelf and attach it to the legs. For drawers, use pre-made drawer slides or build custom ones to fit your needs.

    8. Final Touches

    Inspect your workbench for any loose screws or rough edges. Sand any remaining rough spots and apply a finish to protect the wood and enhance its appearance.

    Tips for Customizing Your 2×4 Workbench Plans

    Mobility

    If you need to move your workbench around your workshop, consider adding casters to the legs. Make sure to use locking casters to keep your bench stable when in use.

    Adjustable Height

    For a more ergonomic workspace, you can design your workbench with adjustable legs. This feature allows you to raise or lower the height of the bench to suit different projects or users.

    Built-in Tool Storage

    Incorporate built-in tool storage to keep your workspace organized. Add pegboards, hooks, or magnetic strips to hold your tools within easy reach.

    Electrical Outlets

    For convenience, you can add electrical outlets to your workbench. This feature is especially useful for powering tools and chargers without needing long extension cords.

    Maintaining Your 2×4 Workbench

    Regular Inspections

    Periodically inspect your workbench for any signs of wear or damage. Tighten loose screws and address any issues promptly to ensure the longevity of your bench.

    Cleaning

    Keep your workbench clean and free of debris. Regularly wipe down the surface and remove any sawdust or spills to maintain a safe and efficient workspace.

    Protecting the Surface

    Use a protective cover or mat when working on messy projects to prevent damage to the work surface. This simple step can extend the life of your workbench.

    2×4 Workbench Plans for Small Spaces

    If you’re working with limited space, you can still build an effective workbench. Opt for a compact design that maximizes functionality without taking up too much room. Foldable or wall-mounted workbenches are excellent options for small workshops.

    2×4 Workbench Plans for Heavy-Duty Use

    For more demanding projects, you might need a heavy-duty workbench. Reinforce your 2×4 workbench plans with additional bracing and thicker materials to support heavier loads and withstand rigorous use.

    Frequently Asked Questions (FAQs)

    1. What are the advantages of using 2×4 lumber for workbench plans?

    2×4 lumber is affordable, durable, and easy to work with, making it an ideal choice for building a sturdy and reliable workbench. It’s readily available at most hardware stores, and its versatility allows for a wide range of customizations.

    2. How long does it take to build a 2×4 workbench?

    The time it takes to build a 2×4 workbench depends on your skill level and the complexity of your design. On average, a simple workbench can be completed in a day or two, while more intricate designs with additional features may take longer.

    3. Can I build a 2×4 workbench without advanced woodworking skills?

    Absolutely! One of the great things about 2×4 workbench plans is their simplicity. Even beginners can follow these plans to build a functional and sturdy workbench with basic tools and materials.

    4. What size should my workbench be?

    The size of your workbench depends on the available space in your workshop and the type of projects you’ll be working on. Common dimensions are 60 inches long, 30 inches wide, and 34 inches high, but you can adjust these measurements to fit your needs.

    5. How can I make my 2×4 workbench more versatile?

    To enhance the versatility of your workbench, consider adding features such as adjustable height, built-in tool storage, or electrical outlets. These additions can make your workbench more functional and convenient for a variety of projects.

    For your “Free” Modern Table Plan – Click Here.

    Conclusion

    Building a workbench using 2×4 workbench plans is a rewarding project that provides you with a sturdy and reliable workspace. By following the steps outlined in this guide, you can create a customized workbench that suits your needs and enhances your workshop. Whether you’re a novice or an experienced woodworker, these plans offer a straightforward and cost-effective solution for building a workbench that will serve you well for years to come. So, gather your tools and materials, and start building your perfect workbench today!

  • Best Woodworking Table Saw: Ultimate Guide for Enthusiasts

    Best Woodworking Table Saw: Ultimate Guide for Enthusiasts

    Woodworking is an art that requires precision, patience, and the right tools. Among these tools, the table saw stands out as a quintessential piece for any serious woodworker. Whether you’re crafting intricate designs or working on pallet woodworking projects, a woodworking table saw can make all the difference. This guide aims to help you navigate through the world of table saws, ensuring you find the perfect fit for your needs.

    For your “Free” Guide to 13 Wood Joinery Types – Click Here.

    Introduction to Woodworking Table Saws

    When diving into woodworking, the table saw often becomes the heart of your workshop. But what makes it so essential? Imagine trying to slice a loaf of bread with a dull knife; frustrating, right? Similarly, a subpar table saw can turn a joyful woodworking project into a tedious task. A good table saw provides the precision, power, and versatility needed for a wide range of projects, from cutting large sheets of plywood to intricate joinery.

    Understanding the Basics: What is a Table Saw?

    A table saw is a woodworking tool consisting of a circular saw blade, mounted on an arbor, and driven by an electric motor. The blade protrudes through the surface of a table, which provides support for the material being cut. This design allows for precise cuts, making it a staple in any woodworking shop.

    Why You Need a Table Saw

    Having a woodworking table saw isn’t just about bragging rights; it’s about safety, efficiency, and quality of work. A high-quality table saw ensures clean, accurate cuts, which are essential for any project. It also reduces the risk of kickback, a common cause of injuries in the workshop. Moreover, a reliable table saw can handle a variety of materials and cuts, making your projects smoother and more enjoyable.

    Types of Table Saws

    There are several types of table saws available, each with its own advantages and best-use scenarios:

    1. Portable Table Saws: Also known as jobsite saws, these are lightweight and easy to transport. They’re perfect for contractors and those who need to move their saws frequently.
    2. Contractor Table Saws: These are larger and more powerful than portable saws, ideal for heavy-duty woodworking.
    3. Cabinet Table Saws: These are the heavyweights of the table saw world. They offer superior power, precision, and durability, making them perfect for professional woodworkers.
    4. Hybrid Table Saws: These combine features of contractor and cabinet saws, providing a balance of performance and cost.

    Top Features to Look for in a Table Saw

    When searching for a woodworking table saw, consider the following features:

    1. Motor Power: The motor’s power, measured in horsepower (HP), determines how easily the saw can cut through dense materials. More HP means more cutting power.
    2. Blade Size: Common blade sizes are 10-inch and 12-inch. Larger blades can make deeper cuts.
    3. Fence System: A good fence system ensures accurate, straight cuts. Look for a saw with a sturdy, easy-to-adjust fence.
    4. Dust Collection: Efficient dust collection keeps your workspace clean and improves visibility and safety.
    5. Safety Features: Look for features like riving knives, blade guards, and anti-kickback pawls to minimize the risk of injury.
    6. Table Size and Extension Wings: A larger table provides better support for large materials. Extension wings can further increase the workspace.

    What are the Top Brands in the Table Saw Market

    Several brands are renowned for producing high-quality woodworking table saws:

    1. SawStop: Known for their innovative safety features, Saw Stop table saws are a favorite among professionals.
    2. DeWalt: DeWalt offers a range of reliable, high-performance table saws suitable for both professionals and hobbyists.
    3. Bosch: Bosch table saws are known for their precision and portability, making them ideal for jobsite use.
    4. Jet: Jet provides durable, powerful table saws perfect for heavy-duty woodworking.
    5. Grizzly: Grizzly table saws are popular for their robust build and competitive pricing.

    What is the best choice of a Table Saw for beginners

    For beginners, a portable or contractor table saw is often the best choice. These saws are typically easier to use and less expensive than cabinet saws. The DeWalt DWE7485 is a great option for beginners. It offers a good balance of power, precision, and safety features, making it ideal for learning the ropes of woodworking.

    Best choice of a Table Saw for Professionals

    Professional woodworkers often require a more powerful and versatile saw. The Saw Stop PCS31230 is a top choice among pros. With its advanced safety features, robust construction, and precise cutting capabilities, it’s perfect for demanding woodworking tasks.

    Setting Up Your Table Saw for Optimal Performance

    Once you’ve chosen the a woodworking table saw for your needs, setting it up correctly is crucial. Start by ensuring the saw is on a flat, stable surface. Align the blade parallel to the miter slot and fence for accurate cuts. Adjust the blade height and angle according to your project requirements. Regular maintenance, such as cleaning the blade and lubricating moving parts, will keep your saw in top condition.

    For your “Free” Modern Table Plan – Click Here.

    Safety Tips for Using a Table Saw

    Safety should always be a priority when using a table saw. Here are some tips to keep in mind:

    1. Read the Manual: Familiarize yourself with your saw’s features and safety instructions.
    2. Wear Safety Gear: Always wear safety glasses, hearing protection, and appropriate clothing.
    3. Use Push Sticks: Push sticks and push blocks keep your hands away from the blade when making narrow cuts.
    4. Keep the Workspace Clean: A cluttered workspace can lead to accidents. Keep the area around your saw clear.
    5. Avoid Distractions: Focus on your work and avoid distractions that could lead to mistakes or injuries.

    Common Mistakes to Avoid with Your Table Saw

    Even experienced woodworkers can make mistakes. Here are some common ones to avoid:

    1. Incorrect Blade Height: Setting the blade too high or too low can lead to poor cuts and increased risk of kickback.
    2. Ignoring Maintenance: Regular maintenance is essential for keeping your saw in good working order.
    3. Rushing: Take your time with each cut to ensure accuracy and safety.
    4. Using Dull Blades: A dull blade can cause burns, tear-out, and kickback. Keep your blades sharp.

    Maintaining Your Table Saw

    Proper maintenance is key to the longevity and performance of your table saw. Clean the blade regularly to remove pitch and resin buildup. Check the alignment of the blade, fence, and miter slot periodically. Lubricate moving parts to reduce friction and wear. Replace worn or damaged parts promptly to prevent accidents.

    Advanced Techniques for Using a Table Saw

    Once you’ve mastered the basics, you can explore advanced techniques to enhance your woodworking skills:

    1. Dado Cuts: Use a dado blade to cut grooves and slots for joinery.
    2. Taper Cuts: A taper jig allows you to make precise angled cuts.
    3. Bevel Cuts: Adjust the blade angle to make bevel cuts for decorative edges and joints.
    4. Resawing: Use the table saw to thin down thick boards for veneer or other projects.

    Choosing the Right Blade for Your Table Saw

    The blade you use can significantly impact your work quality. Here are some blade types to consider:

    1. Rip Blades: Designed for cutting along the grain, rip blades have fewer teeth and larger gullets.
    2. Crosscut Blades: With more teeth and smaller gullets, crosscut blades are ideal for cutting across the grain.
    3. Combination Blades: These blades offer a balance between rip and crosscut capabilities, making them versatile for various cuts.
    4. Specialty Blades: For specific tasks like dado cuts or cutting non-wood materials, specialty blades are available.

    Budget-Friendly Options for a Table Saw

    Not everyone needs a high-end table saw. There are budget-friendly options that still offer excellent performance. The Bosch 4100XC-10 is a great example. It provides reliable power, precision, and portability without breaking the bank. For hobbyists and those on a budget, it’s a solid choice.

    Pallet Woodworking Projects and Your Table Saw

    Pallet woodworking projects are a fantastic way to repurpose old wood and create something new and beautiful. With a woodworking table saw, you can easily break down pallets into usable wood for various projects. Whether you’re making furniture, garden planters, or decorative items, a table saw ensures your cuts are precise and clean, making the assembly process much smoother.

    For your “Free” Outdoor Projects Plan – Click Here.

    FAQs about a Woodworking Table Saw

    1. What is the best woodworking table saw for small workshops?
      • The DeWalt DWE7491RS is a great option for small workshops. It’s compact, powerful, and has excellent portability.
    2. Can I use a table saw for cutting metal?
      • While some table saws can cut thin metal sheets with the right blade, it’s generally recommended to use a saw specifically designed for metal cutting.
    3. How often should I sharpen the blade on my table saw?
      • The frequency of sharpening depends on usage. For regular use, sharpening every few months should suffice. Always inspect the blade for dullness and wear.
    4. Is it worth investing in a high-end table saw?
      • If you’re a professional or serious hobbyist, investing in a high-end table saw like the SawStop PCS31230 can be worth it for the enhanced precision, power, and safety features.
    5. What safety gear is essential when using a table saw?
      • Essential safety gear includes safety glasses, hearing protection, and push sticks. Consider a dust mask if you’re working with materials that produce a lot of dust.

    Conclusion

    Choosing a woodworking table saw can transform your woodworking projects, making them more enjoyable and precise. Whether you’re a beginner embarking on your first pallet woodworking project or a seasoned professional, the right table saw is an invaluable tool. By understanding the different types, features, and brands, you can make an informed decision that meets your specific needs. Remember, safety and maintenance are just as important as choosing the right saw. With the right approach, your table saw will serve you well for years to come.

  • Pallet Woodworking Projects: Crafting with Repurposed Materials

    Pallet Woodworking Projects: Crafting with Repurposed Materials

    Pallet woodworking projects offer an excellent way to create beautiful, functional pieces from recycled materials. Not only do these projects promote sustainability, but they also provide a cost-effective solution for crafting furniture, decor, and more. In this comprehensive guide, we’ll explore a variety of wood pallet projects, from simple DIY tasks to more complex builds. Whether you’re a seasoned woodworker or a beginner, this guide will help you get started on your pallet woodworking journey.

    For your “Free” 2 in 1 Folding Picnic Table Bench Plan – Click Here.

    Introduction to Woodworking Pallet Projects

    Woodworking with pallets has become increasingly popular due to its accessibility and the rustic charm it brings to projects. Pallets are often discarded or given away for free, making them an economical choice for crafting. In this guide, we’ll delve into various wood pallet projects, offering step-by-step instructions and tips to help you transform these wooden structures into something amazing.

    Why Choose Projects consisting of Wood Pallets?

    Why should you consider wood pallet projects? For starters, they are eco-friendly. Repurposing pallets reduces waste and promotes recycling. Additionally, pallets are versatile and can be used to create a wide range of items, from furniture to garden decor. Plus, working with pallets can be a fun and rewarding experience, allowing you to showcase your creativity and craftsmanship.

    Finding and Preparing Wood Pallets

    Before you start any wood pallet projects, you need to find suitable pallets and prepare them for use. Look for pallets marked with “HT” (heat-treated) rather than “MB” (methyl bromide), as the latter indicates chemical treatment. Once you’ve sourced your pallets, disassemble them carefully to avoid damaging the wood. Sand down the boards to remove any rough edges or splinters.

    Essential Tools needed to work with Wood Pallets

    To successfully complete your wood pallet projects, you’ll need some basic tools. Here are a few essentials:

    • Hammer and pry bar for disassembling pallets
    • Saw (hand saw, circular saw, or jigsaw) for cutting wood
    • Sandpaper or electric sander for smoothing surfaces
    • Measuring tape and square for accurate measurements
    • Drill and screws for assembling your projects

    Simple Wood Pallet Projects for Beginners

    If you’re new to woodworking, start with simple projects to build your skills and confidence. Here are a few beginner-friendly ideas:

    1. Pallet Coasters: Cut pallet wood into small squares, sand them down, and apply a finish for a set of rustic coasters.
    2. Pallet Planter Box: Create a small planter box by assembling a few pallet boards. This project is perfect for adding some greenery to your home or garden.
    3. Pallet Wall Art: Arrange and attach pallet boards to create a unique piece of wall art. You can paint or stencil a design onto the wood for added flair.

    Intermediate Wood Pallet Projects

    Once you’ve mastered the basics, you can move on to more intermediate wood pallet projects. These projects may require more tools and skills but are still accessible to most DIY enthusiasts.

    1. Pallet Coffee Table: Build a sturdy coffee table by assembling pallet boards and adding legs. You can customize the design with a glass top or additional shelving.
    2. Pallet Bookshelf: Create a rustic bookshelf by stacking and securing pallet boards. This project is great for organizing books, plants, or decor items.
    3. Pallet Wine Rack: Design a stylish wine rack by cutting and arranging pallet boards to hold wine bottles and glasses.

    Advanced Wood Pallet Projects

    For those with more experience and confidence, advanced pallet projects can offer a satisfying challenge. These projects may require precise measurements and advanced joinery techniques.

    1. Pallet Sofa: Construct a comfortable and stylish pallet sofa by assembling several pallets and adding cushions. This project is perfect for creating outdoor seating.
    2. Pallet Bed Frame: Build a unique bed frame using pallet boards. This project can be customized to fit any mattress size and can include features like storage drawers.
    3. Pallet Dining Table: Create a large dining table by joining pallet boards together. This project requires careful planning and execution but results in a beautiful, one-of-a-kind piece.

    Creative Pallet Decor Projects

    Pallets aren’t just for furniture; they can also be used to create stunning decor items. Here are a few creative ideas:

    1. Pallet Picture Frames: Cut pallet wood into small pieces to create rustic picture frames. These frames add a charming touch to any photo or artwork.
    2. Pallet Clock: Design a wall clock by arranging pallet boards and attaching clock hands and numbers. This project combines functionality with aesthetic appeal.
    3. Pallet Signs: Make personalized signs by painting or stenciling words or images onto pallet boards. These signs are perfect for home decor or gifts.

    For your “Free” Workspace Plan – Click Here.

    Outdoor Wood Pallet Projects

    Wood Pallet projects are ideal for enhancing your outdoor spaces. Here are some projects to consider for your garden or patio:

    1. Pallet Garden Beds: Construct raised garden beds using pallet boards. These beds are great for growing vegetables, herbs, or flowers.
    2. Pallet Swing: Build a cozy swing by assembling pallet boards and securing it with sturdy ropes or chains. This project is perfect for relaxing in your yard.
    3. Pallet Compost Bin: Create a functional compost bin by joining pallet boards together. This eco-friendly project helps you recycle kitchen and garden waste.

    Wood Pallet Projects for Kids

    Involve your kids in woodworking with simple and safe pallet projects. Here are a few ideas that are perfect for family activities:

    1. Pallet Toy Box: Build a toy box to help kids organize their toys. This project is easy to assemble and can be painted in fun colors.
    2. Pallet Playhouse: Create a small playhouse using pallet boards. This project requires supervision but provides a fantastic space for kids to play.
    3. Pallet Chalkboard: Design a chalkboard by attaching a smooth board to a pallet frame. Kids can use it for drawing or practicing their writing skills.

    Finishing Touches for your Projects

    Once you’ve completed your pallet projects, adding finishing touches can enhance their appearance and durability. Here are some tips:

    • Sanding: Ensure all surfaces are smooth to the touch.
    • Staining or Painting: Apply a stain or paint to protect the wood and add color.
    • Sealing: Use a sealant to protect your project from moisture and wear.

    Maintaining and Caring for your Projects

    Proper maintenance will ensure your wood pallet projects last for years. Keep your projects clean and dry and reapply finishes as needed. For outdoor projects, consider using weather-resistant finishes to protect against the elements.

    Where to Sell Your Wood Pallet Projects

    If you enjoy pallet woodworking, consider turning your hobby into a business. Selling your creations can be a rewarding way to share your work with others and make some extra income. Here are a few tips for selling your projects:

    • Marketplaces: List your items on online marketplaces like Etsy or local classifieds.
    • Craft Fairs: Participate in local craft fairs and markets to showcase your work.
    • Social Media: Use social media platforms to promote your projects and connect with potential buyers.

    Joining the Wood Pallet Community

    Engaging with the pallet woodworking community can provide inspiration, support, and new ideas. Join online forums, social media groups, and local clubs to connect with fellow woodworkers. Sharing your projects and learning from others can enhance your woodworking experience.

    Conclusion: Start Your Pallet Woodworking Journey Today

    Pallet woodworking projects offer a fantastic way to repurpose materials, unleash your creativity, and create functional and beautiful pieces. Whether you’re a beginner or an experienced woodworker, there are projects suited to all skill levels. Now that you have a comprehensive guide, it’s time to start your pallet woodworking journey. Gather your tools, find some pallets, and let your imagination run wild!

    Frequently Asked Questions (FAQs)

    1. Where can I find pallets for my woodworking projects? You can find pallets at local warehouses, home improvement stores, and online classifieds. Always check if they are safe for use by looking for “HT” (heat-treated) markings.

    2. What tools do I need for pallet woodworking projects? Basic tools include a hammer, pry bar, saw, sandpaper, measuring tape, square, and a drill. These tools will help you disassemble and assemble your projects.

    3. How can I ensure my pallet woodworking projects are safe for indoor use? Make sure to clean and sand the pallets thoroughly. Avoid using chemically treated pallets by checking for “MB” (methyl bromide) markings.

    4. What are some beginner-friendly wood pallet projects? Simple projects like pallet coasters, planter boxes, and wall art are great for beginners. These projects require minimal tools and skills.

    5. How can I add a professional finish to my pallet projects? Sand all surfaces smooth, apply a stain or paint for color, and seal with a protective finish. These steps will enhance the appearance and durability of your projects.

    For your “Free” Modern Table Plan – Click Here.

  • How to Get into Woodworking: A Beginner’s Guide

    How to Get into Woodworking: A Beginner’s Guide

    Woodworking is a timeless craft that combines creativity and precision, offering endless opportunities to create beautiful and functional pieces. If you’ve ever admired a handcrafted piece of furniture or a detailed wood carving and wondered, “How can I do that?” then this guide is for you. In this comprehensive article, we’ll walk you through how to get into woodworking, covering everything from the basics to advanced tips. Let’s get started on this rewarding journey!

    For your “Free” Outdoor Projects Plan – Click Here.

    Introduction to Woodworking

    Woodworking is more than just a hobby; it’s a way to express your creativity while building something tangible and lasting. Whether you want to create furniture, decor, or even functional items, woodworking offers a satisfying blend of artistry and skill.

    Why Woodworking?

    Why should you consider woodworking as your next hobby or skill to master? For starters, woodworking is incredibly rewarding. It allows you to see the fruits of your labor, turning raw materials into finished products. Plus, it’s a fantastic way to de-stress and focus your mind.

    Understanding the Basics of Woodworking

    Before diving into the practical aspects, it’s essential to understand the basics of woodworking. This includes familiarizing yourself with different types of wood, tools, and techniques. Knowing the fundamentals will give you a solid foundation to build upon as you progress.

    Types of Wood for Beginners

    Not all wood is created equal. As a beginner, you’ll want to start with easy-to-work-with woods like pine or poplar. These woods are relatively soft and forgiving, making them ideal for practice projects. As you gain experience, you can experiment with harder woods like oak or maple.

    Essential Woodworking Tools

    To get started you’ll need a few essential tools. Here’s a list to get you going:

    1. Measuring Tools: Tape measure, square, and marking gauge.
    2. Cutting Tools: Handsaw, jigsaw, and circular saw.
    3. Shaping Tools: Chisels, rasps, and files.
    4. Joining Tools: Hammer, nails, and screws.
    5. Finishing Tools: Sandpaper, brushes, and clamps.

    Setting Up Your Woodworking Space

    A dedicated workspace is crucial for any woodworker. Whether it’s a corner of your garage or a full-fledged workshop, having a well-organized area will make your projects more enjoyable and efficient. Ensure your space is well-lit, ventilated, and equipped with a sturdy workbench.

    Safety First: Safety Tips

    Safety should always be a priority in. Here are some essential tips to keep in mind:

    • Wear Safety Gear: Always wear safety glasses, ear protection, and a dust mask.
    • Keep Your Workspace Clean: A cluttered workspace can lead to accidents.
    • Use Tools Properly: Follow the manufacturer’s instructions for each tool.
    • Stay Focused: Avoid distractions while working with tools.

    Starting Your First Project

    Now that you’re familiar with the basics, it’s time to start your first project. Choose something simple, like a birdhouse or a small shelf. Starting with an easy project will help you build confidence and develop your skills without feeling overwhelmed.

    Understanding Woodworking Plans

    Woodworking plans are detailed guides that show you how to build specific projects. These plans include measurements, materials lists, and step-by-step instructions. As a beginner, following a plan will help you stay organized and ensure you don’t miss any critical steps.

    Mastering Basic Techniques

    There are several fundamental techniques every woodworker should master. These include measuring and marking, cutting, joining, and finishing. Each technique requires practice, so take your time and don’t be afraid to make mistakes.

    For your “Free”Guide to 13 Wood Joinery Types – Click Here.

    How to Improve Your Skills

    As with any craft, the more you practice, the better you’ll become. Here are some tips to help you improve your skills:

    • Take a Class: Local community centers or woodworking stores often offer classes for beginners.
    • Join a Woodworking Club: Connecting with other woodworkers can provide valuable insights and encouragement.
    • Watch Tutorials: Online videos and tutorials can demonstrate techniques and offer project ideas.

    Common Mistakes and How to Avoid Them

    Every woodworker makes mistakes, especially when starting. Some common mistakes include inaccurate measurements, poor tool maintenance, and rushing through a project. By being aware of these pitfalls, you can take steps to avoid them and improve your craftsmanship.

    What Budget will be required to Start off?

    Woodworking can be an expensive hobby, but it doesn’t have to be. Here are some tips for getting started without breaking the bank:

    • Buy Used Tools: Look for second-hand tools at garage sales or online marketplaces.
    • Start Small: Begin with simple projects that require fewer materials.
    • Use Scrap Wood: Many projects can be made from leftover or reclaimed wood.

    How to Find Inspiration for Projects

    Finding inspiration is key to staying motivated in. Look for ideas in magazines, online forums, and social media platforms like Pinterest. Don’t be afraid to put your spin on existing designs and make them your own.

    Advanced Techniques to Explore

    Once you’ve mastered the basics, you might want to explore more advanced techniques. These can include joinery methods like dovetail and mortise-and-tenon joints, woodturning, and carving. Advanced techniques require more skill and precision but can significantly enhance your projects.

    How to Sell Your Projects

    If you find that you love woodworking and want to turn it into a side hustle, selling your projects is a great option. Start by showcasing your work to friends and family, and consider setting up an online store on platforms like Etsy. Attend local craft fairs and markets to reach a wider audience.

    Challenges you will encounter!

    Like any craft, comes with its challenges. Whether it’s dealing with difficult materials, complex designs, or limited tools, perseverance is key. Keep a positive mindset, seek help when needed, and remember that each challenge is an opportunity to learn and grow.

    Maintaining Your Tools

    Proper tool maintenance is essential for safe and efficient woodworking. Regularly clean and sharpen your tools, and store them in a dry, organized space. Well-maintained tools will last longer and perform better, making your projects more enjoyable.

    How this craft can be beneficial when working with Kids

    Woodworking can be a fantastic activity to share with children. It teaches them valuable skills like measuring, planning, and following instructions. Start with simple, child-friendly projects and always supervise them to ensure safety.

    The Community Aspect of Woodworking

    One of the best parts of woodworking is the sense of community it brings. Join online forums, attend local meetups, and participate in woodworking competitions. Sharing your experiences and learning from others will enrich your woodworking journey.

    For your “Free” Modern Table Plan – Click Here

    Conclusion: Your Woodworking Journey Begins Now

    Embarking on your woodworking journey is an exciting and fulfilling adventure. With the right tools, knowledge, and mindset, you can create beautiful and functional pieces that you’ll be proud of. Remember, the key to success in woodworking is practice, patience, and a willingness to learn. Now that you know how to get into woodworking, it’s time to roll up your sleeves and get started. Happy woodworking!

    Frequently Asked Questions (FAQs)

    1. What tools do I need to start woodworking? To start woodworking, you’ll need basic tools such as a tape measure, handsaw, hammer, chisels, and sandpaper. As you progress, you can invest in more specialized tools like a jigsaw or circular saw.

    2. What type of wood is best for beginners? Pine and poplar are excellent choices for beginners due to their softness and ease of workability. These woods are also readily available and affordable.

    3. How can I find woodworking plans? Woodworking plans can be found online, in woodworking magazines, or through community centers that offer woodworking classes. These plans provide step-by-step instructions and materials lists.

    4. How do I ensure my safety while woodworking? Always wear safety gear such as safety glasses, ear protection, and a dust mask. Keep your workspace clean and organized, and follow the manufacturer’s instructions for each tool.

    5. Can I start woodworking with a limited budget? Yes, you can start woodworking on a budget by buying used tools, using scrap wood, and starting with small projects. Look for deals at garage sales or online marketplaces to save money on tools and materials.

  • Dovetail Woodworking: Mastering the Art of Joinery

    Dovetail Woodworking: Mastering the Art of Joinery

    Introduction

    Dovetail woodworking is one of the most admired and respected techniques in the woodworking world. Known for its strength, durability, and beautiful aesthetic, dovetail joinery is a staple in fine furniture making and cabinetry. But what exactly makes dovetail woodworking so special? How can you master this craft to create stunning, lasting pieces? In this comprehensive guide, we’ll delve into the intricacies of dovetail woodworking, providing you with the knowledge and skills to elevate your woodworking projects.

    For your “Free”Guide to 13 Wood Joinery Types – Click Here.

    Understanding Dovetail Woodworking

    1. What is Dovetail Woodworking?

    Dovetail woodworking involves creating interlocking joints between two pieces of wood, often used in drawers, boxes, and furniture corners. These joints are renowned for their resistance to being pulled apart, thanks to the trapezoidal shape of the “tails” and “pins” that fit together perfectly.

    2. History of Dovetail Woodworking

    The art of dovetail joinery dates back thousands of years, with early examples found in ancient Egyptian furniture. Over time, dovetail woodworking has evolved, but the basic principles have remained the same, making it a timeless technique valued by craftsmen across generations.

    3. Types of Dovetail Woodworking Joints

    There are several types of dovetail joints, each with its unique application and aesthetic:

    • Through Dovetails: Visible from both sides of the joint, often used in boxes and carcass construction.
    • Half-Blind Dovetails: Visible from one side only, commonly used in drawer fronts.
    • Secret Mitered Dovetails: Concealed within the miter joint, providing a clean look.
    • Sliding Dovetails: Used to join boards at a right angle, offering both strength and alignment.

    4. Benefits of Dovetail Woodworking Joinery

    Why should you consider dovetail woodworking for your projects? Here are some compelling reasons:

    • Strength and Durability: Dovetail joints are incredibly strong and can withstand significant stress.
    • Aesthetic Appeal: The intricate pattern of dovetails adds a touch of craftsmanship and elegance.
    • Long-Lasting: Properly made dovetail joints can last for generations.

    Tools and Materials for Dovetail Woodworking

    5. Essential Tools

    To begin your journey into dovetail woodworking, you’ll need a few key tools:

    • Dovetail Saw: A fine-toothed saw designed for making precise cuts.
    • Chisels: Sharp chisels are crucial for cleaning up the joints.
    • Marking Gauge: For accurate measurement and marking of your cuts.
    • Mallet: Used in conjunction with chisels for controlled carving.
    • Layout Tools: Such as a square and a ruler for precise measurements.

    6. Choosing the Right Wood for Dovetail Woodworking

    Selecting the appropriate wood is vital for successful dovetail woodworking. Hardwoods like oak, maple, and cherry are popular choices due to their durability and fine grain, which provides a smooth finish.

    7. Preparing Your Workspace

    A well-organized workspace is essential, ensure you have a sturdy workbench, good lighting, and ample space to maneuver your tools and materials.

    Step-by-Step Guide to Making Dovetail Joints

    8. Planning Your Project

    Before you start cutting, plan your project thoroughly. Determine the size and type of dovetail joint you’ll be using, and sketch your design to visualize the final product.

    9. Marking and Measuring dovetail woodworking

    Accuracy is critical. Use your marking gauge to measure and mark the tails and pins on your wood pieces. Double-check your measurements to avoid mistakes.

    10. Cutting the Tails

    Using your dovetail saw, carefully cut along the marked lines for the tails. Maintain a steady hand and follow the lines precisely to ensure a snug fit.

    11. Cutting the Pins

    Align the tails on the second piece of wood and trace their outline. Cut along these lines to create the pins. Precision is key to achieving a perfect fit.

    12. Cleaning Up the Joints on dovetail woodworking

    Use chisels to clean up the cuts, ensuring the tails and pins fit together seamlessly. Patience and attention to detail are crucial at this stage.

    For your “Free” Workspace Plans – Click Here.

    13. Dry Fitting the Joints

    Before applying glue, dry fit the joints to check for any adjustments needed. The pieces should fit together snugly without gaps.

    14. Gluing and Clamping dovetail woodworking

    Apply wood glue to the joints and clamp them together securely. Wipe off any excess glue and allow it to dry according to the manufacturer’s instructions.

    Advanced Techniques in Dovetail Woodworking

    15. Decorative Dovetails

    Once you’ve mastered the basics, experiment with decorative dovetails. This involves varying the size and shape of the tails and pins for a unique, artistic look.

    16. Incorporating Inlays

    Adding inlays to your dovetail joints can enhance their visual appeal. Use contrasting wood or other materials to create striking designs.

    17. Using Dovetail Jigs

    For those looking to streamline the process, dovetail jigs can be a valuable tool. These jigs guide your saw and chisel, ensuring consistent and accurate cuts.

    Common Mistakes and How to Avoid Them

    18. Inaccurate Measurements

    One of the most common pitfalls in dovetail joinery is inaccurate measurements. Always measure twice and cut once to avoid costly mistakes.

    19. Poor Saw Technique

    A steady hand and proper saw technique are crucial. Practice cutting straight lines and maintaining control over your saw.

    20. Rushing the Process

    Patience is essential in dovetail joinery. Take your time with each step to ensure the highest quality joints.

    Applications of Dovetail Joinery

    21. Furniture Making

    Dovetail joinery is a hallmark of fine furniture making. Use it to construct drawers, cabinets, and carcasses for a sturdy and elegant finish.

    22. Box Making

    From jewelry boxes to tool chests, dovetail joinery is ideal for creating durable and beautiful boxes.

    23. Decorative Items

    Beyond functional items, dovetail joints can be used in decorative pieces like picture frames and wall art, showcasing your craftsmanship.

    Maintaining Your Dovetail Joints

    24. Regular Inspection

    Periodically inspect your dovetail joints for any signs of wear or damage. Early detection can prevent more significant issues down the line.

    25. Re-gluing

    If a joint becomes loose, re-glue it promptly to maintain the integrity of the piece.

    26. Finishing Techniques

    Applying a protective finish can enhance the appearance and longevity of your dovetail joints. Consider using varnish, oil, or wax based on your project needs.

    The Future of Dovetail Woodworking

    27. Innovations in Tools and Techniques

    As technology advances, new tools and techniques are emerging in dovetail joinery. Stay updated with the latest trends to continuously improve your skills.

    28. Sustainability and Woodworking

    Embrace sustainable practices by using responsibly sourced wood and minimizing waste in your dovetail woodworking projects.

    Conclusion

    Dovetail woodworking is a rewarding and enriching craft that combines precision, creativity, and skill. By mastering the techniques and understanding the principles behind dovetail joinery, you can create stunning, durable pieces that stand the test of time. Whether you’re a seasoned woodworker or a beginner, there’s always something new to learn and explore in the world of dovetail woodworking.

    For your “Free” 2 in 1 Folding Picnic Table Bench Plan – Click Here.

    FAQs

    1. What wood is best for dovetail joinery?

    Hardwoods like oak, maple, and cherry are ideal for dovetail woodworking due to their durability and fine grain.

    2. Can I use dovetail jigs for all types of joints?

    Dovetail jigs are versatile and can be used for most dovetail joints, though manual techniques might be preferred for more intricate designs.

    3. How long does it take to master dovetail joinery?

    The time to master dovetail woodworking varies based on your dedication and practice. With consistent effort, you can achieve proficiency within a few months.

    4. Are dovetail joints stronger than other types of joinery?

    Yes, dovetail joints are known for their strength and resistance to being pulled apart, making them one of the strongest types of joinery.

    5. Can dovetail joinery be done with power tools?

    While traditional dovetail woodworking is done with hand tools, power tools and jigs can significantly speed up the process and ensure precision.

  • Woodworking Hand Planes: Essential Tools for Every Woodworker

    Woodworking Hand Planes: Essential Tools for Every Woodworker

    Woodworking hand planes are one of the most essential tools in a woodworker’s arsenal, making woodworking a timeless craft. Whether you’re a seasoned woodworker or a beginner, understanding the various types of hand planes and their uses can significantly enhance your craftsmanship. This comprehensive guide will delve into everything you need to know about woodworking hand planes, ensuring you’re well-equipped to tackle any project with confidence.

    For your “Free” Guide to 13 Wood Joinery Types – Click Here.

    Introduction to Woodworking Hand Planes

    Hand planes have been around for centuries, helping woodworkers achieve smooth, flat surfaces on their projects. These tools come in various shapes and sizes, each designed for specific tasks. By mastering the use of woodworking hand planes, you can achieve a level of precision and quality that power tools often can’t match.

    The History of Hand Planes

    Hand planes have a rich history, dating back to ancient civilizations. The earliest versions were simple tools made from stone and wood. Over time, they evolved into the sophisticated metal and wooden planes we use today. Understanding their history gives us a greater appreciation for their role in woodworking. The Egyptians, Romans, and medieval craftsmen all contributed to the development of hand planes. Each culture improved upon the design and functionality, leading to the diverse range of planes available today.

    Types of Woodworking Hand Planes

    There are several types of hand planes, each serving a unique purpose. Let’s explore some of the most common ones:

    1. Block Plane
    2. Bench Plane
    3. Shoulder Plane
    4. Router Plane
    5. Rabbet Plane
    6. Scrub Plane
    7. Joinery Plane

    The Essential Block Plane

    The block plane is a small, versatile tool perfect for trimming and fine-tuning. It’s easy to handle and is ideal for tasks that require precision, such as fitting joints or smoothing edges. Block planes typically have their blades set at a lower angle compared to other planes, making them excellent for end grain work. They come in standard and low-angle versions, each suited for different tasks. The compact size of block planes makes them easy to carry and use, even in tight spaces.

    Bench Planes: The Workhorses

    Bench planes are larger and more robust, making them perfect for flattening and smoothing large surfaces. They come in various sizes, with the number indicating the plane’s length. Common bench planes include the No. 4 smoothing plane, the No. 5 jack plane, and the No. 7 jointer plane. Each type of bench plane serves a specific purpose:

    • Smoothing Plane (No. 4): Ideal for final smoothing before finishing.
    • Jack Plane (No. 5): A versatile plane used for rough work and initial flattening.
    • Jointer Plane (No. 7): Perfect for jointing edges and flattening large surfaces.

    Shoulder Planes for Precision Work

    Shoulder planes are designed for trimming tenons and other joinery. Their narrow bodies allow them to fit into tight spaces, making them indispensable for detailed work. The blade extends the full width of the tool, allowing you to cut right up to the edge of a workpiece. This makes shoulder planes perfect for fine-tuning the fit of joints and ensuring a clean, precise finish.

    Router Planes for Consistency

    Router planes are used to create consistent, precise grooves and recesses. They are perfect for tasks like creating dados or inlays. The blade of a router plane is mounted vertically and can be adjusted to different depths, providing control over the cut. Router planes are often used in conjunction with templates or guides to achieve accurate, repeatable results.

    Rabbet Planes for Specialized Cuts

    Rabbet planes are designed for cutting rabbets (or rebates), which are recesses along the edge of a piece of wood. They are essential for joinery and can also be used to create decorative elements. Rabbet planes feature a blade that extends to the edge of the plane body, allowing you to cut right up to a shoulder or corner. They can be adjusted to cut different widths and depths, making them versatile tools for various woodworking tasks.

    Scrub Planes for Heavy Stock Removal

    Scrub planes are designed for quick, aggressive stock removal. They are used to rough out shapes and prepare rough-sawn lumber for further refinement. Scrub planes have a heavily cambered blade, which allows them to take thick shavings and quickly reduce the thickness of a workpiece. They are particularly useful for initial flattening of rough stock and preparing boards for planing with finer tools.

    Joinery Planes for Fine Work

    Joinery planes, such as plow planes and shoulder planes, are used for precise joinery work. These planes are designed for creating grooves, dados, and other detailed cuts that require accuracy and precision. Plow planes are adjustable and come with various cutters, allowing you to create different widths and depths of grooves. Joinery planes are essential for tasks like fitting joints, creating moldings, and adding decorative details to your workpieces.

    Choosing the Right-Hand Plane

    Selecting the right hand plane depends on the task at hand. For general smoothing and flattening, a bench plane is your best bet. For detailed work, a block or shoulder plane is ideal. Understanding the strengths of each type will help you choose the right tool for your project. Consider factors such as the size of the workpiece, the type of wood, and the desired finish when selecting a hand plane. Investing in a quality hand plane will pay off in the long run, as a well-made tool will provide better results and last longer.

    Maintaining Your Hand Planes

    Proper maintenance is crucial for keeping your hand planes in top condition. This includes regular sharpening, cleaning, and storing them correctly. A well-maintained hand plane can last a lifetime and provide years of reliable service. Regular maintenance not only ensures optimal performance but also prevents damage to the tool and extends its lifespan. Here are some tips for maintaining your hand planes:

    • Cleaning: After each use, clean your hand plane to remove any wood shavings, dust, and debris. Use a brush or compressed air to clean hard-to-reach areas. Wipe down the plane with a soft cloth to remove any moisture and prevent rust.
    • Sharpening: A sharp blade is essential for achieving clean, smooth cuts. There are various methods for sharpening hand plane blades, including using sharpening stones, honing guides, and power sharpeners. Regular sharpening will keep your planes performing at their best.
    • Lubrication: Apply a light coat of oil or wax to the metal parts of your hand plane to prevent rust and ensure smooth operation. This is especially important for planes that are used infrequently or stored in humid environments.
    • Storage: Store your hand planes in a dry, cool place to prevent rust and damage. Keep them in a protective case or tool chest to prevent dust and debris from accumulating. Avoid storing hand planes on their blades to prevent damage to the cutting edge.

    For your “Free” Workspace Plans – Click Here.

    Sharpening Your Hand Planes

    A sharp blade is essential for achieving clean, smooth cuts. There are various methods for sharpening hand plane blades, including using sharpening stones, honing guides, and power sharpeners. Regular sharpening will keep your planes performing at their best. Here are some tips for sharpening your hand plane blades:

    • Sharpening Stones: Use sharpening stones to maintain a sharp edge on your hand plane blades. Start with a coarse grit stone to remove any nicks or damage, then progress to finer grit stones for a razor-sharp edge. Water stones, oil stones, and diamond stones are popular choices for sharpening hand plane blades.
    • Honing Guides: A honing guide helps maintain a consistent angle while sharpening your blade. This ensures an even, sharp edge and reduces the risk of damaging the blade. Honing guides are available in various styles and can be adjusted to accommodate different blade widths and angles.
    • Stropping: After sharpening, use a leather strop to remove any burrs and polish the edge of the blade. Stropping helps achieve a mirror-like finish and ensures a razor-sharp cutting edge. Apply a small amount of honing compound to the strop for optimal results.

    Tuning Your Hand Planes

    Tuning your hand planes involves adjusting them for optimal performance. This includes setting the blade depth, aligning the blade, and ensuring the sole is flat. Proper tuning will enhance the accuracy and ease of use of your hand planes. Here are some steps for tuning your hand planes:

    • Blade Depth: Adjust the blade depth to control the thickness of the shavings. A shallow blade setting produces thin shavings for fine smoothing, while a deeper setting removes more material for rough shaping. Use the depth adjustment knob to set the blade to the desired depth.
    • Blade Alignment: Ensure the blade is parallel to the sole of the plane for even cutting. Use the lateral adjustment lever to align the blade if necessary. A misaligned blade can cause uneven cuts and reduce the quality of your work.
    • Sole Flatness: Check the sole of the plane for flatness using a straightedge. A flat sole ensures consistent contact with the workpiece and prevents the plane from rocking or digging into the wood. If the sole is not flat, use a flat surface and sandpaper to flatten it.

    Using Woodworking Hand Planes Safely

    Safety is paramount when using hand planes. Always wear protective gear, such as safety glasses, and use proper technique to avoid injuries. Keep your work area clean and free of obstacles to ensure a safe working environment. Here are some safety tips for using hand planes:

    • Proper Technique: Use smooth, controlled strokes when planning to prevent accidents and ensure accurate results. Avoid applying excessive force, as this can cause the plane to slip or dig into the wood. Maintain a firm grip on the plane and keep your hands away from the blade.
    • Sharp Blades: Keep your blades sharp to reduce the risk of accidents and improve cutting performance. Dull blades require more force and are more likely to slip, increasing the risk of injury. Regularly inspect and sharpen your blades to maintain optimal performance.
    • Protective Gear: Wear safety glasses to protect your eyes from flying debris and dust. Consider wearing hearing protection if you are working in a noisy environment or using power tools in conjunction with hand planes. Use gloves to protect your hands from sharp edges and splinters.

    Common Mistakes to Avoid

    Even experienced woodworkers can make mistakes when using hand planes. Common errors include using a dull blade, applying too much pressure, or failing to maintain the tool properly. Avoiding these mistakes will improve your results and extend the life of your hand planes. Here are some common mistakes to watch out for:

    • Dull Blades: Using a dull blade can result in tear-out, uneven cuts, and a rough finish. Regularly sharpen your blades to ensure clean, smooth cuts and reduce the risk of damage to your workpiece.
    • Excessive Pressure: Applying too much pressure can cause the plane to dig into the wood, resulting in uneven cuts and gouges. Use smooth, controlled strokes and let the sharp blade do the work.
    • Improper Maintenance: Neglecting to clean, sharpen, and tune your hand planes can lead to poor performance and damage to the tool. Regular maintenance is essential for keeping your hand planes in top condition and ensuring optimal results.

    Advanced Techniques with Hand Planes

    Once you’ve mastered the basics, you can explore advanced techniques with hand planes. This includes creating custom profiles, using jigs and guides, and incorporating hand planes into complex joinery. These techniques will elevate your woodworking skills to new heights. Here are some advanced techniques to try:

    • Custom Profiles: Use molding planes or profile cutters to create custom profiles and decorative details. This allows you to add unique elements to your projects and showcase your creativity and skill.
    • Jigs and Guides: Use jigs and guides to achieve precise, repeatable results. Jigs can help you maintain consistent angles and depths, while guides ensure straight, accurate cuts. Experiment with different jigs and guides to expand your capabilities and improve your results.
    • Complex Joinery: Incorporate hand planes into complex joinery tasks, such as dovetail joints, mortise and tenon joints, and finger joints. Hand planes can help you achieve tight, precise fits and smooth, clean surfaces for your joints.

    The Joy of Woodworking with Hand Planes

    There’s something deeply satisfying about working with hand planes. The tactile feedback, the sound of the blade slicing through wood, and the smooth finish they leave behind make woodworking a truly rewarding experience. Hand planes allow you to connect with your work on a deeper level. Here are some reasons to embrace hand plane woodworking:

    • Craftsmanship: Hand planes offer a level of precision and control that power tools often can’t match. Using hand planes allows you to achieve a higher level of craftsmanship and create workpieces with a personal touch.
    • Simplicity: Hand planes are simple tools that require no electricity or complex setups. This makes them accessible and easy to use, even for beginners. The simplicity of hand planes allows you to focus on your technique and the quality of your work.
    • Satisfaction: The process of planing wood by hand is meditative and satisfying. The rhythmic motion, the feel of the wood, and the visible progress make woodworking with hand planes a fulfilling experience.

    Building Your Hand Plane Collection

    As you become more experienced, you may want to expand your collection of hand planes. Each new plane opens up new possibilities and allows you to tackle a wider range of projects. Collecting hand planes can be a lifelong journey, filled with discovery and growth. Here are some tips for building your hand plane collection:

    • Start Small: Begin with a few essential planes, such as a block plane, a smoothing plane, and a jack plane. These versatile tools will cover a wide range of tasks and provide a solid foundation for your collection.
    • Quality Over Quantity: Invest in high-quality hand planes that are well-made and built to last. Quality tools will provide better results and be more enjoyable to use. Look for reputable brands and consider purchasing vintage planes that can be restored.
    • Expand Gradually: Add new planes to your collection as you encounter specific needs and challenges in your woodworking projects. Each new plane should address a specific task or improve your capabilities. Over time, your collection will grow to include a diverse range of tools.

    For your “Free” Guide to 13 Wood Joinery Types – Click Here.

    Conclusion

    Woodworking hand planes are indispensable tools for any woodworker. By understanding their history, types, and uses, you can enhance your craftsmanship and achieve professional-quality results. Whether you’re just starting or looking to refine your skills, mastering the use of hand planes will take your woodworking to the next level. Investing time in learning about and using woodworking hand planes will not only improve your skills but also deepen your appreciation for the art of woodworking.

    FAQs About Woodworking Hand Planes

    1. What is the best hand plane for beginners? The best hand plane for beginners is usually a block plane. It’s versatile, easy to handle, and perfect for a variety of tasks.

    2. How often should I sharpen my hand plane blades? It depends on how frequently you use them. Generally, it’s good practice to sharpen your blades after every few hours of use to maintain optimal performance.

    3. Can I use hand planes on all types of wood? Yes, hand planes can be used on most types of wood. However, some harder woods may require more frequent sharpening and tuning.

    4. What should I do if my hand plane isn’t cutting smoothly? If your hand plane isn’t cutting smoothly, check the blade sharpness, adjust the blade depth, and ensure the sole is flat. Proper tuning and maintenance are key.

    5. Are there any alternatives to hand planes for smoothing wood? While power tools like electric planers and sanders can be used, hand planes offer a level of precision and control that’s hard to match. They are also quieter and don’t require electricity.

    By investing time in learning about and using woodworking hand planes, you’ll not only improve your skills but also gain a deeper appreciation for the art of woodworking. So, pick up a hand plane, and let the shavings fly!