Blog

  • Router for Carpentry: The Essential Tool for Woodworking Precision

    Router for Carpentry: The Essential Tool for Woodworking Precision

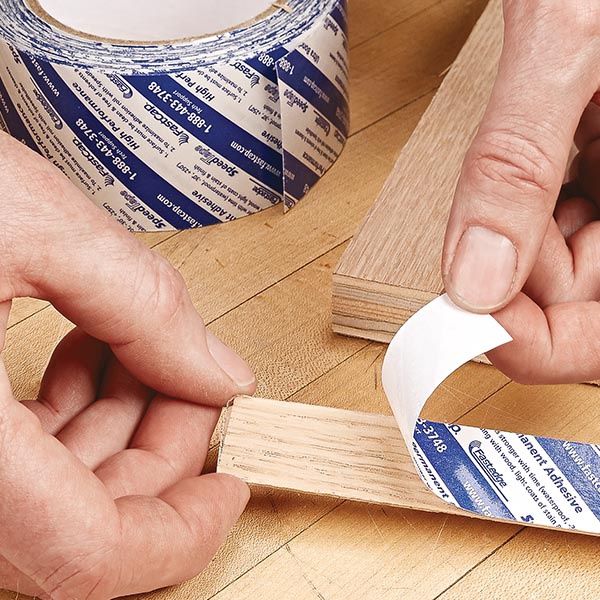
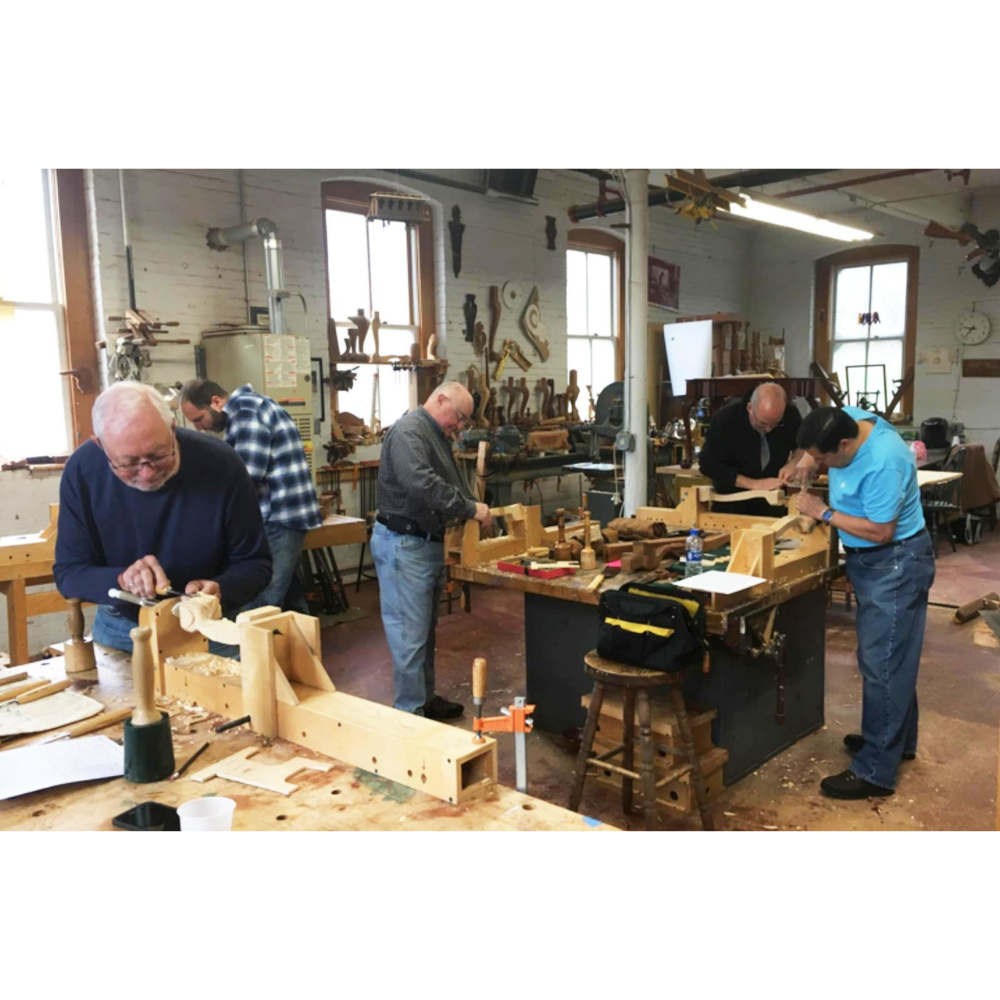
    When I first ventured into woodworking, I had no idea how essential a router for carpentry would become in my toolkit. It wasn’t just another tool on the shelf; it turned out to be the key to unlocking the kind of detail and precision that separates amateur projects from professional-quality work. I can’t tell you how many times I’ve reached for my router, whether I’m shaping a piece of furniture or adding delicate trim to a cabinet. It’s truly one of the most versatile tools I’ve ever owned, and once you get the hang of it, there’s no turning back.

    In this article, I want to take you through everything I’ve learned about using a router for carpentry. From picking the right one to mastering various techniques, this guide is filled with tips and insights based on years of personal experience. Whether you’re just starting out or looking to refine your skills, I hope you’ll find something useful here.

    1. Introduction to Routers for Carpentry

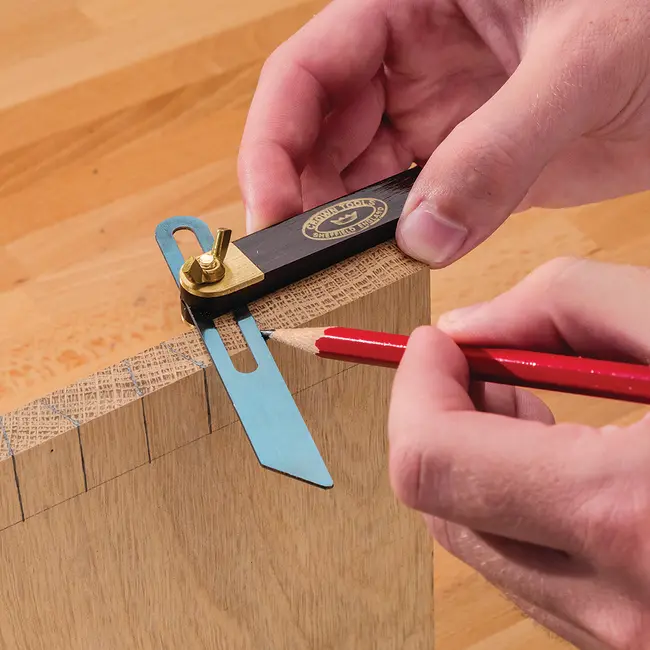
    So, let me ask you: have you ever worked on a project where the edges weren’t quite perfect, or the joints didn’t line up as seamlessly as you’d hoped? That’s where a router for carpentry can make all the difference. A router is like the Swiss Army knife of woodworking—it can shape, carve, hollow out, and create beautiful details that are almost impossible to achieve with hand tools alone. Once you’ve used one, you’ll wonder how you ever managed without it.

    I remember the first time I used a router. It felt a little intimidating at first, but once I got comfortable, it opened up a world of possibilities. Whether you’re building furniture, making cabinets, or just adding some decorative touches to your work, a router is the tool that helps you get that professional finish.

    2. The Basics: What Exactly is a Router for Carpentry?

    To put it simply, a router for carpentry is a power tool that spins a bit at high speed to cut, shape, or hollow out wood. You can change the bit depending on what kind of cut you need, and there’s a wide variety to choose from. Whether you want to smooth out edges, cut grooves, or add decorative patterns, there’s a bit for every job.

    I think of a router as my sculpting tool. It’s the one I reach for when I need precision and detail. Imagine trying to carve intricate edges or hollow out grooves by hand—it would take forever, and the results wouldn’t be nearly as clean. With a router, it’s like having a magic wand that brings your woodworking visions to life.

    3. Types of Routers for Carpentry

    There are a few different types of routers out there, and choosing the right one depends on the kind of work you plan to do. Here’s a breakdown of the main types I’ve worked with:

    Plunge Router for Carpentry

    The plunge router is my go-to when I need to start cutting in the middle of a piece of wood. Unlike other routers that require you to start at the edge, a plunge router lets you lower the bit straight into the wood. It’s perfect for making mortises, grooves, or even creating unique designs. When I’m working on a project that requires me to adjust the depth of the cut mid-way, this is the tool I trust.

    Fixed-Base Router for Carpentry

    I’ve also spent a lot of time using a fixed-base router, especially when I need consistency. With this type of router, the depth of the bit stays fixed, which makes it ideal for edge work or projects where I need the same depth throughout. It’s a bit simpler to use, and if you’re just starting out, I’d recommend getting comfortable with a fixed-base router first. You’ll find it predictable and easier to control.

    Trim Router for Carpentry

    For those finer, more delicate jobs, I always turn to my trim router. This smaller, more compact tool is perfect for tasks like trimming laminate or adding intricate edges to a project. It’s not as powerful as the larger routers, but what it lacks in size, it makes up for in precision. If you’ve ever worked on detailed trim or finishing, you’ll appreciate how nimble this little router can be.

    4. How I Chose My First Router for Carpentry

    I remember standing in front of a shelf of routers, completely overwhelmed by the options. If you’re in that boat right now, let me help you out with a few things I’ve learned along the way about picking the right router for carpentry:

    Power

    The first thing I looked at was power. I wanted something strong enough to handle harder woods, so I went with a router that had at least 2 horsepower (HP). If you’re working with lighter materials, you might not need as much power, but for dense woods, I found that extra oomph really makes a difference.

    Variable Speed

    The next feature I looked for was variable speed. Not every wood needs the same speed setting, and having the ability to dial it up or down has been incredibly useful. For softer woods, a slower speed works great, while harder woods need a faster rotation to cut cleanly. If you plan to work with a variety of materials like I do, variable speed is a must.

    Comfort

    Don’t underestimate how important it is for the router to feel good in your hands. You’re going to be holding onto it for long periods, so I made sure to pick one with an ergonomic design. The router should feel balanced and easy to control. I found that having a good grip can mean the difference between a smooth cut and a shaky line.

    5. My Favorite Router Bits for Carpentry

    Ah, router bits—this is where the magic really happens. Think of router bits as the different brushes in a painter’s toolkit. Each one has a different purpose and helps you achieve a specific effect. Here are the bits I keep on hand and use the most:

    Straight Bit

    This is the bread and butter of routing. I use a straight bit for cutting grooves, hollowing out areas, and making dados. It’s probably the most versatile bit, and I can’t imagine not having it in my arsenal.

    Flush-Trim Bit

    When I need to trim the edges of a laminate or make two surfaces perfectly even, the flush-trim bit is my go-to. It’s one of those bits that I didn’t think I’d need until I started working with materials like plywood or laminates, and now I can’t do without it.

    Chamfer Bit

    If you’re like me and love adding clean, angled edges to your projects, the chamfer bit will be your best friend. I use it all the time to give my work a crisp, professional finish, whether it’s on a tabletop or the edges of a cabinet door.

    Round-Over Bit

    There’s something about rounded edges that just feels right, isn’t there? I use a round-over bit whenever I want to soften sharp corners on a piece of furniture. It adds a nice, smooth touch that makes everything feel polished and safe—especially important if you have kids running around.

    6. Learning Router Techniques: What Worked for Me

    One of the things I love about using a router for carpentry is how many techniques you can master over time. When I first started, I was focused on the basics, but as I got more comfortable, I began experimenting with different methods. Here are a few techniques that have become staples in my workshop:

    Edge Routing

    This was probably the first thing I mastered with my router, and I recommend starting here. Edge routing is when you run the router along the edge of a board to create a decorative profile. It’s a simple technique, but it can transform a plain piece of wood into something elegant and detailed. I use it all the time for tabletops, shelving, and moldings.

    Template Routing

    If you need to replicate a shape multiple times, template routing is a lifesaver. I’ve used this technique for making identical cabinet doors or shaping furniture legs. All you have to do is create a template of the shape you want, and then use the router to follow the pattern. It’s accurate and saves you a ton of time.

    Joinery

    One of the reasons I fell in love with my router was because of how easy it makes joinery. Whether I’m making dovetails, dadoes, or rabbets, the router gives me the precision I need to create tight, professional-looking joints. No more wobbly drawer boxes or uneven shelves!

    7. Why I Believe Every Workshop Needs a Router for Carpentry

    If there’s one tool I can’t live without, it’s my router for carpentry. The versatility it offers is unmatched. It’s not just about cutting wood; it’s about opening up creative possibilities. From simple edge profiling to complex joinery, there’s so much you can do with a router that it feels like an extension of my hands. I honestly believe that every woodworker, whether a beginner or a pro, should invest in a router—it’ll change the way you approach your projects.

    8. Router Safety: What I Do to Stay Safe

    I’ll admit, when I first started using a router, the speed and power of the tool were a little intimidating. Over time, I’ve developed a few safety habits that keep me safe while using my router, and I’d love to share them with you:

    • Protective Gear: I never start a routing project without my safety glasses and ear protection. Routers can throw up a lot of sawdust, and the noise can be deafening after a while.
    • Keep Hands Clear: This might sound obvious, but always keep your hands away from the spinning bit. I’ve found that using push blocks and jigs helps keep my hands out of harm’s way.
    • Go Slow: One mistake I made early on was trying to rush through a cut. Big mistake! Going slow and steady not only gives you a cleaner cut but also reduces the chances of accidents.

    Conclusion: Why the Router is My Carpentry MVP

    In all my years of woodworking, the router for carpentry has remained my most trusted and versatile tool. It’s helped me create beautiful, professional-grade work that I’m proud to show off. Whether you’re just getting started or looking to take your skills to the next level, I can’t recommend investing in a router enough. It’s a tool that truly grows with you, and the more you use it, the more possibilities you’ll uncover.

    So go ahead—grab a router, experiment, and see where it takes you. I guarantee it’ll become one of your favorite tools in no time.

    FAQs About Router for Carpentry

    1. How do I prevent tear-out when using a router for carpentry? Preventing tear-out is all about grain direction. Always route with the grain, and if you’re working on end grain, take shallow passes. Using a sharp bit helps too!

    2. What’s the best type of wood to use with a router? Most woods work well with a router, but hardwoods like oak and maple tend to give cleaner cuts. Softer woods can sometimes splinter, so I recommend using sharp bits and slower speeds when working with pine or poplar.

    3. Can I use a router for carpentry on MDF or plywood? Absolutely! I often use a router on MDF and plywood, especially for cabinetry. Just be sure to use the right bits and speeds to avoid chipping or tear-out.

    4. Should I get a plunge router or a fixed-base router? Both are great, but if you’re just starting out, I’d recommend a fixed-base router. It’s easier to control, and you can always add a plunge base later once you’re more comfortable.

    5. How do I know when it’s time to replace my router bits? You’ll know it’s time when your cuts start to look rough or you feel more resistance during routing. Dull bits strain your router and can leave burn marks on your wood. Keep an eye on the quality of your cuts!

  • Double Sided Tape for Woodworking: The Essential Guide

    Double Sided Tape for Woodworking: The Essential Guide

    Double sided tape for woodworking is an essential tool in this intricate and rewarding craft, recognized by both beginner and experienced woodworkers. Often overlooked, this simple yet versatile product has earned a crucial spot in workshops worldwide. Whether you’re securing a template, performing delicate work, or temporarily assembling projects, double-sided tape provides a wide range of uses that can significantly simplify your tasks and improve accuracy.

    In this guide, we’ll walk you through everything you need to know about double-sided tape for woodworking: from what it is, to how to use it effectively, and how to choose the right type. Let’s dive in and explore why this tape could be the unsung hero of your next woodworking project!

    What is Double-Sided Tape?

    Double-sided tape is exactly what it sounds like: a tape that has adhesive on both sides. Unlike single-sided tape, which is often used to seal, bind, or protect surfaces, double-sided tape is designed to bond two surfaces together temporarily but effectively.

    In woodworking, double-sided tape has become a crucial component for tasks where you need to hold wood pieces or templates together without causing damage or leaving residue. Its strength and versatility allow you to keep pieces in place without the need for clamps or other tools. Plus, since it comes in various thicknesses and adhesive strengths, you can find the perfect match for each specific task.

    Why Use Double-Sided Tape?

    You might be wondering, “Why not just use clamps?” While clamps have their place in woodworking, double-sided tape offers flexibility and convenience that clamps cannot always provide. Imagine working with a delicate template or small piece of wood. Using clamps could cause warping or denting, whereas double-sided tape provides a secure hold without damaging your materials.

    Moreover, double-sided tape eliminates the risk of shifting or slipping, allowing for more precise work. Think of it as an extra set of hands—hands that are perfectly still, never tired, and always available.

    Types of Double-Sided Tape

    Not all double-sided tapes are created equal, and different woodworking tasks require specific types. Here are some common varieties you’ll encounter:

    1. Carpet Tape: While primarily designed for securing carpets, this tape is widely used in woodworking for its strong adhesion and ability to hold wood pieces together securely.
    2. Foam Double-Sided Tape: Foam tapes provide a cushioning effect, making them ideal for uneven surfaces or where slight flexibility is needed.
    3. Heavy-Duty Double-Sided Tape: For projects that require maximum holding power, heavy-duty tape can offer long-lasting adherence and support even for larger wood panels.
    4. Thin Double-Sided Tape: When you need a subtle, almost invisible bond between pieces, thin tape is a great option.
    5. Removable Double-Sided Tape: As the name suggests, this tape is designed to be easily removable without leaving a sticky residue, making it perfect for temporary applications.

    How to Choose the Right Double-Sided Tape for Woodworking

    Choosing the right double-sided tape depends on several factors. The first thing you’ll want to consider is the type of project you’re working on. Are you temporarily holding a template in place, or do you need to bond larger, heavier pieces of wood together? For heavier pieces, heavy-duty double-sided tape will provide the extra grip you need.

    Next, think about the material you’re working with. Not all tapes adhere well to every type of wood or surface, so you’ll want to ensure that your tape is compatible. Additionally, for projects requiring temporary holds, removable or low-residue double-sided tape will prevent damage to your materials when you take it off.

    Applications of Double-Sided Tape

    There are numerous ways you can use double-sided tape in woodworking. Some common applications include:

    • Holding Templates: When cutting or routing, you often need to keep a template in place. Clamps may get in the way, but double-sided tape allows you to secure the template without obstructions.
    • Laminating Small Pieces: If you’re working with veneers or small pieces that need temporary adhesion before final assembly, double-sided tape is the perfect solution.
    • Fixing Sandpaper: For tasks like sharpening tools or sanding delicate edges, double-sided tape can secure sandpaper to a flat surface or block, making it easier to handle.
    • Creating Temporary Joints: When you need to see how parts fit together before gluing or screwing, double-sided tape helps you assemble projects temporarily, allowing for adjustments.
    • Jigs and Fixtures: Building jigs or temporary fixtures for your saw or drill press? Double-sided tape holds everything in place with minimal setup time.

    How to Use Double-Sided Tape in Woodworking

    Using double-sided tape is straightforward, but a few tips can help ensure the best results:

    1. Clean the Surface: Before applying the tape, make sure the wood surface is clean and free from dust or debris. This ensures a stronger bond.
    2. Apply Evenly: Roll out the tape in even, smooth lines. Avoid overlaps or wrinkles as these can create gaps or weak spots in the adhesion.
    3. Press Firmly: After placing the tape on the wood, press it down firmly to ensure it bonds well. Use a roller or your hands to apply even pressure.
    4. Remove Carefully: When it’s time to remove the tape, do so slowly and carefully to avoid pulling up any wood fibers or damaging the surface.

    The Strengths and Weaknesses of Double-Sided Tape

    As with any tool or product, there are advantages and disadvantages to using double-sided tape for woodworking. Understanding both sides can help you make an informed decision about when and how to use it.

    Strengths:

    • Versatility: Suitable for various applications, from holding templates to securing jigs.
    • Non-Invasive: Unlike clamps, tape won’t leave marks or impressions on your workpieces.
    • Ease of Use: Simply peel and stick—there’s no complex setup required.
    • Precision: Holds objects in place without slipping or movement.

    Weaknesses:

    • Temporary: While great for temporary holds, double-sided tape isn’t a substitute for permanent bonding methods like glue or screws.
    • Residue Risk: Some tapes may leave adhesive residue behind, especially if left on for an extended period.
    • Not Suitable for Heavy Loads: Double-sided tape may struggle to support very heavy or large wood pieces.

    When Not to Use Double-Sided Tape

    Despite its versatility, there are certain situations where double-sided tape may not be the best choice. For example, when working with very heavy or thick wood panels, tape may not provide sufficient strength. In such cases, clamps or screws may be necessary to hold pieces together.

    Additionally, for projects requiring permanent bonding, double-sided tape should not be relied upon. Wood glue, nails, or screws will provide a much stronger and more lasting hold.

    How to Remove Double-Sided Tape Without Damaging Wood

    Removing double-sided tape for woodworking can sometimes be tricky, especially if the tape has been on for a long time or has left residue. To minimize damage, here are some steps you can follow:

    1. Slow and Steady: Peel the tape back slowly, pulling at an angle to minimize the risk of pulling up wood fibers.
    2. Use Heat: A hairdryer or heat gun can soften the adhesive, making it easier to remove.
    3. Adhesive Remover: For stubborn residue, an adhesive remover or rubbing alcohol can help dissolve the glue without damaging the wood.
    4. Sand the Surface: If necessary, gently sand the area where the tape was applied to restore the wood’s smooth finish.

    Alternatives to Double-Sided Tape

    While double-sided tape is an excellent option for many woodworking tasks, there are alternatives that may be better suited for certain projects. Some common alternatives include:

    • Clamps: Ideal for heavy-duty applications or when you need a very strong hold.
    • Hot Glue: Provides quick adhesion and is easily removable, but it may not be suitable for delicate surfaces.
    • Blue Painter’s Tape: Often used for marking or temporary holds without leaving residue.

    Top Brands of Double-Sided Tape

    When choosing a double-sided tape for woodworking, the brand can make a significant difference in terms of quality and reliability. Some of the top brands known for producing high-quality double-sided tape for woodworking include:

    • Scotch: Known for its variety of tape products, Scotch offers durable, strong double-sided tapes that work well in woodworking projects.
    • 3M: A leader in adhesive technologies, 3M tapes are trusted for their strength, durability, and range of applications.
    • XFasten: A more specialized tape brand that focuses on creating durable, woodworking-specific double-sided tapes.
    • Shurtape: Shurtape produces heavy-duty double-sided tapes designed for both temporary and long-term woodworking applications.

    Common Mistakes to Avoid When Using Double-Sided Tape

    While using double-sided tape for woodworking is relatively simple, there are a few common mistakes that can reduce its effectiveness. Here are some things to watch out for:

    1. Applying to Dirty Surfaces: Adhesive tape requires a clean surface to bond effectively. If dust or sawdust is present, the tape won’t stick properly.
    2. Using the Wrong Type of Tape: Not all tapes are created equal. Make sure you choose the right kind for your specific project needs.
    3. Leaving Tape on Too Long: While double-sided tape can be left in place temporarily, leaving it on for too long can cause adhesive residue or damage to the wood.

    How to Store Double-Sided Tape for Longevity

    To ensure your double-sided tape stays in good condition, it’s essential to store it correctly. Keep it in a cool, dry place, away from direct sunlight. Heat can cause the adhesive to degrade, making the tape less effective when you need it. You should also avoid moisture, as it can cause the tape to lose its stickiness or become damaged.

    Conclusion: Why Double-Sided Tape is a Must-Have Tool

    In conclusion, double-sided tape for woodworking is an indispensable tool for anyone looking to improve the precision and ease of their projects. Whether you’re a professional carpenter or a weekend hobbyist, this tape offers a simple solution for temporary holds, template work, jig making, and more. Its versatility, ease of use, and non-invasive nature make it a go-to choice for various woodworking tasks. Keep a few different types of double-sided tape in your toolbox, and you’ll find yourself reaching for it time and time again.

    FAQs About Double-Sided Tape for Woodworking

    1. Can double-sided tape be used for heavy-duty woodworking projects?
    While double-sided tape can handle small to medium-sized woodworking tasks, it’s not designed to hold extremely heavy loads for extended periods. For heavy-duty projects, clamps or screws are better suited.

    2. Will double-sided tape damage wood?
    Generally, double-sided tape for woodworking is designed to be gentle on wood surfaces. However, if left on for too long or if removed incorrectly, it can pull up wood fibers or leave adhesive residue. Always remove it carefully and use the appropriate type of tape for the task.

    3. How do I prevent double-sided tape from leaving a residue?
    To prevent residue, use removable or low-residue double-sided tape. Additionally, avoid leaving the tape on for longer than necessary and clean the wood surface before applying the tape.

    4. Can double-sided tape hold up in humid or hot conditions?
    Certain tapes, especially foam-based or heavy-duty varieties, are designed to withstand higher temperatures or humidity. However, excessive heat and moisture can weaken some tapes, so it’s essential to choose a tape suited for your environment.

    5. How do I remove double-sided tape from wood without damaging the surface?
    The key is to remove the tape slowly and steadily, using heat if necessary. If residue is left behind, rubbing alcohol or a commercial adhesive remover can help clean the surface without causing damage.

  • Top 3 “Best Woodwork Moisture Meters” for 2024.

    Top 3 “Best Woodwork Moisture Meters” for 2024.

    1. Wagner Meters Orion 950

    The Wagner Meters Orion 950 stands out in 2024 as one of the most advanced wood moisture meters available on the market. Its pinless technology allows for non-invasive testing, which is particularly valuable for high-quality woodworking projects where maintaining the integrity of the surface is crucial. The meter provides accurate readings without the need for pins, making it ideal for fine furniture, flooring, and other woodworking projects that demand precision.

    The Orion 950’s deep reading capability of up to 1.5 inches ensures that you can assess moisture content not only on the surface but also within the wood’s core, which is critical for understanding how wood will behave over time. Additionally, its Bluetooth connectivity is a significant advancement, allowing users to log data directly to their mobile devices, making tracking and analyzing moisture levels easier and more efficient.

    Another noteworthy feature is the on-site calibration check block, which helps users verify the meter’s accuracy at any time, ensuring consistent results over the meter’s lifetime. This is particularly useful for professionals who rely on precise measurements for their work. The Orion 950’s robust build and comprehensive feature set make it a top choice for professional woodworkers and inspectors in 2024.

    Pros:

    • Pinless Technology: Non-invasive, no damage to wood surfaces.
    • Deep Reading Capability: Measures up to 1.5 inches into the wood.
    • Bluetooth Connectivity: Easy data logging and analysis on mobile devices.
    • Calibration Check Block: Ensures long-term accuracy and reliability.
    • Build Quality: Durable and well-designed for professional use.

    Cons:

    • Price: Higher cost compared to other models, which might be prohibitive for hobbyists.
    • Learning Curve: Advanced features may require some time to master.

    Specifications:

    • Measurement Range: 4% to 32% moisture content
    • Accuracy: ±0.1%
    • Measurement Depth: Up to 1.5 inches
    • Display Type: Digital with Bluetooth connectivity
    • Battery Type: 2 AA batteries
    • Warranty: 7-year warranty
    • Weight: 8.9 ounces

    2. Delmhorst J-2000

    The Delmhorst J-2000 is a highly reliable pin-type wood moisture meter that has been a favorite among woodworkers for years. Its continued popularity in 2024 is due to its outstanding accuracy and the ability to adjust for different wood species, making it a versatile tool in any woodshop. The pin-type design, while leaving small holes in the wood, offers an unmatched level of precision in moisture content measurement, making it ideal for critical woodworking projects where exact moisture levels are crucial.

    This model is particularly valued for its adjustable digital readout, allowing users to input the specific gravity of the wood species they are working with, ensuring that the moisture readings are as accurate as possible. The Delmhorst J-2000 also comes with an electrode that can penetrate deeply into thick wood pieces, providing readings that reflect the moisture content throughout the wood, not just on the surface.

    The straightforward interface and robust construction of the J-2000 make it a dependable tool for both seasoned professionals and serious hobbyists. Its durability and precision, combined with a long history of reliability, solidify its place among the top wood moisture meters for 2024.

    Pros:

    • High Accuracy: Precise measurements, especially for critical woodworking projects.
    • Species Correction: Adjustable digital readout for different wood species.
    • Deep Penetration: Electrode for thorough moisture content readings.
    • Durability: Built to last, even in tough shop environments.

    Cons:

    • Pin-Type Design: Leaves small holes in the wood.
    • Limited Features: Lacks modern features like Bluetooth connectivity.

    Specifications:

    • Measurement Range: 6% to 40% moisture content
    • Accuracy: ±0.2%
    • Measurement Depth: Depends on electrode used
    • Display Type: Digital
    • Battery Type: 9V battery
    • Warranty: 3-year warranty
    • Weight: 10 ounces

    3. Protimeter Surveymaster

    The Protimeter Surveymaster is a versatile and advanced dual-function moisture meter, combining both pin and pinless technology in one device. This flexibility makes it one of the top choices for woodworkers and inspectors in 2024, especially those who need a comprehensive tool capable of handling various scenarios. The dual functionality allows users to choose between invasive and non-invasive testing methods, depending on the situation and the importance of surface integrity.

    The Surveymaster’s intuitive display and auto shut-off feature make it user-friendly and convenient for everyday use. Its design is ergonomic and durable, capable of withstanding the rigors of frequent use in a professional setting. The pinless mode is perfect for quick scans to determine moisture distribution across a surface, while the pin mode provides precise measurements for deeper moisture content, which is essential for preventing future issues like warping or splitting in wood.

    What sets the Protimeter Surveymaster apart is its ability to handle a wide range of moisture content, making it suitable for both high and low moisture readings. This versatility, combined with its robust design and ease of use, makes it a standout choice for 2024.

    Pros:

    • Dual Functionality: Combines pin and pinless modes for versatile use.
    • Wide Measurement Range: Suitable for a broad spectrum of moisture content levels.
    • User-Friendly Design: Intuitive display and ergonomic design.
    • Durable: Built to withstand heavy use in professional settings.

    Cons:

    • Bulkier Design: Slightly larger and heavier than other models.
    • Cost: Higher price point, reflecting its advanced features.

    Specifications:

    • Measurement Range: 6% to 90% moisture content
    • Accuracy: ±0.5%
    • Measurement Depth: Varies between pin and pinless modes
    • Display Type: Digital
    • Battery Type: 9V battery
    • Warranty: 2-year warranty
    • Weight: 11 ounces

    Conclusion

    Each of these wood moisture meters offers distinct advantages depending on your needs:

    • Wagner Meters Orion 950: Best for professionals needing non-invasive testing with advanced features.
    • Delmhorst J-2000: Ideal for those who prioritize accuracy and species-specific adjustments.
    • Protimeter Surveymaster: Perfect for users who require the versatility of both pin and pinless modes in one device.

    These meters are among the best in 2024, combining durability, precision, and user-friendly features to meet the demands of woodworkers and inspectors alike.

  • Woodworking Square Guide: Precision Made Simple.

    Woodworking Square Guide: Precision Made Simple.

    Woodworking is a craft that requires precision, patience, and the right set of tools. Among the most critical tools in any woodworker’s arsenal is the woodworking square. This simple yet essential tool ensures that every cut, joint, and angle is perfectly aligned, which is crucial for creating high-quality, professional-looking projects. In this comprehensive guide, we’ll dive deep into the world of woodworking squares, exploring their history, types, uses, and how they contribute to achieving unmatched accuracy in woodworking.

    1. Introduction: What is a Woodworking Square?

    The woodworking square is a versatile tool that serves as a guide for ensuring accuracy in a variety of woodworking tasks. Whether you’re marking lines, checking angles, or aligning pieces, a woodworking square helps ensure that everything is straight and true. It’s the tool that turns rough wood into precise components for furniture, cabinets, and more. The importance of the woodworking square cannot be overstated—it is fundamental to producing high-quality work.

    2. The History and Evolution of the Woodworking Square

    The history of the woodworking square dates back centuries. Early civilizations, including the Egyptians and Romans, used rudimentary squares made from wood and metal to construct their monumental architecture. Over time, these tools evolved into the precise instruments we use today. Understanding this evolution helps us appreciate the precision and reliability of modern squares.

    Ancient squares were typically made from hardwoods like oak or mahogany, sometimes with brass reinforcements for added durability. These early tools were handcrafted, requiring significant skill to produce. As metalworking techniques advanced, squares began to be made from steel and other metals, offering greater durability and precision. Today, modern woodworking squares are produced with high levels of accuracy, often to within a fraction of a degree, making them indispensable in the woodworking trade.

    3. Types of Woodworking Squares

    There are several types of woodworking squares, each designed for specific tasks. Understanding the different types will help you choose the right one for your needs.

    • Try Square: The try square is perhaps the most commonly used type of woodworking square. It consists of a steel blade fixed at a 90-degree angle to a wooden or metal handle. It’s primarily used for checking and marking right angles. The try square is a simple tool but incredibly effective for ensuring that your cuts are perfectly square.
    • Combination Square: The combination square is a versatile tool that combines several functions into one. It typically includes a ruler, a 90-degree square, a 45-degree miter square, and a level. The ruler is adjustable, allowing you to measure different angles and depths with precision. This tool is especially useful for marking, measuring, and checking the accuracy of your work.
    • Framing Square: Also known as a carpenter’s square, the framing square is a large, L-shaped tool used for measuring and marking large pieces of wood, such as those used in framing houses. It’s essential for ensuring that large structures are square and true.
    • Speed Square: The speed square is a triangular tool that combines the functions of a try square, miter square, protractor, and saw guide. It’s often used for quick measurements and is particularly popular in construction for marking rafters and stairs.
    • Bevel Square: Also known as a sliding T-bevel, this square is adjustable, allowing you to replicate and transfer angles. It’s particularly useful when working with non-standard angles that aren’t 90 or 45 degrees.

    4. Why Accuracy is Essential in Woodworking

    Accuracy in woodworking is paramount. A slight error in measurement or alignment can result in pieces that don’t fit together correctly, leading to gaps, weak joints, or an overall poor appearance. The woodworking square is the tool that ensures these errors are minimized, if not entirely eliminated.

    When working on a project, every component must be cut and joined with precision. The woodworking square helps you achieve this by providing a reliable reference for ensuring that cuts are at the correct angle and that joints are properly aligned. This accuracy is not only important for the aesthetics of the piece but also for its structural integrity. A well-made joint is stronger and more durable, ensuring that the finished piece will stand the test of time.

    5. The Role of the Woodworking Square in Achieving Precision

    Precision is the hallmark of high-quality woodworking, and the woodworking square is the tool that makes this precision possible. By providing a consistent reference point for measurements and cuts, the woodworking square helps ensure that every part of a project is aligned perfectly.

    For example, when cutting pieces for a frame, the woodworking square ensures that each piece is cut at exactly 90 degrees, so that the frame will be square when assembled. Without the square, even a small deviation from 90 degrees could result in a frame that’s skewed or uneven, which would be particularly noticeable once the piece is finished.

    The woodworking square also plays a crucial role in joinery. When creating joints, such as mortise and tenon or dovetail joints, the square ensures that the pieces are aligned correctly, resulting in a strong and seamless joint. In complex projects with multiple joints, the cumulative effect of even small errors can be significant, so precision is key.

    6. How to Use a Woodworking Square for Maximum Accuracy

    Using a woodworking square correctly is essential for achieving accuracy in your work. Here’s a detailed guide on how to use different types of squares in various woodworking tasks:

    1. Aligning and Marking: Place the square’s body against the edge of your workpiece. The blade should rest flat on the surface. For marking, use a sharp pencil or marking knife to draw a line along the blade’s edge. This line will be your reference for cutting.
    2. Checking for Squareness: To check if a piece is square, place the square’s body against one edge and the blade against the adjacent edge. If the blade lies flat along the entire edge without gaps, the piece is square. This is particularly important when checking the squareness of frames, cabinets, or other structures.
    3. Measuring Angles: When using a combination or speed square, you can measure angles by aligning the pivot point of the square with the corner of the workpiece and rotating the blade or ruler to the desired angle. Mark the line for cutting. This method is especially useful for cutting rafters, stairs, or other pieces that require precise angles.
    4. Transferring Angles: For transferring an angle from one piece to another, a bevel square is ideal. Set the bevel square to the angle you want to replicate, then place it on the second piece and mark the angle. This is especially helpful when working with non-standard angles.
    5. Checking Joints: When assembling joints, use the square to ensure that the pieces are aligned correctly. For example, when assembling a frame, check that each corner is square by placing the square in the corner and checking for any gaps.

    7. Common Mistakes to Avoid When Using a Woodworking Square

    Even though the woodworking square is a straightforward tool, there are common mistakes that can lead to inaccurate results. Here are some pitfalls to avoid:

    • Assuming All Squares are Perfect: Not all squares are perfectly square out of the box. It’s important to check the accuracy of your square before using it. You can do this by drawing a line along the edge of the square, flipping the square over, and drawing another line from the same starting point. If the lines align, your square is accurate.
    • Not Maintaining the Tool: Over time, even the best woodworking squares can become worn or damaged. Regular maintenance, such as cleaning and checking for squareness, is essential to ensure that your square remains accurate.
    • Using the Wrong Type of Square: Each type of square is designed for specific tasks. Using the wrong type of square can lead to errors. For example, using a try square for large framing work might not give you the accuracy you need. Make sure to use the appropriate square for the task at hand.
    • Improper Marking Technique: When marking, it’s important to use the square correctly. Ensure that the square is firmly held against the edge of the workpiece and that you’re marking along the entire length of the blade. A light, steady hand will produce the best results.

    8. The Importance of Maintenance and Calibration

    Maintaining your woodworking square is essential for ensuring that it remains accurate and reliable. Here’s how to keep your square in top condition:

    • Cleaning: After each use, clean your square to remove any dust, wood chips, or debris that could affect its accuracy. Use a soft cloth to wipe down the blade and handle. For metal squares, applying a light coat of oil can prevent rust.
    • Checking for Squareness: Regularly check your square for accuracy. This can be done using the method described earlier (drawing two lines and checking for alignment). If your square is out of true, it may need to be recalibrated or replaced.
    • Storage: Store your woodworking square in a dry, safe place where it won’t be subjected to heavy impacts or pressure. Hanging it on a tool rack or storing it in a dedicated case will protect it from damage.
    • Calibration: If your square becomes slightly out of true, some types, like combination squares, can be recalibrated. This typically involves adjusting the blade or tightening the screws that hold it in place. Follow the manufacturer’s instructions for calibration to ensure accuracy.

    9. Advanced Techniques for Precision with a Woodworking Square

    Once you’ve mastered the basics of using a woodworking square, there are advanced techniques that can help you achieve even greater precision in your work:

    • Using a Square as a Saw Guide: A speed square can be used as a guide for making straight cuts with a hand saw or circular saw. Simply align the square along the cutting line, and use the edge as a guide for the saw blade. This technique ensures a perfectly straight cut every time.
    • Laying Out Complex Angles: For projects that require compound angles, such as roof rafters or stair stringers, a combination square or speed square is invaluable. By using the square’s built-in protractor, you can accurately layout angles that are otherwise difficult to measure.
    • Creating Precision Joints: When making joints such as dovetails or box joints, the accuracy of your square is crucial. Use the square to mark out the joint and to check that each cut is square and true. This ensures that the joint fits together perfectly without gaps.
    • Verifying Machine Settings: Use a woodworking square to verify the settings on your saws and other machines. For example, you can use a square to check that the blade of your table saw is perpendicular to the table, ensuring that your cuts are accurate.

    10. Choosing the Right Woodworking Square for Your Projects

    Selecting the right woodworking square depends on the types of projects you typically work on. Here are some tips for choosing the best square for your needs:

    • For Fine Woodworking: If you’re focused on furniture making or other fine woodworking projects, a high-quality try square or combination square is essential. Look for squares made from durable materials with a high level of precision.
    • For Construction and Framing: If you’re working on larger projects, such as framing a house or building outdoor structures, a framing square and speed square are your best options. These tools are designed for larger workpieces and are ideal for ensuring that everything is square and true.
    • For Versatility: If you need a square that can handle a variety of tasks, a combination square is a great choice. It combines multiple functions into one tool, making it suitable for everything from marking and measuring to checking angles.
    • For Beginners: If you’re new to woodworking, start with a try square. It’s simple to use and will cover most of your basic needs. As you gain more experience, you can add other types of squares to your collection.

    11. The Role of a Woodworking Square in Joinery

    Joinery is the art of connecting pieces of wood to create structures like furniture, cabinetry, and more. Precision is crucial in joinery, and the woodworking square plays a vital role in achieving that precision. Here’s how:

    • Ensuring Straight Cuts: In joinery, each piece must be cut perfectly to fit together without gaps. The square ensures that each cut is straight and at the correct angle, which is particularly important in joints like dovetails and mortise and tenon.
    • Aligning Components: When assembling joints, the square helps you align each piece correctly. For example, when creating a mortise and tenon joint, the square ensures that the tenon is perfectly aligned with the mortise, resulting in a tight, strong joint.
    • Checking Joint Accuracy: After cutting and assembling a joint, use the square to check that it’s accurate. If the joint is not square, it may not fit together properly, or it could weaken over time. The square helps you catch these errors before they become a problem.

    12. Practical Tips for Using a Woodworking Square

    Here are some additional tips to help you get the most out of your woodworking square:

    • Use a Sharp Pencil or Knife: For the most accurate markings, use a sharp pencil or marking knife. This ensures that your lines are precise and easy to follow.
    • Double-Check Your Measurements: Before making any cuts, double-check your measurements and marks with the square. It’s better to take a few extra seconds to ensure accuracy than to make a mistake that could ruin your project.
    • Practice on Scrap Wood: If you’re new to using a woodworking square, practice on scrap wood before working on your actual project. This will help you get comfortable with the tool and ensure that your measurements and markings are accurate.

    13. The Future of Woodworking Squares: Innovations and Technology

    As with many tools, woodworking squares have seen innovations and improvements over the years. Advances in materials and manufacturing processes have led to more accurate and durable squares. Some modern squares incorporate digital technology, providing electronic readouts for even greater precision.

    Digital squares can measure angles with incredible accuracy and display the results on a screen, making it easier than ever to achieve perfect measurements. While these advanced tools can be more expensive, they offer unmatched precision and are becoming increasingly popular among professional woodworkers.

    14. Conclusion: The Woodworking Square as an Indispensable Tool

    The woodworking square is more than just a tool—it’s a woodworker’s best friend. Whether you’re a seasoned professional or just starting in the craft, this simple yet powerful tool is essential for achieving the precision and accuracy that high-quality woodworking demands. By ensuring that every cut, joint, and angle is perfectly aligned, the woodworking square helps you create beautiful, durable, and professional-quality projects.

    FAQs

    1. What is the most commonly used woodworking square? The most commonly used woodworking square is the try square. It’s simple, reliable, and perfect for checking and marking right angles.

    2. Can I use a woodworking square for metalworking? While primarily designed for woodworking, some squares can be used in metalworking, particularly the combination square. However, it’s essential to ensure the tool is suitable for the material you’re working with.

    3. How do I check if my woodworking square is accurate? You can check the accuracy of your woodworking square by placing it against a straight edge and marking a line. Then, flip the square and draw another line from the same starting point. If the lines align, your square is accurate.

    4. What materials are woodworking squares made from? Woodworking squares are typically made from steel, aluminum, or plastic. Steel squares are the most durable and precise, but plastic squares can be a good choice for beginners or light-duty use.

    5. Do I need more than one type of woodworking square? Yes, having multiple types of woodworking squares allows you to tackle different tasks more effectively. Each square has its specific use, and having a variety can greatly enhance your woodworking precision and versatility.

    This expanded guide should provide you with the comprehensive insights needed to understand and effectively use a woodworking square in all your projects. By mastering this tool, you’ll be well on your way to creating precise, professional-quality work every time.

  • Teds Woodworking: Discover 16,000+ Plans for All Skill Levels

    Teds Woodworking: Discover 16,000+ Plans for All Skill Levels

    Woodworking is a craft that has fascinated people for centuries, transforming raw timber into beautiful, functional pieces. For anyone passionate about this craft, discovering comprehensive resources can be a game-changer. Enter Teds Woodworking, a highly acclaimed resource designed to help both novice and experienced woodworkers achieve their dreams. In this article, we’ll delve into what offers and benefits, and how it can revolutionize your woodworking journey.

    For your “Free” 2 in 1 Folding Picnic Table Bench Plan – Click Here.

    Table of Contents

    1. Introduction to Teds Woodworking
    2. What is Teds Woodworking?
    3. The Origin and Creator of Teds Woodworking
    4. Why Choose Teds Woodworking?
    5. Key Features of Teds Woodworking
    6. Exploring the Plans and Projects
    7. Benefits of Using Teds Woodworking Plans
    8. How Teds Woodworking Saves Time and Money
    9. Teds Woodworking for Beginners
    10. Advanced Projects in Teds Woodworking
    11. Tips for Getting the Most Out of Teds Woodworking
    12. Real User Experiences and Testimonials
    13. Frequently Asked Questions (FAQs)

    Introduction to Teds Woodworking

    Are you a woodworking enthusiast looking for the ultimate resource to fuel your passion? Look no further than Teds Woodworking. This comprehensive guide has something for everyone, from beginners to seasoned pros.

    What is Teds Woodworking?

    Teds Woodworking is an extensive collection of plans, instructions, and blueprints curated to help woodworkers at all skill levels. It provides over 16,000 detailed plans that cover a wide range of projects. Whether you’re interested in crafting furniture, building sheds, or creating intricate designs, This collection has you covered.

    The Origin and Creator of Teds Woodworking

    Teds Woodworking was created by Ted McGrath, a professional woodworker, educator, and AWI member. With years of experience under his belt, Ted wanted to share his knowledge and expertise with others. He realized that many aspiring woodworkers struggle with finding reliable plans and clear instructions, leading him to compile this extensive resource.

    Why Choose Teds?

    Why should you consider Teds Woodworking over other resources? Here are a few compelling reasons:

    • Comprehensive Plans: With over 16,000 plans, you’ll never run out of projects.
    • Detailed Instructions: Each plan comes with step-by-step instructions, making it easy to follow along.
    • Skill Levels: Teds caters to all skill levels, from beginners to advanced woodworkers.
    • Affordability: It’s a cost-effective solution compared to hiring a professional or buying individual plans.

    Key Features of Teds

    Let’s take a closer look at some of the key features that make Teds Woodworking a standout resource:

    • Variety of Projects: From small crafts to large constructions, there’s something for everyone.
    • Clear Schematics: Each plan includes detailed schematics, ensuring you understand every step.
    • Material Lists: Know exactly what materials you need before starting a project.
    • 3D Diagrams: Visual aids help you grasp complex designs more easily.
    • CAD Plan Viewer: Edit and customize plans to suit your specific needs.

    For your “Free” Outdoor Projects Plan – Click Here.

    Exploring the Plans and Projects

    One of the highlights of Teds Woodworking is the variety of plans and projects available. Here are a few examples of what you can expect:

    • Furniture: Chairs, tables, beds, and cabinets.
    • Outdoor Projects: Gazebos, pergolas, and garden furniture.
    • Decorative Items: Picture frames, clocks, and wall art.
    • Utility Projects: Workbenches, storage solutions, and tool organizers.

    Benefits of Using Teds Plans

    Using Teds plans comes with numerous benefits. First and foremost, it eliminates the guesswork. You’ll have access to precise measurements, detailed instructions, and clear diagrams. This means fewer mistakes, less wasted material, and a smoother building process.

    How Teds Woodworking Saves Time and Money

    By providing comprehensive plans and detailed instructions, Ted helps you save time and money. You won’t need to spend hours researching or experimenting with different techniques. Instead, you can dive straight into your projects, confident that you have a reliable guide to follow.

    Teds Woodworking for Beginners

    If you’re a beginner, Teds is an excellent starting point. The beginner-friendly plans and clear instructions make it easy to get started. Plus, you’ll find plenty of resources to help you learn the basics, such as:

    • Introduction to Tools: Learn about the essential tools you’ll need.
    • Basic Techniques: Master the foundational skills of woodworking.
    • Safety Tips: Ensure you’re working safely at all times.

    Advanced Projects in Teds Woodworking

    For those with more experience, Teds offers advanced projects that will challenge your skills and expand your repertoire. These projects often involve intricate designs, complex joinery, and high-quality finishes. Examples include:

    • Custom Furniture: Design and build unique pieces tailored to your needs.
    • Outdoor Structures: Construct durable and stylish outdoor features.
    • Artistic Creations: Push the boundaries of traditional woodworking with creative and artistic projects.

    Tips for Getting the Most Out of Teds

    To maximize the benefits of Teds, consider these tips:

    • Start Small: Begin with simpler projects to build your confidence.
    • Stay Organized: Keep your workspace tidy and materials well-organized.
    • Follow Instructions: Carefully read through the instructions before starting.
    • Take Your Time: Don’t rush; woodworking is about precision and patience.
    • Learn Continuously: Keep expanding your skills by exploring new techniques and projects.

    Real User Experiences and Testimonials

    Many users have shared their positive experiences with Teds. Here are a few testimonials:

    • John D.: “Teds has transformed my hobby. The plans are easy to follow, and the projects are fun and rewarding.”
    • Emily S.: “As a beginner, I found Teds incredibly helpful. The instructions are clear, and I’ve learned so much.”
    • Mark R.: “I’ve been woodworking for years, and Teds still surprises me with its variety and depth. Highly recommended.”

    Frequently Asked Questions (FAQs)

    1. What is Teds Woodworking? Teds is a comprehensive collection of plans and instructions created by Ted McGrath. It includes over 16,000 plans for various projects, catering to all skill levels.

    2. Who is Ted McGrath? Ted McGrath is a professional woodworker, educator, and AWI member. He created Teds to share his extensive knowledge and help others succeed in working with wood.

    3. Is Teds Woodworking suitable for beginners? Yes, Teds is suitable for beginners. It includes beginner-friendly plans, clear instructions, and resources to help you learn the basics of woodworking.

    4. How does Teds Woodworking save time and money? Teds saves time and money by providing comprehensive plans and detailed instructions. This eliminates the need for extensive research and reduces the likelihood of mistakes and wasted materials.

    5. Can I customize the plans in Teds Woodworking? Yes, Teds includes a CAD plan viewer, allowing you to edit and customize plans to suit your specific needs.

    For your “Free” Workspace Plans – Click Here.

    Conclusion

    In conclusion, Teds Woodworking is a valuable resource for anyone passionate about woodworking. With its extensive collection of plans, detailed instructions, and user-friendly features, it has something to offer everyone, from beginners to advanced woodworkers. By choosing Teds, you can embark on a rewarding woodworking journey, creating beautiful and functional pieces with confidence and ease. Whether you’re building a simple chair or a complex outdoor structure, Teds provides the guidance and inspiration you need to succeed. So why wait? Dive into the world of Teds Woodworking and start crafting your dreams today!

  • Garage Woodworking Shop Layout: Maximize Space Efficiently

    Garage Woodworking Shop Layout: Maximize Space Efficiently

    Introduction

    Your garage woodworking shop layout is a vital part when considering transforming your 2-car garage into a woodworking haven for DIY enthusiasts and professional woodworkers. The key to success lies in an effective shop layout. This layout will not only maximize the available space but also ensure that your tools and materials are organized efficiently. In this article, we will explore various tips and strategies to help you create a functional and productive woodworking shop in your garage.

    For your “Free” Workspace Plans – Click Here.

    1. Understanding Your Space

    Before diving into the specifics of your garage workshop layout, it’s crucial to understand the dimensions and limitations of your space. Measure the length, width, and height of your garage. This will give you a clear idea of how much room you have to work with. Remember, the goal is to create a layout that optimizes every square inch without making the space feel cramped.

    2. Defining Your Work Zones when considering a garage woodworking shop layout

    Creating distinct work zones is essential for an efficient garage woodworking shop layout. These zones should include areas for cutting, assembling, finishing, and storing materials and tools. By defining specific zones, you can streamline your workflow and minimize the time spent moving between tasks. I always try to locate the cutting zone as close as possible to the garage door entry to enable long lengths of wood to be easily moved from outside to inside the workspace. By the time the wood has been cut for a project it is much smaller and more easily moved to the next work zone.

    3. Choosing the Right Tools

    Selecting the right tools in your garage woodworking shop is a critical step. Consider the types of projects you plan to undertake and choose tools that will help you achieve your goals. Essential tools for any workshop include a table saw, miter saw, band saw, drill press, and various hand tools. Invest in quality tools that will last and provide precision in your work.

    4. Workbench Placement

    The workbench is the heart of any woodworking shop. For a woodworking shop layout, place your workbench in a central location where it is easily accessible from all areas of the shop. This will allow you to work on large projects without constantly moving your materials around. Consider building a custom workbench that fits your specific needs and space constraints. I also like to mount the workbench on wheels, this enables you to move it around the workshop when building large projects, be sure that 2 of the wheels have the ability to swivel and the other 2 fixed this will make your task moving your work bench much easier.

    5. Efficient Storage Solutions

    Storage is a critical aspect of any woodworking shop. In a garage, you need to be creative with your storage solutions to maximize space. Utilize wall-mounted shelves, pegboards, and cabinets to keep your tools and materials organized and easily accessible. Consider using mobile storage units that can be moved around as needed.

    6. Dust Collection System

    A dust collection system is essential for maintaining a clean and safe working environment. In a garage workshop layout, install a dust collection system that connects to your major power tools. This will help reduce dust and debris, making your shop more pleasant to work in and protecting your health.

    7. Lighting and Electrical Needs

    Proper lighting is crucial in a woodworking shop to ensure accuracy and safety. Install bright, overhead lighting and task lighting in key areas such as the workbench and cutting zones. Additionally, plan your electrical needs carefully. Ensure that you have enough outlets to accommodate all your power tools and consider adding a dedicated circuit for your dust collection system.

    For your “Free” 2 in 1 Folding Picnic Table Bench Plan – Click Here.

    8. Maximizing Vertical Space

    One of the best ways to optimize your garage workshop layout is by utilizing vertical space. Install shelves and cabinets that reach up to the ceiling to store less frequently used items. Hang tools on pegboards and use hooks to keep them off the floor. This approach frees up valuable floor space and keeps your shop organized. I like to run compressed air lines through the ceiling space of the workshop and drop them down at specific locations to access air operated tools such as brad guns, drills and screwdrivers.

    9. Safety Considerations

    Safety should always be a top priority in any woodworking shop. Ensure that your garage workshop layout includes ample space for moving around safely. Keep walkways clear of clutter and install safety features such as fire extinguishers, first aid kits, and proper ventilation. Regularly inspect your tools and equipment to ensure they are in good working condition.

    10. Flexibility and Mobility

    Flexibility is key when turning your garage into a woodworking shop. Consider using mobile workstations and tool carts that can be easily moved around as needed. This allows you to reconfigure your workspace for different projects and makes cleaning up much easier. Having a flexible layout also enables you to adapt to new tools and equipment as your woodworking skills evolve.

    11. Soundproofing Your Shop

    Woodworking can be noisy, which might not sit well with your family or neighbors. Consider soundproofing your garage woodworking shop. Use insulation materials, heavy curtains, and weatherstripping to reduce noise levels. This will create a more pleasant working environment and prevent disturbances to those around you.

    12. Personal Touches

    Finally, add personal touches to your garage come woodworking shop to make it your own. Display finished projects, hang inspirational quotes, or set up a comfortable seating area for breaks. Creating a space that reflects your personality, and style will make it more enjoyable to spend time in your shop.

    Conclusion

    Creating an efficient and functional garage workshop requires careful planning and consideration. By understanding your space, defining work zones, choosing the right tools, and implementing effective storage solutions, you can transform your garage into a productive woodworking haven. Remember to prioritize safety, flexibility, and personal touches to make your shop a place where you can enjoy your woodworking projects to the fullest.

    For your “Free” Workspace Plans – Click Here.

    FAQs

    1. What is the best way to organize tools in a garage woodshop?

    The best way to organize tools in a garage woodshop is by using wall-mounted shelves, pegboards, and cabinets. This keeps tools easily accessible and maximizes floor space.

    2. How can I ensure proper ventilation in my garage woodworking shop?

    To ensure proper ventilation, install exhaust fans and consider adding windows or vents. This will help remove dust and fumes, creating a healthier working environment.

    3. What lighting is best for a woodworking shop?

    Bright, overhead lighting combined with task lighting in key areas like the workbench and cutting zones is ideal. LED lights are energy-efficient and provide excellent illumination.

    4. How can I soundproof my garage workshop?

    Soundproof your shop by using insulation materials, heavy curtains, and weatherstripping. This reduces noise levels and prevents disturbances to others.

    5. What safety features should I include in my woodworking shop?

    Include fire extinguishers, first aid kits, and proper ventilation. Ensure walkways are clear of clutter and regularly inspect tools and equipment for safety.

    By following these guidelines, you can create a well-organized and efficient garage woodshop that will enhance your woodworking experience.

  • Best Woodworking Chisels: Top Picks and Expert Tips for Precision

    Best Woodworking Chisels: Top Picks and Expert Tips for Precision

    Woodworking is an art that requires precision, skill, and the right tools. One of the essential tools in a woodworker’s arsenal is the chisel. In this comprehensive guide, we will explore the best woodworking chisels available on the market, their uses, and how to choose the right ones for your projects. Whether you are a beginner or an experienced woodworker, this article will provide valuable insights to help you enhance your craft.

    For your “Free” 2 in 1 Folding Picnic Table Bench Plan – Click Here.

    Table of Contents

    1. Introduction to Woodworking Chisels
    2. Types of Chisels
    3. Bench Chisels: The Workhorse of Woodworking
    4. Paring Chisels: Precision at Its Finest
    5. Mortise Chisels: For Heavy-Duty Tasks
    6. Butt Chisels: Compact and Handy
    7. Japanese Chisels: A Blend of Tradition and Innovation
    8. Materials Used in Chisels
    9. Choosing the Right Handle for Your Chisel
    10. Caring for Your Chisels
    11. Sharpening Your Chisels: Techniques and Tips
    12. Top Brands for Woodworking Chisels
    13. Affordable vs. Premium Chisels: Which to Choose?
    14. Using Chisels Safely and Effectively
    15. Conclusion: Elevate Your Woodworking with the Best Chisels
    16. FAQs About Woodworking Chisels

    Introduction to Woodworking Chisels

    When it comes to woodworking, having the best tools is crucial for achieving top-quality results. Among these tools, chisels hold a special place. The best woodworking chisels not only make your work easier but also allow you to achieve the precision and detail required for fine craftsmanship. In this guide, we will delve into everything you need to know about woodworking chisels, from the different types available to how to care for and use them effectively.

    Types of Woodworking Chisels

    Chisels come in various shapes and sizes, each designed for specific tasks. Understanding the different types of chisels will help you select the right tool for your needs. Here are some of the most common types:

    • Bench Chisels
    • Paring Chisels
    • Mortise Chisels
    • Butt Chisels
    • Japanese Chisels

    Bench Chisels: The Workhorse of Woodworking

    Bench chisels are the most versatile and commonly used chisels in woodworking. They are perfect for general-purpose tasks, such as chopping and paring wood. Bench chisels typically have a beveled edge, making them suitable for both heavy-duty work and fine detailing.

    Paring Chisels: Precision at Its Finest

    Paring chisels are designed for delicate work where precision is paramount. They are long and thin, allowing you to pare away thin shavings of wood without applying too much force. Paring chisels are ideal for fine joinery and detailed carving.

    Mortise Chisels: For Heavy-Duty Tasks

    Mortise chisels are robust tools used for cutting deep mortises, which are rectangular holes in wood. These chisels have thick blades and are built to withstand the heavy mallet blows required to chop out large amounts of wood.

    Butt Chisels: Compact and Handy

    Butt chisels are shorter than other chisels, making them perfect for working in tight spaces. They are commonly used for fitting hinges and other hardware where precision and control are crucial.

    Japanese Chisels: A Blend of Tradition and Innovation

    Japanese chisels, known as “nomi,” combine traditional craftsmanship with modern materials. These chisels are renowned for their sharpness and durability, making them a favorite among many woodworkers. Japanese chisels typically have a laminated blade, which combines a hard steel cutting edge with a softer steel body.

    Materials Used in Woodworking Chisels

    The material of the chisel blade plays a significant role in its performance and durability. The best woodworking chisels are made from high-quality steel, which holds a sharp edge and resists wear. Common materials include:

    • High Carbon Steel
    • Alloy Steel
    • A2 Steel
    • O1 Steel

    For your “Free” Outdoor Projects Plan – Click Here.

    Choosing the Right Handle for Your Chisel

    The handle of a chisel is just as important as the blade. A good handle provides comfort and control, reducing fatigue during prolonged use. Chisel handles are typically made from wood or plastic, with wooden handles being favored for their traditional feel and durability. Look for handles that fit comfortably in your hand and provide a secure grip.

    Caring for Your Woodworking Chisels

    Proper care and maintenance of your chisels are essential to keep them in good working condition. Here are some tips for caring for your chisels:

    • Clean your chisels after each use to remove any wood chips and debris.
    • Store your chisels in a dry place to prevent rust.
    • Regularly check the sharpness of your chisels and sharpen them as needed.

    Sharpening Your Chisels: Techniques and Tips

    Sharp chisels are a joy to work with, while dull chisels can be frustrating and dangerous. Here are some techniques and tips for sharpening your chisels:

    • Use a honing guide to maintain a consistent angle while sharpening.
    • Start with a coarse grit stone and progress to finer grits for a sharp edge.
    • Strop your chisels on a leather strop to remove any burrs and polish the edge.

    Top Brands for Woodworking Chisels

    There are many brands of woodworking chisels available, but some stand out for their quality and performance. Here are some of the top brands to consider:

    • Lie-Nielsen
    • Veritas
    • Stanley
    • Narex
    • Sorby

    Affordable vs. Premium Chisels: Which to Choose?

    When choosing woodworking chisels, you may wonder whether to go for affordable or premium options. While premium chisels often offer superior performance and durability, affordable chisels can also be a good choice for beginners or those on a budget. It’s important to balance cost with quality and consider how often you will use the chisels.

    Using Chisels Safely and Effectively

    Safety is paramount when using woodworking chisels. Here are some tips to ensure safe and effective use:

    • Always use a mallet designed for chisels to avoid damaging the handle.
    • Keep your hands behind the cutting edge to prevent injury.
    • Use a firm grip and apply controlled force.
    • Always cut away from your body.

    Conclusion: Elevate Your Woodworking with the Best Chisels

    The best woodworking chisels are indispensable tools that can elevate your woodworking projects to new heights. By choosing the right chisels for your needs and maintaining them properly, you can achieve precise and beautiful results. Whether you’re just starting out or looking to upgrade your toolkit, the right chisels will make all the difference.

    For your “Free” Guide to 13 Wood Joinery Types – Click Here.

    FAQs About Woodworking Chisels

    1. What are the best woodworking chisels for beginners? For beginners, bench chisels are a great starting point. Brands like Stanley and Narex offer affordable and reliable options that are easy to use and maintain.

    2. How often should I sharpen my woodworking chisels? The frequency of sharpening depends on how often you use your chisels and the type of wood you work with. As a general rule, sharpen your chisels whenever you notice a decrease in performance or difficulty in cutting.

    3. Can I use woodworking chisels for carving? Yes, you can use chisels for carving, but it’s best to use chisels specifically designed for carving, such as paring chisels, which offer more precision and control.

    4. How do I prevent my chisels from rusting? To prevent rust, store your chisels in a dry place and apply a light coat of oil to the blades after cleaning. Using silica gel packs in your toolbox can also help absorb moisture.

    5. Are Japanese chisels better than Western chisels? Japanese and Western chisels each have their strengths. Japanese chisels are known for their sharpness and durability, while Western chisels are versatile and widely available. The choice depends on personal preference and the specific needs of your projects.

    By understanding the different types of chisels and their uses, you can make informed decisions and invest in the tools that will best suit your woodworking needs. Happy woodworking!

  • Best Drill Press for Woodworking: Your Ultimate Guide

    Best Drill Press for Woodworking: Your Ultimate Guide

    When it comes to woodworking, having the right tools can make all the difference. One of the most essential tools for any woodworker is a drill press. In this guide, we’ll dive deep into the world of drill presses, helping you find the best drill press for woodworking. Whether you’re a seasoned professional or a beginner, you’ll find valuable insights here to make an informed decision.

    For your “Free” 2 in 1 Folding Picnic Table Bench Plan – Click Here.

    Table of Contents

    1. Introduction to Drill Presses
    2. Why a Drill Press is Essential for Woodworking
    3. Types of Drill Presses
    4. Key Features to Look for in a Drill Press
    5. Top Brands for Woodworking Drill Presses
    6. How to Choose the Right Drill Press for Your Workshop
    7. Bench vs. Floor Drill Presses
    8. Best Drill Press for Woodworking: Our Top Picks
    9. Maintaining Your Drill Press
    10. Safety Tips When Using a Drill Press
    11. Upgrading Your Drill Press: Accessories and Add-ons
    12. Conclusion: Making the Best Choice
    13. FAQs about the Best Drill Press for Woodworking

    Introduction to Drill Presses

    When you think about woodworking, a drill press might not be the first tool that comes to mind. However, it’s one of the most versatile and essential pieces of equipment in any workshop. Whether you’re drilling precise holes, sanding, or even mortising, a drill press can handle it all. In this guide, we’ll explore what makes a drill press the best, ensuring you can tackle any project with confidence.

    Why a Drill Press is Essential for Woodworking

    Imagine trying to drill perfectly straight holes with a handheld drill. It’s challenging and often leads to mistakes. A drill press eliminates these issues by providing stability and precision. But that’s not all. With the best drill press, you can also enjoy consistent depth control, angled drilling, and the ability to handle larger bits for more extensive projects. It’s like having a multitool dedicated to drilling – efficient and precise.

    Types of Drill Presses

    There are several types of drill presses, each suited to different needs and preferences:

    • Bench Drill Press: Compact and perfect for small workshops.
    • Floor Drill Press: Larger, more powerful, and suitable for heavy-duty projects.
    • Radial Drill Press: Offers flexibility with its adjustable arm for wider workpieces.

    Choosing the right type depends on your workspace and the projects you typically undertake. Consequently, it’s important to consider your specific needs.

    Key Features to Look for in a Drill Press

    Selecting a drill press for woodworking requires understanding what features matter most. Here are key considerations:

    1. Power: More horsepower means more capability to handle tough materials.
    2. Speed Range: Variable speed settings allow for precision and adaptability.
    3. Table Size and Adjustability: A larger, adjustable table provides better support and versatility.
    4. Depth Stop: Ensures consistent drilling depths for repetitive tasks.
    5. Ease of Adjustment: Quick and easy adjustments save time and effort.

    Top Brands for Woodworking Drill Presses

    Several brands stand out in the woodworking community for their quality and reliability. These include:

    • JET
    • WEN
    • Delta
    • Powermatic
    • Shop Fox

    Each of these brands offers models that could be considered the best drill press for woodworking, depending on your specific needs. Therefore, it’s worth exploring each brand’s offerings.

    How to Choose the Right Drill Press for Your Workshop

    Choosing the right drill press involves considering your workshop’s space, the types of projects you handle, and your budget. Think about the drill press’s footprint and whether you need a benchtop or floor model. Evaluate the features that will best serve your needs, such as speed settings and table adjustments. Additionally, consider future projects that might require more advanced features.

    For your “Free” Outdoor Projects Plan – Click Here.

    Bench vs. Floor Drill Presses

    Should you go for a bench or a floor drill press? It depends on your workspace and project requirements. Bench drill presses are ideal for smaller workshops with limited space. They are compact yet powerful. On the other hand, floor drill presses, while taking up more space, offer more power and versatility, making them perfect for larger, more demanding projects. Thus, it’s crucial to match the drill press type with your specific workshop needs.

    Best Drill Press for Woodworking: Our Top Picks

    After extensive research and testing, here are our top picks for the best drill press for woodworking:

    1. JET JDP-17: Known for its power and precision, this model is a top choice for serious woodworkers.
    2. WEN 4214: Offers excellent value with its variable speed and robust construction.
    3. Delta 18-900L: This floor drill press stands out with its auto-tensioning belt drive system.
    4. Powermatic PM2800B: A premium choice with digital RPM readout and laser guides.
    5. Shop Fox W1848: Combines affordability with features like oscillating spindle for sanding.

    Maintaining Your Drill Press

    Maintaining your drill press is crucial for its longevity and performance. Regularly clean the machine, lubricate moving parts, and check for any loose components. Replacing worn-out parts and keeping the machine covered when not in use can also extend its lifespan. Consequently, these practices ensure your drill press remains in top condition.

    Safety Tips When Using a Drill Press

    Safety should always be a priority when using a drill press. Here are some tips to ensure you stay safe:

    • Wear Safety Gear: Always use safety glasses and hearing protection.
    • Secure Your Workpiece: Use clamps or a vice to hold the workpiece firmly.
    • Keep Hair and Clothing Away: Avoid loose clothing and tie back long hair.
    • Check the Machine Before Use: Ensure all parts are tight and the machine is in good working condition.
    • Stay Focused: Avoid distractions and never leave the drill press running unattended.

    By following these safety tips, you can prevent accidents and ensure a safe working environment.

    Upgrading Your Drill Press: Accessories and Add-ons

    Enhance your drill press’s functionality with various accessories. Consider adding a laser guide for precision, a mortising attachment for woodworking joints, or a sanding drum kit for versatile finishing options. These upgrades can turn your drill press into a multifunctional powerhouse. Moreover, investing in these add-ons can significantly improve your woodworking efficiency.

    Conclusion: Making the Best Choice

    Choosing the best drill press for woodworking boils down to understanding your needs and the features that will make your work more efficient and enjoyable. Whether you opt for a bench model for its compactness or a floor model for its power, ensure it aligns with your projects and workshop space. Investing in a quality drill press is a decision that will pay off in precision, efficiency, and the overall quality of your woodworking. In conclusion, the right drill press can elevate your woodworking projects to a new level.

    For your “Free” Workspace Plans – Click Here.

    FAQs about the Best Drill Press for Woodworking

    1. What makes a drill press better for woodworking compared to other types of drills? A drill press offers stability, precision, and versatility that handheld drills can’t match, making it ideal for woodworking tasks.
    2. Can I use a metalworking drill press for woodworking? Yes, but a woodworking-specific drill press will have features tailored to wood projects, like better dust collection and appropriate speed ranges.
    3. How much should I spend on a good woodworking drill press? Prices can vary widely, but a good quality drill press for woodworking typically ranges from $200 to $1000, depending on features and brand.
    4. What size drill press do I need for my projects? The size depends on the scale of your projects. For most woodworking tasks, a 10 to 15-inch drill press is sufficient.
    5. Is it worth upgrading to a drill press with a digital readout? A digital readout offers precise speed control and easier adjustments, which can be worth the investment for detailed and frequent work.

    By considering these insights and tips, you’re well on your way to finding the best drill press for woodworking that suits your needs perfectly. Happy woodworking!

  • “Woodworking Classes Near Me: Explore the Craft Nearby”

    “Woodworking Classes Near Me: Explore the Craft Nearby”

    Are you intrigued by the idea of creating beautiful wooden crafts but unsure where to start? Woodworking classes near me could be the perfect solution to kickstart your journey into the world of woodworking. Whether you’re a complete novice or looking to refine your skills, local woodworking classes offer a hands-on learning experience right in your community.

    For your “Free” 2 in 1 Folding Picnic Table Bench Plan – Click Here.

    Understanding Woodworking Classes

    Woodworking classes provide a structured environment where participants can learn and practice essential woodworking techniques under the guidance of experienced instructors. These classes cater to various skill levels, from beginners to advanced craftsmen, ensuring that everyone can find a suitable course.

    Benefits of Enrolling in Woodworking Classes Near Me

    When searching for woodworking classes near me, you’ll discover a range of benefits that make these courses appealing:

    1. Hands-On Learning Opportunities: Unlike online tutorials, woodworking classes offer hands-on experience with tools and materials, allowing you to learn and practice in a real workshop environment.
    2. Guidance from Experienced Instructors: Local woodworking instructors bring years of expertise and knowledge, providing valuable guidance and personalized feedback to help you improve your skills effectively.

    Types of Woodworking Classes Near Me on Offer

    Depending on your interests and skill level, you can choose from various types of woodworking classes available near you:

    • Introductory Woodworking Classes: Perfect for beginners, these classes cover basic techniques such as measuring, cutting, and joining wood.
    • Advanced Woodworking Techniques: For seasoned woodworkers looking to refine their skills, advanced classes delve into intricate joinery, carving, and finishing techniques.

    Finding the Right Woodworking Class Near Me

    Choosing the right woodworking class involves considering several factors to ensure it meets your needs and preferences:

    • Location and Accessibility: Opt for classes conveniently located near your home or workplace to minimize travel time and maximize your learning experience.
    • Class Size and Environment: Smaller class sizes often mean more personalized attention from instructors, while the workshop environment should be well-equipped and conducive to learning.

    Costs and Budgeting

    Before enrolling, it’s essential to understand the cost structure of classes near you:

    • Tuition Fees: These can vary depending on the duration and intensity of the course, with some classes offering payment plans or discounts for early registration.
    • Additional Materials: Factor in costs for wood, tools, and safety gear required for the classes, as these may not always be included in the tuition fees.

    What to Expect in Your First Woodworking Class

    Stepping into your first woodworking class can be both exciting and nerve-wracking. Here’s a glimpse of what you can expect:

    • Introduction to Tools: Familiarize yourself with essential woodworking tools such as saws, chisels, and planes under the supervision of your instructor.
    • Basic Techniques Demonstration: Learn foundational techniques like measuring, marking, and cutting wood accurately to lay the groundwork for your projects.

    Advancing Your Skills Beyond the Basics

    As you progress through classes, you’ll have the opportunity to expand your skill set and tackle more challenging projects:

    • Intermediate Projects: Build confidence by crafting furniture pieces or small woodworking projects that apply the techniques you’ve learned.
    • Specialized Workshops: Explore niche areas such as woodturning, cabinet making, or sculptural woodworking through specialized workshops offered by local artisans.

    For your “Free” Outdoor Projects Plan – Click Here.

    Networking and Community Engagement

    Beyond learning woodworking skills, classes near you provide an opportunity to connect with like-minded individuals and build a supportive community:

    • Collaborative Projects: Engage in group projects or collaborative efforts that foster creativity and camaraderie among participants.

    Finding the Best Woodworking Classes Near Me: Tips and Tricks

    Here are some practical tips for finding the best woodworking classes in your area:

    • Research Online: Use search engines and local directories to find woodworking classes near you. Websites like Meetup or local community center websites often list upcoming classes.
    • Ask for Recommendations: Reach out to friends, family, or colleagues who may have taken woodworking classes locally. Personal recommendations can provide valuable insights.
    • Visit Woodworking Supply Stores: Local woodworking supply stores often have bulletin boards or information about upcoming classes and workshops.

    Benefits of Joining a Woodworking Community

    Joining a woodworking community through local classes offers numerous advantages:

    • Shared Knowledge and Tips: Learn from fellow enthusiasts who share their experiences and tips for improving woodworking techniques.
    • Access to Resources: Gain access to a wider range of tools, materials, and resources through community workshops and shared spaces.

    The Importance of Safety in Woodworking

    Safety should always be a priority in woodworking classes. Before starting any project, ensure you:

    • Understand Tool Safety: Familiarize yourself with the proper use and maintenance of all tools and equipment.
    • Wear Protective Gear: Use safety glasses, ear protection, and dust masks as necessary to protect yourself from potential hazards.

    Taking Your Woodworking Skills to the Next Level

    Once you’ve mastered the basics, consider these steps to further develop your woodworking skills:

    • Advanced Courses: Take advanced courses to learn specialized techniques such as marquetry, veneering, or advanced joinery methods.
    • Attend Workshops and Seminars: Participate in workshops and seminars hosted by renowned woodworkers or industry experts to gain new insights and inspiration.

    Exploring Woodworking as a Career or Business

    If you’re passionate about woodworking, you may consider turning it into a career or business opportunity:

    • Starting a Woodworking Business: Learn about entrepreneurship in woodworking, including market research, pricing strategies, and building a client base.
    • Online Selling Platforms: Explore platforms like Etsy or local craft fairs to showcase and sell your handmade woodworking creations.

    For your “Free”Guide to 13 Wood Joinery Types – Click Here.

    FAQs (Frequently Asked Questions)

    1. How do I find woodworking classes near me?

    • Start by searching online, checking community center bulletin boards, or asking local woodworking supply stores for recommendations.

    2. What should I bring to my first woodworking class?

    • Basic tools like a tape measure, pencil, safety glasses, and comfortable work clothes are often recommended. Check with your instructor for specific requirements.

    3. Can I join woodworking classes if I have no prior experience?

    • Absolutely! Many classes cater to beginners and provide foundational training to help you get started.

    4. Are woodworking classes expensive?

    • Costs vary, but there are often options to fit different budgets, including introductory courses and community center workshops.

    5. How can woodworking classes benefit me beyond learning a new skill?

    • Woodworking promotes problem-solving, enhances creativity, and offers a fulfilling hobby that can lead to practical and artistic accomplishments.

    Conclusion

    Exploring woodworking classes near me opens doors to a rewarding journey of craftsmanship and creativity. Whether you’re interested in crafting furniture, decorative items, or simply honing your DIY skills, these classes provide the guidance and resources you need to succeed. Embrace the opportunity to learn, connect with fellow enthusiasts, and unleash your woodworking potential right in your local community.

  • Woodworking Memes: Crafting Humor in the Workshop

    Woodworking Memes: Crafting Humor in the Workshop

    Woodworking is a timeless craft that blends precision, creativity, and patience. But like any craft, it comes with its own set of quirks and challenges. This is where woodworking memes come into play. They bring a dash of humor to the sawdust-filled days of carpenters and woodworkers worldwide. In this article, we’ll dive into the world of memes, exploring their origins, why they resonate so well with woodworkers, and even sharing some of the most hilarious examples out there. So, grab your favorite chisel, sit back, and let’s carve out some laughs together.

    For your “Free” 2 in 1 Folding Picnic Table Bench Plan – Click Here.

    Table of Contents

    1. What Are Woodworking Memes?
    2. The Origins of Woodworking Memes
    3. Why Woodworking Memes Are So Popular
    4. Memes vs. Reality: The Everyday Struggles of Woodworkers
    5. The Most Common Themes in Woodworking Memes
    6. Hilarious Woodworking Memes That Will Make You Laugh
    7. Woodworking Memes and Social Media
    8. Creating Your Own Woodworking Memes
    9. The Impact of Memes on the Woodworking Community
    10. Woodworking Memes: A Therapeutic Tool?
    11. Memes That Highlight Woodworking Safety
    12. How to Use Woodworking Memes in Your Shop
    13. The Future of Woodworking Memes
    14. Summary
    15. FAQs

    What Are Woodworking Memes?

    Memes are humorous images, videos, or text that poke fun at the various aspects of woodworking. These memes often highlight the funny side of the woodworking experience, from the frustrations of measuring mistakes to the joy of finishing a project. They are shared widely across social media platforms, woodworking forums, and among friends in the community. The key to a good woodworking meme is its relatability—capturing the shared experiences of woodworkers in a way that makes them laugh.

    The Origins of Woodworking Memes

    The origins of memes can be traced back to the early days of the internet, where niche communities began to share inside jokes and humorous observations about their crafts. As social media grew, so did the reach of these memes. Platforms like Facebook, Instagram, and Reddit became breeding grounds for creative, humorous content. Woodworking memes emerged as a way for craftsmen and hobbyists to connect over shared experiences and laugh at the lighter side of their work.

    Why Woodworking Memes Are So Popular

    Why are memes so popular? It’s simple—they speak to the heart of every woodworker. Whether you’re a seasoned carpenter or a weekend hobbyist, the struggles and triumphs depicted in these memes are universally understood. They provide a sense of community and camaraderie, reminding woodworkers that they are not alone in their challenges. Plus, who doesn’t love a good laugh after a long day in the shop?

    Memes vs. Reality: The Everyday Struggles of Woodworkers

    One of the reasons memes resonate so deeply is because they often depict the real-life struggles of woodworkers. Whether it’s the frustration of a project not going as planned or the satisfaction of a perfectly executed joint, these memes capture the highs and lows of the craft. For instance, a meme showing a “measure twice, cut once” mishap can be both humorous and painfully relatable to anyone who has made that mistake.

    The Most Common Themes in Woodworking Memes

    Woodworking memes cover a wide range of themes, each highlighting different aspects of the craft. Some of the most common themes include:

    1. Measuring Mistakes: Jokes about inaccurate measurements are a staple in woodworking memes.
    2. Tool Addiction: Many memes play on the woodworker’s love for acquiring new tools.
    3. Project Disasters: These memes highlight the moments when projects don’t go as planned.
    4. Wood Selection: Humorous takes on the importance of choosing the right type of wood.
    5. Shop Safety: Light-hearted reminders about the importance of safety in the workshop.

    Hilarious Woodworking Memes That Will Make You Laugh

    Here are some classic examples of memes that will bring a smile to your face:

    • A picture of a perfectly organized tool wall with the caption, “If only my projects were as organized as my tools.”
    • An image of a woodworker covered in sawdust with the text, “Saw dust is man glitter.”
    • A meme showing a piece of wood split in half with the caption, “When you try to save a bad cut with glue.”

    Memes and Social Media

    Social media has played a significant role in the spread of memes. Platforms like Instagram and Facebook allow woodworkers to share their favorite memes with a wide audience. Hashtags like #woodworkingmemes and #woodworkerhumor help enthusiasts find and connect with content that resonates with them. These platforms have also enabled woodworkers to create and share their own memes, adding to the growing library of humorous content.

    For your “Free” Outdoor Projects Plan – Click Here.

    Creating Your Own Memes

    Creating your own memes based on woodworking is a fun and creative way to engage with the community. To get started, think about the common experiences and frustrations you face in your woodworking projects. Use a meme generator tool to pair your observations with humorous images. Share your creations on social media and see how many fellow woodworkers relate to your humor. Remember, the best memes are those that are authentic and relatable.

    The Impact of Memes on the Woodworking Community

    Memes have a positive impact on the community. They provide a way for woodworkers to bond over shared experiences and find humor in their daily challenges. Memes can also be educational, offering tips and reminders in a light-hearted way. Overall, they contribute to a sense of camaraderie and support within the woodworking community.

    Memes: A Therapeutic Tool?

    Believe it or not, memes can be therapeutic. Laughter is a great stress reliever, and finding humor in your work can help you maintain a positive attitude. Memes provide a way to vent frustrations and share them with others who understand, making the challenges of woodworking a little more manageable.

    Memes That Highlight Safety

    Safety is paramount in woodworking, and memes can play a role in promoting safe practices. Memes that highlight the importance of wearing safety gear, keeping your workspace clean, and using tools correctly can be both funny and educational. For example, a meme showing a woodworker wearing every piece of safety gear imaginable with the caption, “Better safe than sorry,” can serve as a humorous reminder to prioritize safety.

    How to Use Memes in Your Shop

    Integrating memes into your shop can be a great way to boost morale and keep things light-hearted. Consider posting some of your favorite memes on a bulletin board or sharing them during breaks. You can also use memes as a fun way to kick off a safety meeting or team-building session. The goal is to create a positive and enjoyable environment where everyone can laugh and learn together.

    The Future of Memes

    The future of memes looks bright. As the woodworking community continues to grow online, so will the creation and sharing of memes. New trends and themes will emerge, reflecting the evolving experiences of woodworkers. Whether it’s through new social media platforms or innovative meme formats, woodworking humor will continue to bring joy and laughter to the craft.

    Summary

    Memes are more than just a source of humor—they are a reflection of the shared experiences and challenges faced by woodworkers everywhere. From measuring mishaps to tool addiction, these memes capture the essence of the craft in a way that is both relatable and entertaining. As the woodworking community grows, so does the library of hilarious and insightful memes that bring us all together. So next time you’re in the shop, take a moment to enjoy a good laugh with a woodworking meme.

    For your “Free” Workspace Plans – Click Here.

    FAQs

    1. What are memes?

    Memes are humorous images, videos, or text that highlight the funny aspects of woodworking. They often depict common experiences and frustrations faced by woodworkers in a relatable and entertaining way.

    2. Why are memes popular?

    Memes are popular because they resonate with woodworkers’ shared experiences. They provide a sense of community and camaraderie, making people feel understood and less alone in their challenges.

    3. How can I create my own memes?

    To create your own memes, think about common woodworking experiences and pair them with humorous images using a meme generator tool. Share your creations on social media to connect with other woodworkers.

    4. Can memes be educational?

    Yes, memes can be educational. They often contain tips and reminders about safety practices and techniques in a light-hearted and memorable way.

    5. How can I use memes in my shop?

    You can use memes in your shop to boost morale and create a positive environment. Post them on a bulletin board, share them during breaks, or use them to kick off safety meetings or team-building sessions.