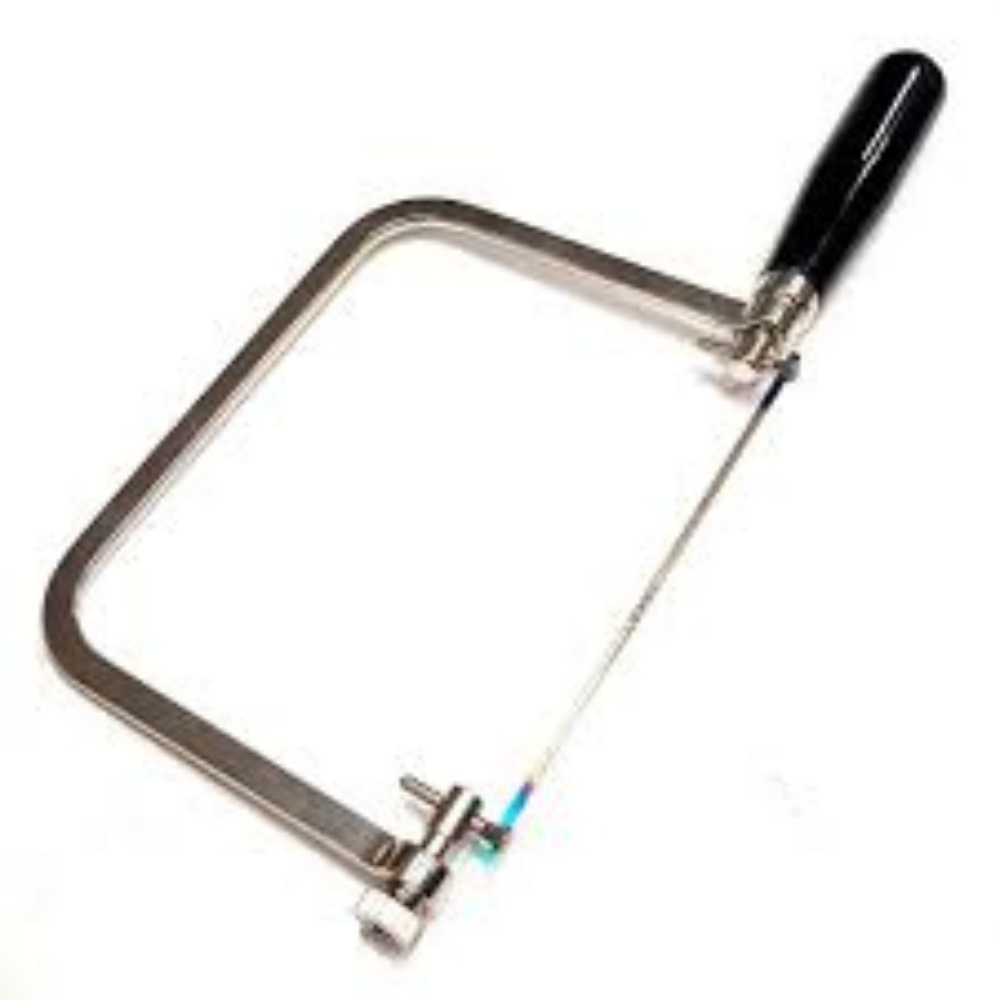
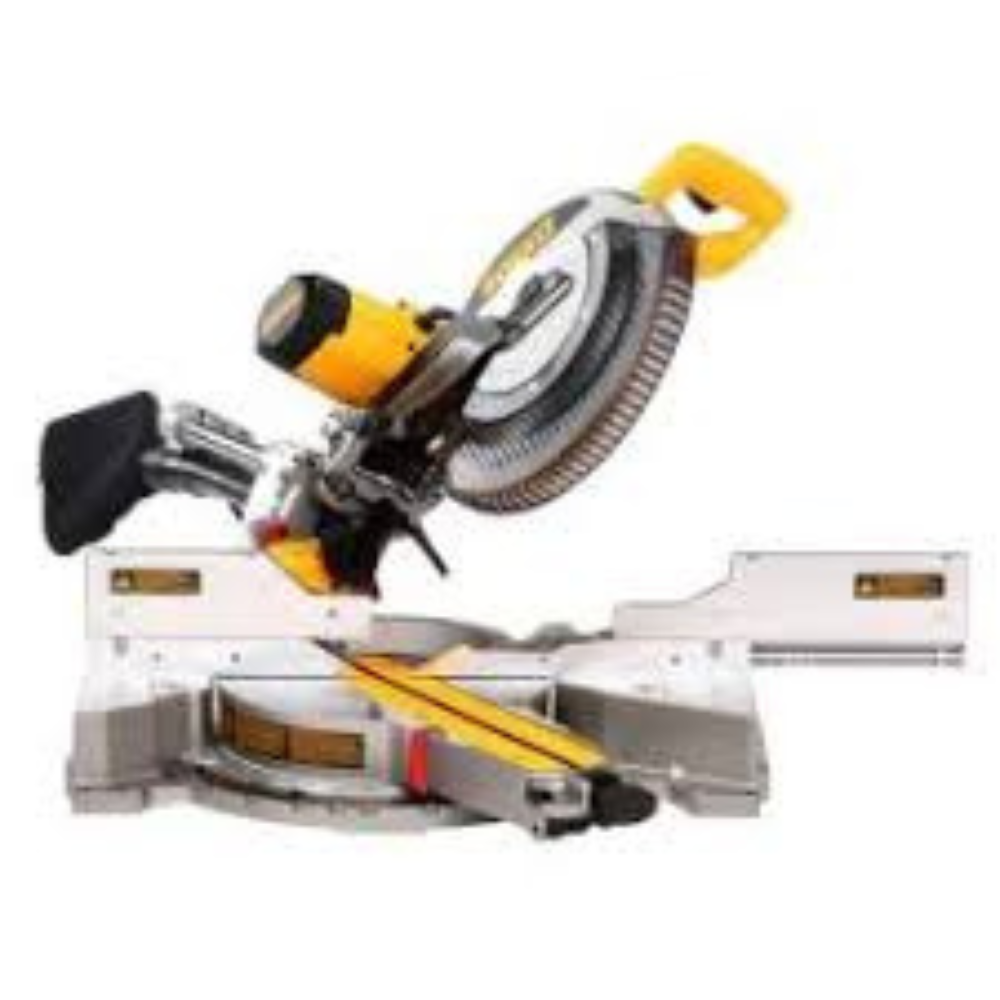
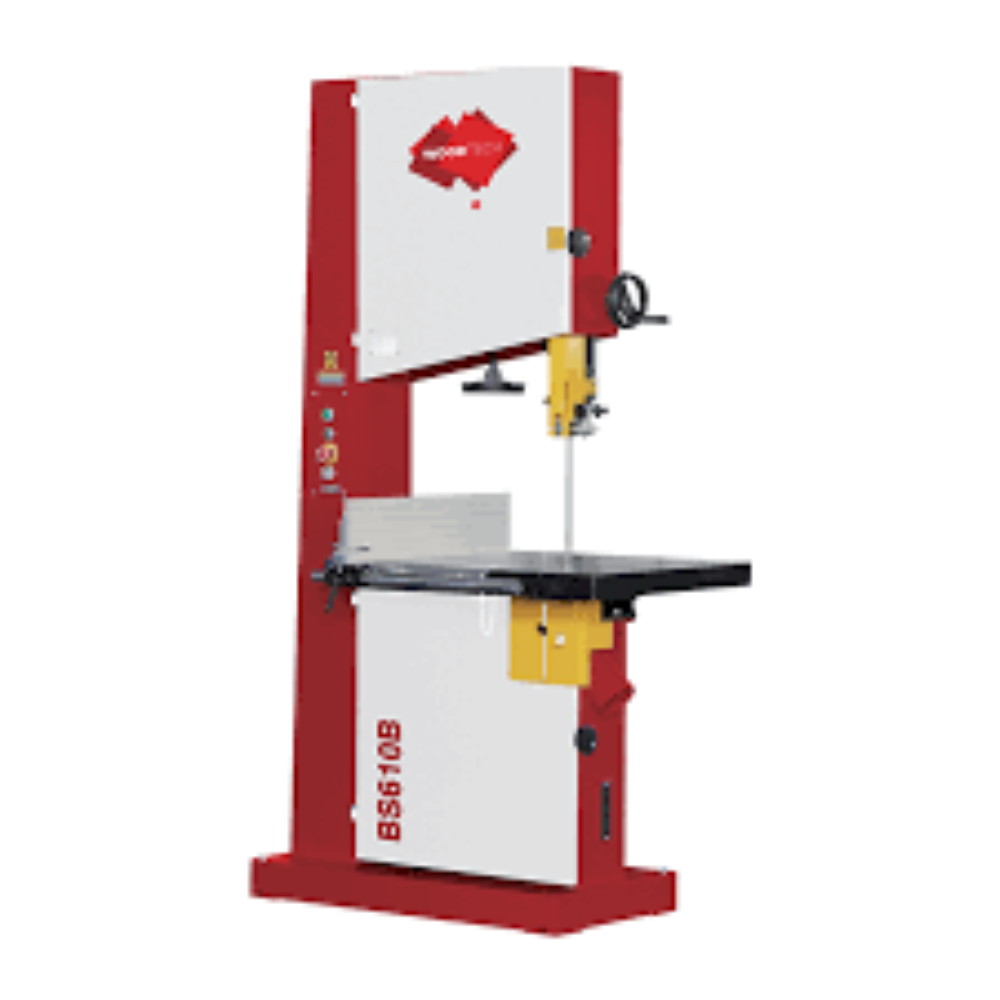
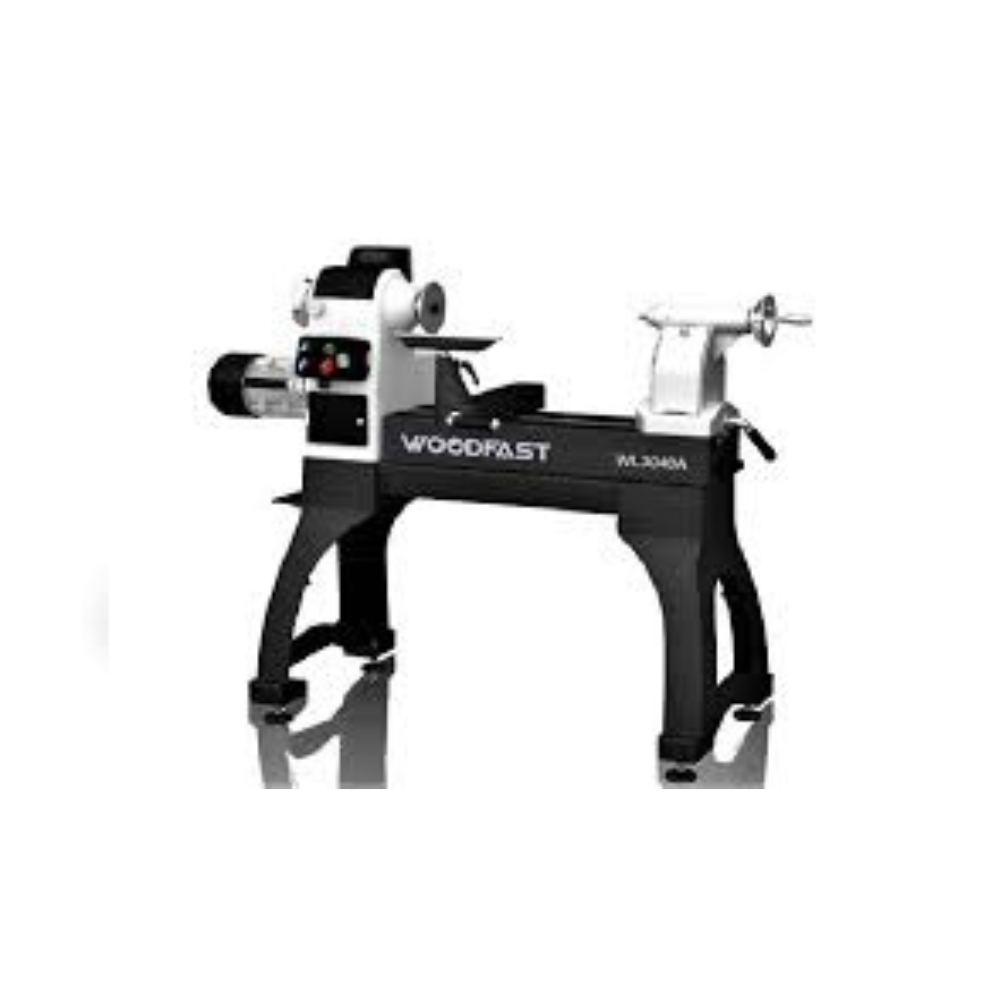
Category: Woodwork Tools

Where Do Woodwork Tools Fit in Your Crafting Journey?

Imagine each tool in your workshop as an extension of your creative spirit. With every stroke, cut, and carve, these tools help you shape raw wood into something extraordinary. Think about the endless possibilities—the countless functional and beautiful wooden pieces you could craft with the right tools. It’s a lot, isn’t it? That’s where this guide comes in. We’re here to help you navigate the world of woodwork tools, ensuring you’re not just equipped but also inspired and ready to take on any project.

What Are Essential Woodwork Tools?

Ever asked yourself, “What tools do I really need for woodworking?” Whether you’re just getting started or have years of experience under your belt, woodwork tools are your primary means of transforming ideas into reality. These tools, ranging from simple hand tools like chisels and hammers to advanced machinery like table saws and routers, are indispensable in shaping, joining, and finishing wooden objects. They’re the key to turning your creative visions into tangible projects.

Why Should You Care About the Right Tools?

Because the right tools make all the difference. Understanding what each tool does and how to use it effectively gives you the confidence to tackle any woodworking challenge. It’s not just about owning a tool; it’s about knowing how to wield it to its full potential. The satisfaction that comes from creating something with your hands—whether it’s a simple DIY project or a complex professional build—is immeasurable when you have the right tools in your arsenal.

Choosing the Right Tools for Every Skill Level

It’s important to remember that the best tools aren’t necessarily the most expensive ones. The right tools for your projects depend on your skill level and the complexity of what you’re trying to achieve. Whether you’re a beginner looking for basic tools to get started or an experienced woodworker seeking professional-grade equipment, making informed decisions about your tools can dramatically enhance your crafting experience.

Ready to Learn More?

If you’re eager to expand your knowledge and refine your tool collection, you’re in the right place. Explore our related posts below to discover more about selecting the perfect tools for your woodworking needs. Every click is a step closer to mastering the craft, empowering you to create with confidence.

  • Router for Carpentry: The Essential Tool for Woodworking Precision

    Router for Carpentry: The Essential Tool for Woodworking Precision

    When I first ventured into woodworking, I had no idea how essential a router for carpentry would become in my toolkit. It wasn’t just another tool on the shelf; it turned out to be the key to unlocking the kind of detail and precision that separates amateur projects from professional-quality work. I can’t tell you how many times I’ve reached for my router, whether I’m shaping a piece of furniture or adding delicate trim to a cabinet. It’s truly one of the most versatile tools I’ve ever owned, and once you get the hang of it, there’s no turning back.

    In this article, I want to take you through everything I’ve learned about using a router for carpentry. From picking the right one to mastering various techniques, this guide is filled with tips and insights based on years of personal experience. Whether you’re just starting out or looking to refine your skills, I hope you’ll find something useful here.

    1. Introduction to Routers for Carpentry

    So, let me ask you: have you ever worked on a project where the edges weren’t quite perfect, or the joints didn’t line up as seamlessly as you’d hoped? That’s where a router for carpentry can make all the difference. A router is like the Swiss Army knife of woodworking—it can shape, carve, hollow out, and create beautiful details that are almost impossible to achieve with hand tools alone. Once you’ve used one, you’ll wonder how you ever managed without it.

    I remember the first time I used a router. It felt a little intimidating at first, but once I got comfortable, it opened up a world of possibilities. Whether you’re building furniture, making cabinets, or just adding some decorative touches to your work, a router is the tool that helps you get that professional finish.

    2. The Basics: What Exactly is a Router for Carpentry?

    To put it simply, a router for carpentry is a power tool that spins a bit at high speed to cut, shape, or hollow out wood. You can change the bit depending on what kind of cut you need, and there’s a wide variety to choose from. Whether you want to smooth out edges, cut grooves, or add decorative patterns, there’s a bit for every job.

    I think of a router as my sculpting tool. It’s the one I reach for when I need precision and detail. Imagine trying to carve intricate edges or hollow out grooves by hand—it would take forever, and the results wouldn’t be nearly as clean. With a router, it’s like having a magic wand that brings your woodworking visions to life.

    3. Types of Routers for Carpentry

    There are a few different types of routers out there, and choosing the right one depends on the kind of work you plan to do. Here’s a breakdown of the main types I’ve worked with:

    Plunge Router for Carpentry

    The plunge router is my go-to when I need to start cutting in the middle of a piece of wood. Unlike other routers that require you to start at the edge, a plunge router lets you lower the bit straight into the wood. It’s perfect for making mortises, grooves, or even creating unique designs. When I’m working on a project that requires me to adjust the depth of the cut mid-way, this is the tool I trust.

    Fixed-Base Router for Carpentry

    I’ve also spent a lot of time using a fixed-base router, especially when I need consistency. With this type of router, the depth of the bit stays fixed, which makes it ideal for edge work or projects where I need the same depth throughout. It’s a bit simpler to use, and if you’re just starting out, I’d recommend getting comfortable with a fixed-base router first. You’ll find it predictable and easier to control.

    Trim Router for Carpentry

    For those finer, more delicate jobs, I always turn to my trim router. This smaller, more compact tool is perfect for tasks like trimming laminate or adding intricate edges to a project. It’s not as powerful as the larger routers, but what it lacks in size, it makes up for in precision. If you’ve ever worked on detailed trim or finishing, you’ll appreciate how nimble this little router can be.

    4. How I Chose My First Router for Carpentry

    I remember standing in front of a shelf of routers, completely overwhelmed by the options. If you’re in that boat right now, let me help you out with a few things I’ve learned along the way about picking the right router for carpentry:

    Power

    The first thing I looked at was power. I wanted something strong enough to handle harder woods, so I went with a router that had at least 2 horsepower (HP). If you’re working with lighter materials, you might not need as much power, but for dense woods, I found that extra oomph really makes a difference.

    Variable Speed

    The next feature I looked for was variable speed. Not every wood needs the same speed setting, and having the ability to dial it up or down has been incredibly useful. For softer woods, a slower speed works great, while harder woods need a faster rotation to cut cleanly. If you plan to work with a variety of materials like I do, variable speed is a must.

    Comfort

    Don’t underestimate how important it is for the router to feel good in your hands. You’re going to be holding onto it for long periods, so I made sure to pick one with an ergonomic design. The router should feel balanced and easy to control. I found that having a good grip can mean the difference between a smooth cut and a shaky line.

    5. My Favorite Router Bits for Carpentry

    Ah, router bits—this is where the magic really happens. Think of router bits as the different brushes in a painter’s toolkit. Each one has a different purpose and helps you achieve a specific effect. Here are the bits I keep on hand and use the most:

    Straight Bit

    This is the bread and butter of routing. I use a straight bit for cutting grooves, hollowing out areas, and making dados. It’s probably the most versatile bit, and I can’t imagine not having it in my arsenal.

    Flush-Trim Bit

    When I need to trim the edges of a laminate or make two surfaces perfectly even, the flush-trim bit is my go-to. It’s one of those bits that I didn’t think I’d need until I started working with materials like plywood or laminates, and now I can’t do without it.

    Chamfer Bit

    If you’re like me and love adding clean, angled edges to your projects, the chamfer bit will be your best friend. I use it all the time to give my work a crisp, professional finish, whether it’s on a tabletop or the edges of a cabinet door.

    Round-Over Bit

    There’s something about rounded edges that just feels right, isn’t there? I use a round-over bit whenever I want to soften sharp corners on a piece of furniture. It adds a nice, smooth touch that makes everything feel polished and safe—especially important if you have kids running around.

    6. Learning Router Techniques: What Worked for Me

    One of the things I love about using a router for carpentry is how many techniques you can master over time. When I first started, I was focused on the basics, but as I got more comfortable, I began experimenting with different methods. Here are a few techniques that have become staples in my workshop:

    Edge Routing

    This was probably the first thing I mastered with my router, and I recommend starting here. Edge routing is when you run the router along the edge of a board to create a decorative profile. It’s a simple technique, but it can transform a plain piece of wood into something elegant and detailed. I use it all the time for tabletops, shelving, and moldings.

    Template Routing

    If you need to replicate a shape multiple times, template routing is a lifesaver. I’ve used this technique for making identical cabinet doors or shaping furniture legs. All you have to do is create a template of the shape you want, and then use the router to follow the pattern. It’s accurate and saves you a ton of time.

    Joinery

    One of the reasons I fell in love with my router was because of how easy it makes joinery. Whether I’m making dovetails, dadoes, or rabbets, the router gives me the precision I need to create tight, professional-looking joints. No more wobbly drawer boxes or uneven shelves!

    7. Why I Believe Every Workshop Needs a Router for Carpentry

    If there’s one tool I can’t live without, it’s my router for carpentry. The versatility it offers is unmatched. It’s not just about cutting wood; it’s about opening up creative possibilities. From simple edge profiling to complex joinery, there’s so much you can do with a router that it feels like an extension of my hands. I honestly believe that every woodworker, whether a beginner or a pro, should invest in a router—it’ll change the way you approach your projects.

    8. Router Safety: What I Do to Stay Safe

    I’ll admit, when I first started using a router, the speed and power of the tool were a little intimidating. Over time, I’ve developed a few safety habits that keep me safe while using my router, and I’d love to share them with you:

    • Protective Gear: I never start a routing project without my safety glasses and ear protection. Routers can throw up a lot of sawdust, and the noise can be deafening after a while.
    • Keep Hands Clear: This might sound obvious, but always keep your hands away from the spinning bit. I’ve found that using push blocks and jigs helps keep my hands out of harm’s way.
    • Go Slow: One mistake I made early on was trying to rush through a cut. Big mistake! Going slow and steady not only gives you a cleaner cut but also reduces the chances of accidents.

    Conclusion: Why the Router is My Carpentry MVP

    In all my years of woodworking, the router for carpentry has remained my most trusted and versatile tool. It’s helped me create beautiful, professional-grade work that I’m proud to show off. Whether you’re just getting started or looking to take your skills to the next level, I can’t recommend investing in a router enough. It’s a tool that truly grows with you, and the more you use it, the more possibilities you’ll uncover.

    So go ahead—grab a router, experiment, and see where it takes you. I guarantee it’ll become one of your favorite tools in no time.

    FAQs About Router for Carpentry

    1. How do I prevent tear-out when using a router for carpentry? Preventing tear-out is all about grain direction. Always route with the grain, and if you’re working on end grain, take shallow passes. Using a sharp bit helps too!

    2. What’s the best type of wood to use with a router? Most woods work well with a router, but hardwoods like oak and maple tend to give cleaner cuts. Softer woods can sometimes splinter, so I recommend using sharp bits and slower speeds when working with pine or poplar.

    3. Can I use a router for carpentry on MDF or plywood? Absolutely! I often use a router on MDF and plywood, especially for cabinetry. Just be sure to use the right bits and speeds to avoid chipping or tear-out.

    4. Should I get a plunge router or a fixed-base router? Both are great, but if you’re just starting out, I’d recommend a fixed-base router. It’s easier to control, and you can always add a plunge base later once you’re more comfortable.

    5. How do I know when it’s time to replace my router bits? You’ll know it’s time when your cuts start to look rough or you feel more resistance during routing. Dull bits strain your router and can leave burn marks on your wood. Keep an eye on the quality of your cuts!

  • Top 3 “Best Woodwork Moisture Meters” for 2024.

    Top 3 “Best Woodwork Moisture Meters” for 2024.

    1. Wagner Meters Orion 950

    The Wagner Meters Orion 950 stands out in 2024 as one of the most advanced wood moisture meters available on the market. Its pinless technology allows for non-invasive testing, which is particularly valuable for high-quality woodworking projects where maintaining the integrity of the surface is crucial. The meter provides accurate readings without the need for pins, making it ideal for fine furniture, flooring, and other woodworking projects that demand precision.

    The Orion 950’s deep reading capability of up to 1.5 inches ensures that you can assess moisture content not only on the surface but also within the wood’s core, which is critical for understanding how wood will behave over time. Additionally, its Bluetooth connectivity is a significant advancement, allowing users to log data directly to their mobile devices, making tracking and analyzing moisture levels easier and more efficient.

    Another noteworthy feature is the on-site calibration check block, which helps users verify the meter’s accuracy at any time, ensuring consistent results over the meter’s lifetime. This is particularly useful for professionals who rely on precise measurements for their work. The Orion 950’s robust build and comprehensive feature set make it a top choice for professional woodworkers and inspectors in 2024.

    Pros:

    • Pinless Technology: Non-invasive, no damage to wood surfaces.
    • Deep Reading Capability: Measures up to 1.5 inches into the wood.
    • Bluetooth Connectivity: Easy data logging and analysis on mobile devices.
    • Calibration Check Block: Ensures long-term accuracy and reliability.
    • Build Quality: Durable and well-designed for professional use.

    Cons:

    • Price: Higher cost compared to other models, which might be prohibitive for hobbyists.
    • Learning Curve: Advanced features may require some time to master.

    Specifications:

    • Measurement Range: 4% to 32% moisture content
    • Accuracy: ±0.1%
    • Measurement Depth: Up to 1.5 inches
    • Display Type: Digital with Bluetooth connectivity
    • Battery Type: 2 AA batteries
    • Warranty: 7-year warranty
    • Weight: 8.9 ounces

    2. Delmhorst J-2000

    The Delmhorst J-2000 is a highly reliable pin-type wood moisture meter that has been a favorite among woodworkers for years. Its continued popularity in 2024 is due to its outstanding accuracy and the ability to adjust for different wood species, making it a versatile tool in any woodshop. The pin-type design, while leaving small holes in the wood, offers an unmatched level of precision in moisture content measurement, making it ideal for critical woodworking projects where exact moisture levels are crucial.

    This model is particularly valued for its adjustable digital readout, allowing users to input the specific gravity of the wood species they are working with, ensuring that the moisture readings are as accurate as possible. The Delmhorst J-2000 also comes with an electrode that can penetrate deeply into thick wood pieces, providing readings that reflect the moisture content throughout the wood, not just on the surface.

    The straightforward interface and robust construction of the J-2000 make it a dependable tool for both seasoned professionals and serious hobbyists. Its durability and precision, combined with a long history of reliability, solidify its place among the top wood moisture meters for 2024.

    Pros:

    • High Accuracy: Precise measurements, especially for critical woodworking projects.
    • Species Correction: Adjustable digital readout for different wood species.
    • Deep Penetration: Electrode for thorough moisture content readings.
    • Durability: Built to last, even in tough shop environments.

    Cons:

    • Pin-Type Design: Leaves small holes in the wood.
    • Limited Features: Lacks modern features like Bluetooth connectivity.

    Specifications:

    • Measurement Range: 6% to 40% moisture content
    • Accuracy: ±0.2%
    • Measurement Depth: Depends on electrode used
    • Display Type: Digital
    • Battery Type: 9V battery
    • Warranty: 3-year warranty
    • Weight: 10 ounces

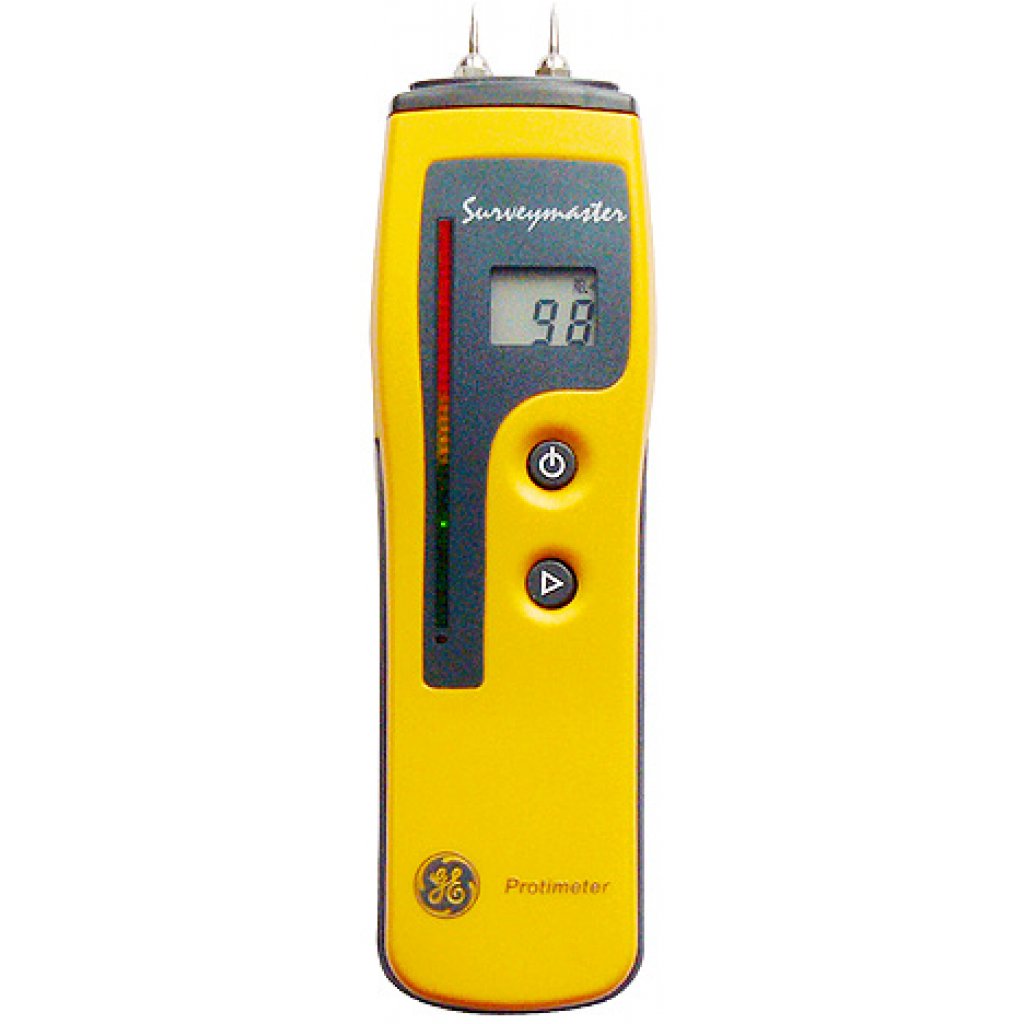
    3. Protimeter Surveymaster

    The Protimeter Surveymaster is a versatile and advanced dual-function moisture meter, combining both pin and pinless technology in one device. This flexibility makes it one of the top choices for woodworkers and inspectors in 2024, especially those who need a comprehensive tool capable of handling various scenarios. The dual functionality allows users to choose between invasive and non-invasive testing methods, depending on the situation and the importance of surface integrity.

    The Surveymaster’s intuitive display and auto shut-off feature make it user-friendly and convenient for everyday use. Its design is ergonomic and durable, capable of withstanding the rigors of frequent use in a professional setting. The pinless mode is perfect for quick scans to determine moisture distribution across a surface, while the pin mode provides precise measurements for deeper moisture content, which is essential for preventing future issues like warping or splitting in wood.

    What sets the Protimeter Surveymaster apart is its ability to handle a wide range of moisture content, making it suitable for both high and low moisture readings. This versatility, combined with its robust design and ease of use, makes it a standout choice for 2024.

    Pros:

    • Dual Functionality: Combines pin and pinless modes for versatile use.
    • Wide Measurement Range: Suitable for a broad spectrum of moisture content levels.
    • User-Friendly Design: Intuitive display and ergonomic design.
    • Durable: Built to withstand heavy use in professional settings.

    Cons:

    • Bulkier Design: Slightly larger and heavier than other models.
    • Cost: Higher price point, reflecting its advanced features.

    Specifications:

    • Measurement Range: 6% to 90% moisture content
    • Accuracy: ±0.5%
    • Measurement Depth: Varies between pin and pinless modes
    • Display Type: Digital
    • Battery Type: 9V battery
    • Warranty: 2-year warranty
    • Weight: 11 ounces

    Conclusion

    Each of these wood moisture meters offers distinct advantages depending on your needs:

    • Wagner Meters Orion 950: Best for professionals needing non-invasive testing with advanced features.
    • Delmhorst J-2000: Ideal for those who prioritize accuracy and species-specific adjustments.
    • Protimeter Surveymaster: Perfect for users who require the versatility of both pin and pinless modes in one device.

    These meters are among the best in 2024, combining durability, precision, and user-friendly features to meet the demands of woodworkers and inspectors alike.

  • Woodworking Square Guide: Precision Made Simple.

    Woodworking Square Guide: Precision Made Simple.

    Woodworking is a craft that requires precision, patience, and the right set of tools. Among the most critical tools in any woodworker’s arsenal is the woodworking square. This simple yet essential tool ensures that every cut, joint, and angle is perfectly aligned, which is crucial for creating high-quality, professional-looking projects. In this comprehensive guide, we’ll dive deep into the world of woodworking squares, exploring their history, types, uses, and how they contribute to achieving unmatched accuracy in woodworking.

    1. Introduction: What is a Woodworking Square?

    The woodworking square is a versatile tool that serves as a guide for ensuring accuracy in a variety of woodworking tasks. Whether you’re marking lines, checking angles, or aligning pieces, a woodworking square helps ensure that everything is straight and true. It’s the tool that turns rough wood into precise components for furniture, cabinets, and more. The importance of the woodworking square cannot be overstated—it is fundamental to producing high-quality work.

    2. The History and Evolution of the Woodworking Square

    The history of the woodworking square dates back centuries. Early civilizations, including the Egyptians and Romans, used rudimentary squares made from wood and metal to construct their monumental architecture. Over time, these tools evolved into the precise instruments we use today. Understanding this evolution helps us appreciate the precision and reliability of modern squares.

    Ancient squares were typically made from hardwoods like oak or mahogany, sometimes with brass reinforcements for added durability. These early tools were handcrafted, requiring significant skill to produce. As metalworking techniques advanced, squares began to be made from steel and other metals, offering greater durability and precision. Today, modern woodworking squares are produced with high levels of accuracy, often to within a fraction of a degree, making them indispensable in the woodworking trade.

    3. Types of Woodworking Squares

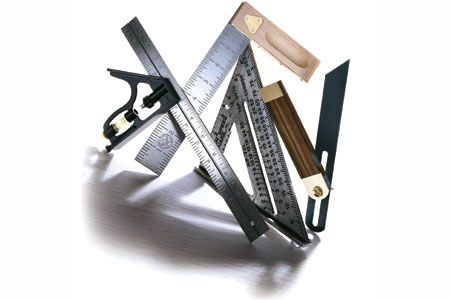
    There are several types of woodworking squares, each designed for specific tasks. Understanding the different types will help you choose the right one for your needs.

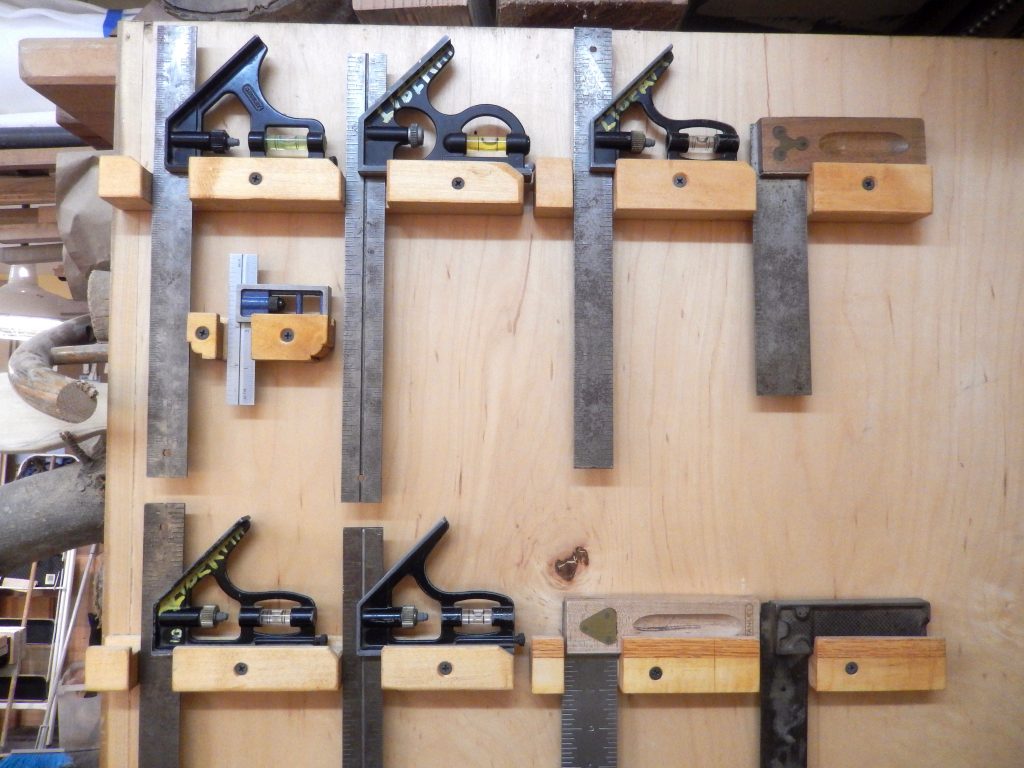
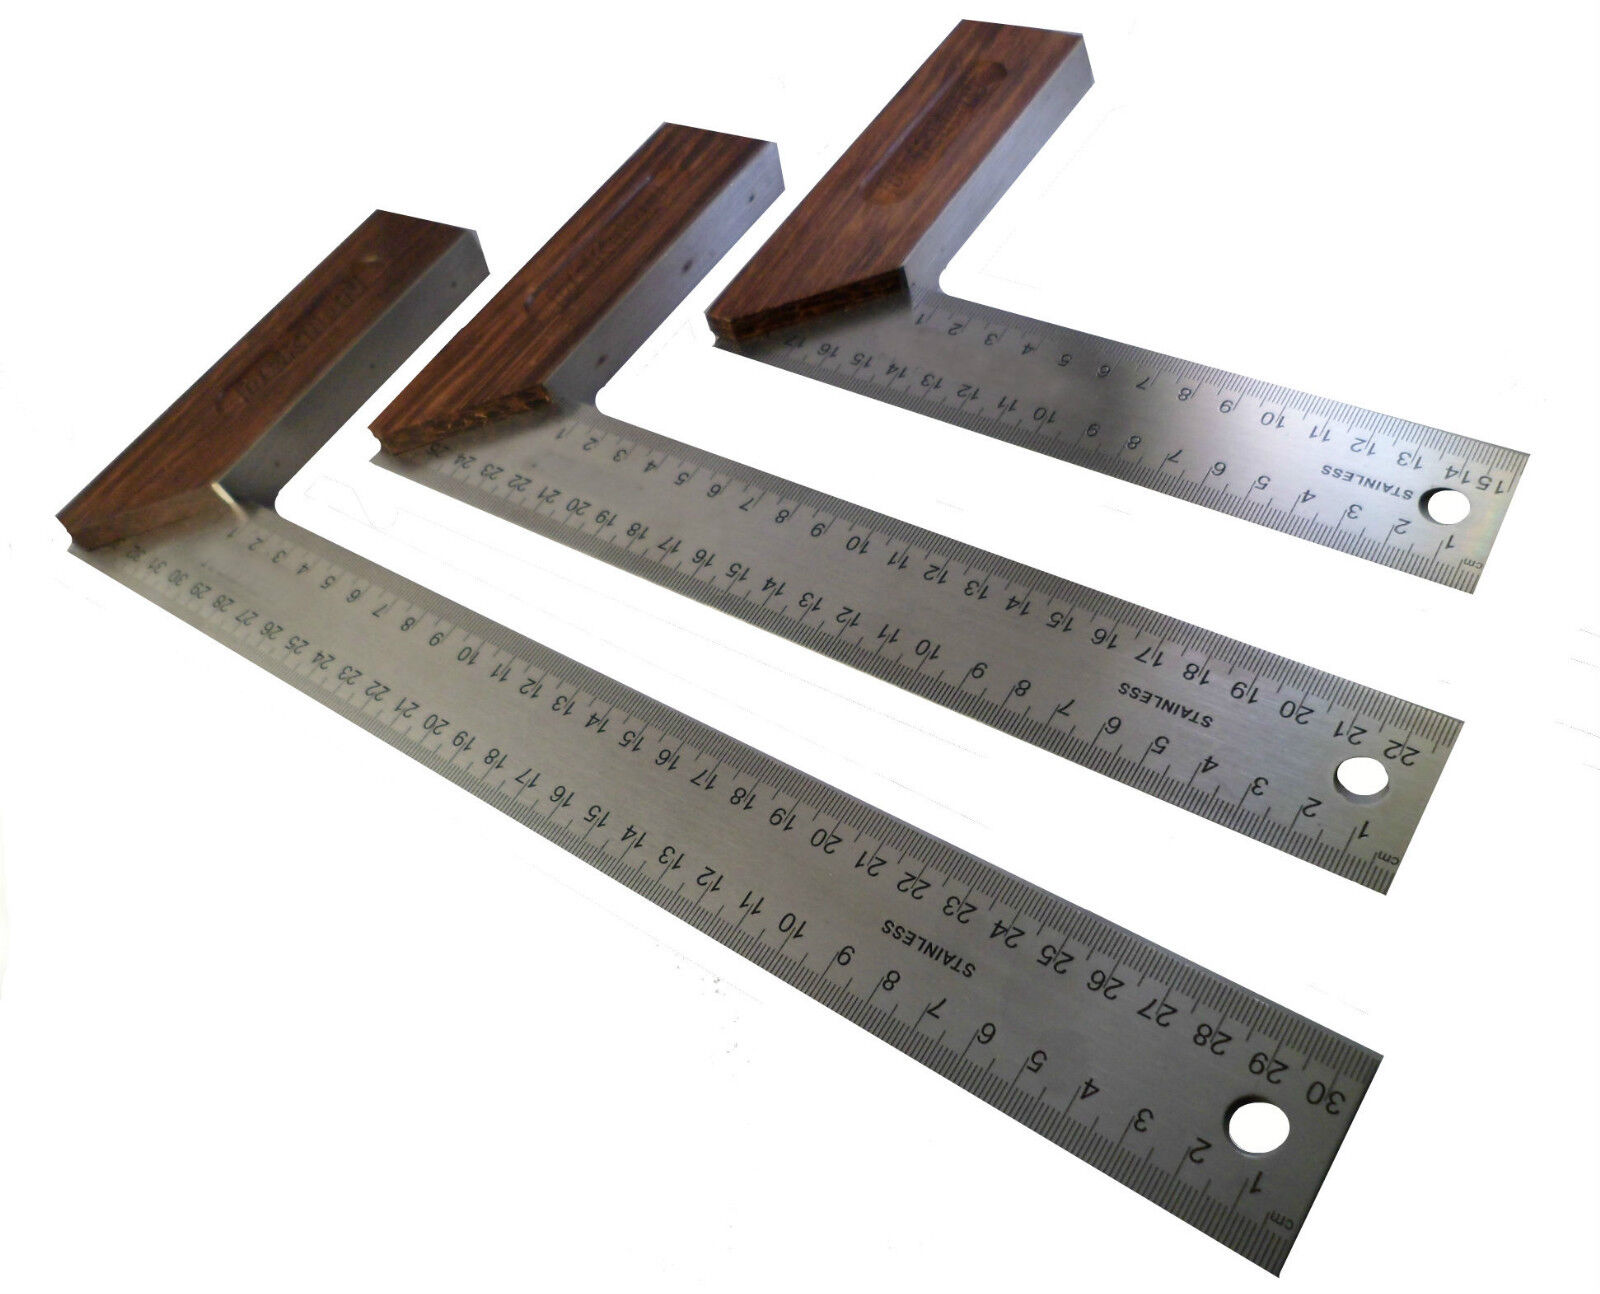
    • Try Square: The try square is perhaps the most commonly used type of woodworking square. It consists of a steel blade fixed at a 90-degree angle to a wooden or metal handle. It’s primarily used for checking and marking right angles. The try square is a simple tool but incredibly effective for ensuring that your cuts are perfectly square.
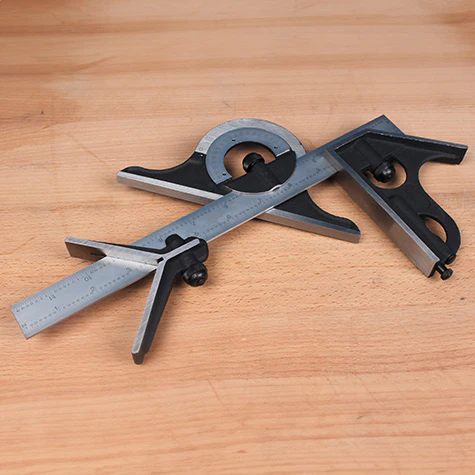
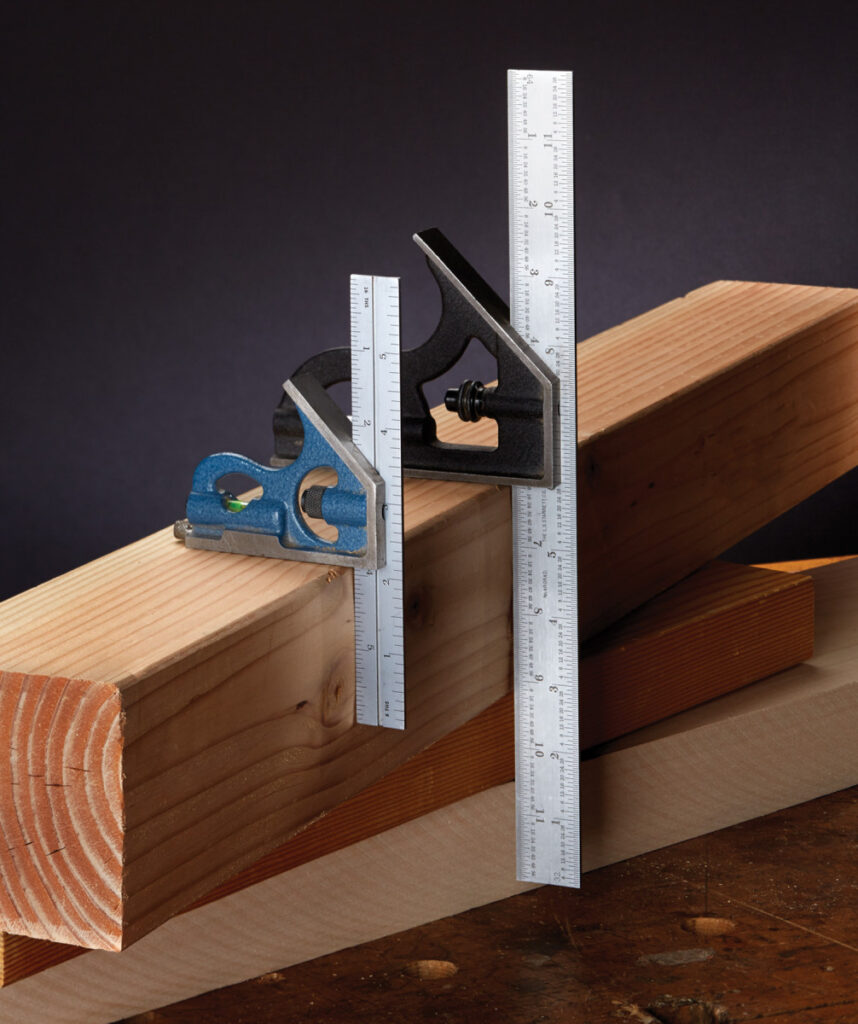
    • Combination Square: The combination square is a versatile tool that combines several functions into one. It typically includes a ruler, a 90-degree square, a 45-degree miter square, and a level. The ruler is adjustable, allowing you to measure different angles and depths with precision. This tool is especially useful for marking, measuring, and checking the accuracy of your work.
    • Framing Square: Also known as a carpenter’s square, the framing square is a large, L-shaped tool used for measuring and marking large pieces of wood, such as those used in framing houses. It’s essential for ensuring that large structures are square and true.
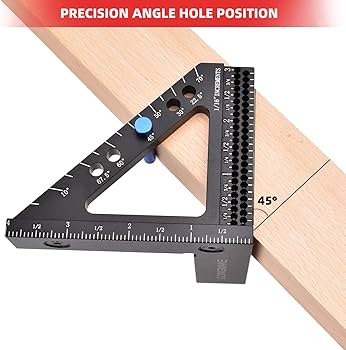
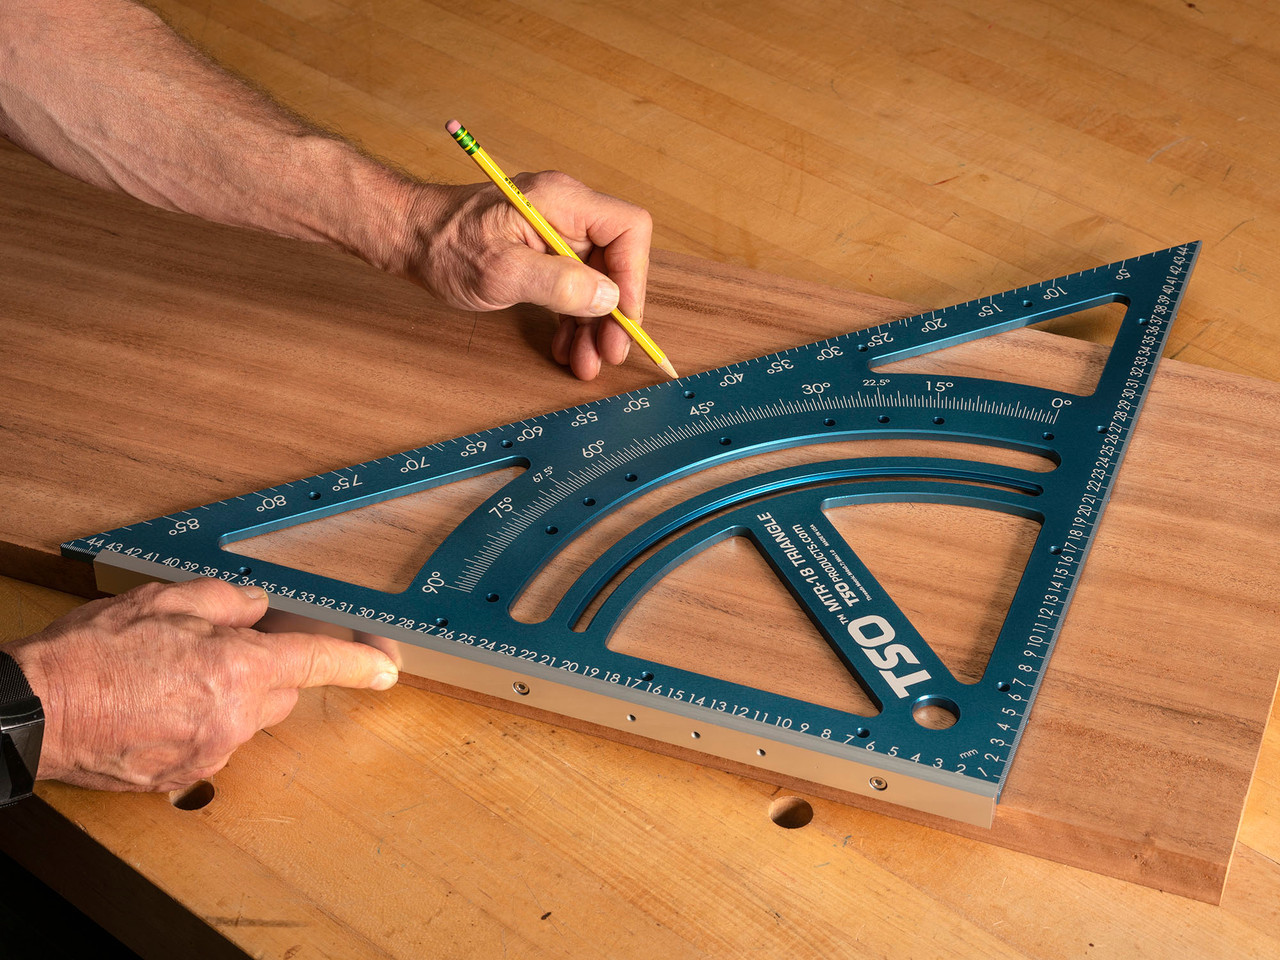
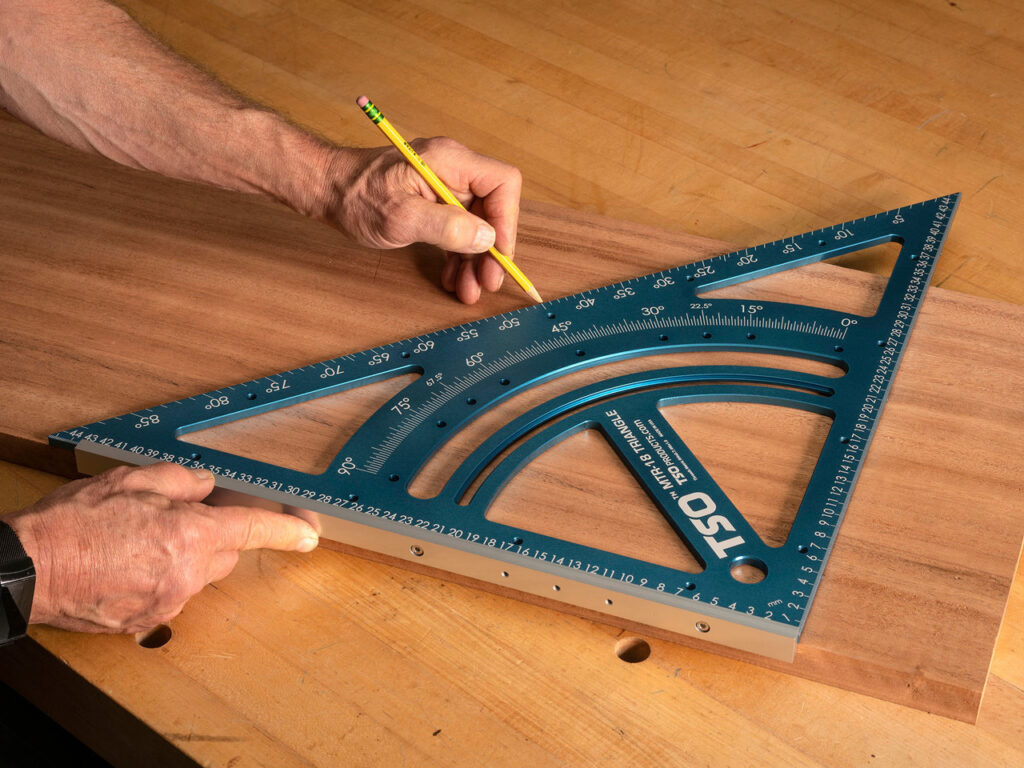
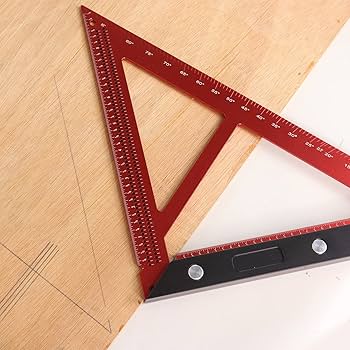
    • Speed Square: The speed square is a triangular tool that combines the functions of a try square, miter square, protractor, and saw guide. It’s often used for quick measurements and is particularly popular in construction for marking rafters and stairs.
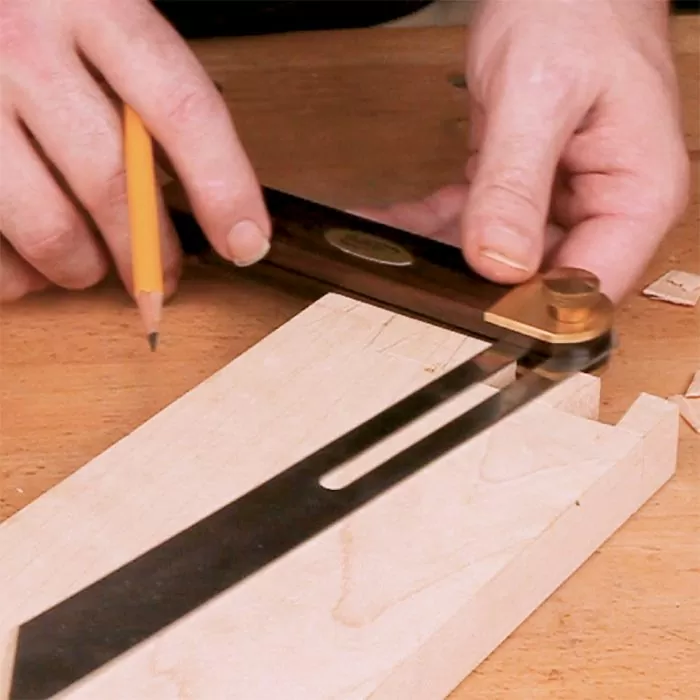
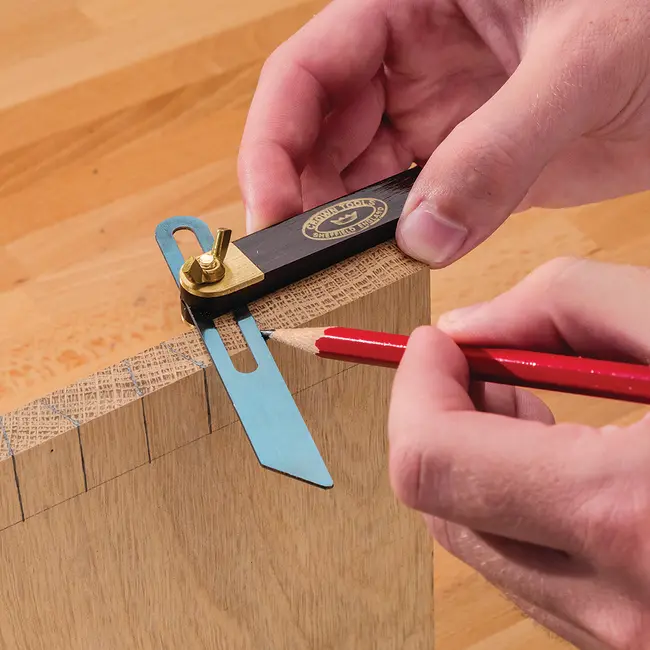
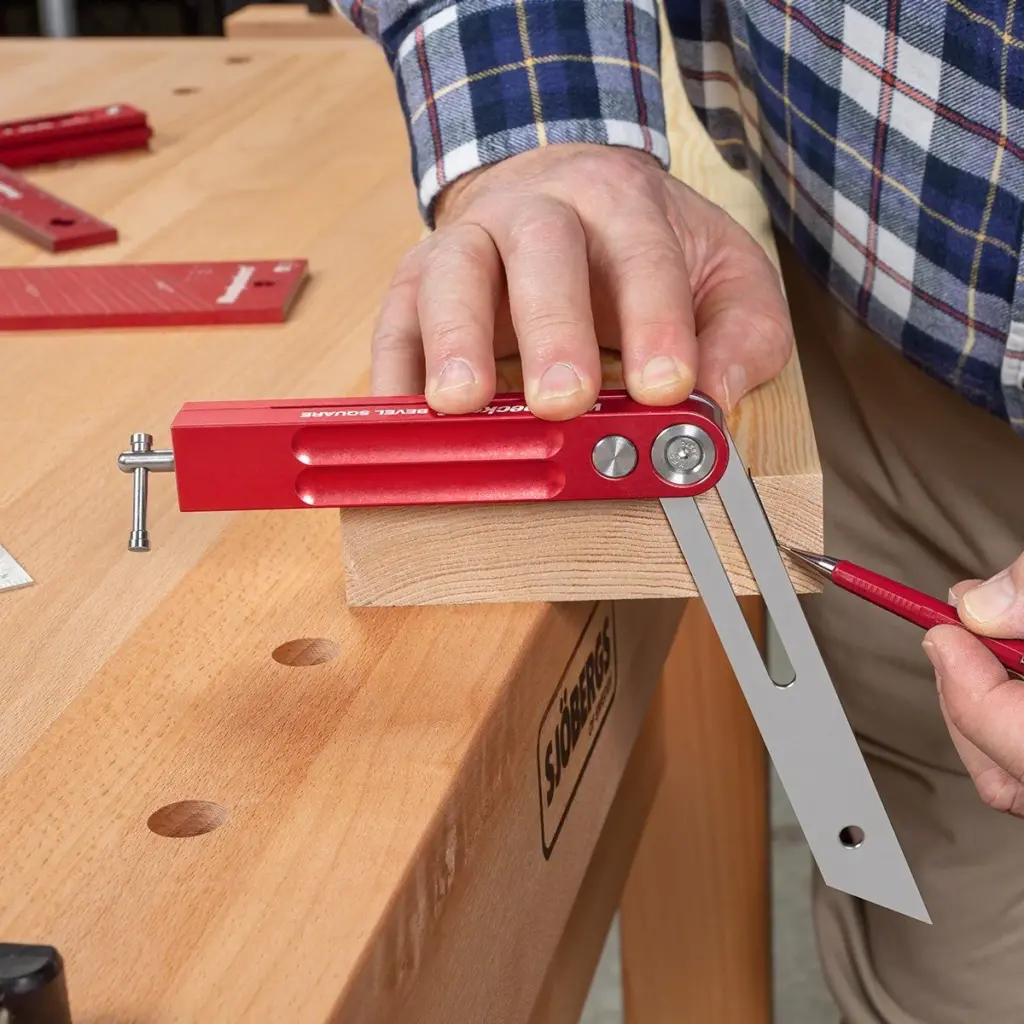
    • Bevel Square: Also known as a sliding T-bevel, this square is adjustable, allowing you to replicate and transfer angles. It’s particularly useful when working with non-standard angles that aren’t 90 or 45 degrees.

    4. Why Accuracy is Essential in Woodworking

    Accuracy in woodworking is paramount. A slight error in measurement or alignment can result in pieces that don’t fit together correctly, leading to gaps, weak joints, or an overall poor appearance. The woodworking square is the tool that ensures these errors are minimized, if not entirely eliminated.

    When working on a project, every component must be cut and joined with precision. The woodworking square helps you achieve this by providing a reliable reference for ensuring that cuts are at the correct angle and that joints are properly aligned. This accuracy is not only important for the aesthetics of the piece but also for its structural integrity. A well-made joint is stronger and more durable, ensuring that the finished piece will stand the test of time.

    5. The Role of the Woodworking Square in Achieving Precision

    Precision is the hallmark of high-quality woodworking, and the woodworking square is the tool that makes this precision possible. By providing a consistent reference point for measurements and cuts, the woodworking square helps ensure that every part of a project is aligned perfectly.

    For example, when cutting pieces for a frame, the woodworking square ensures that each piece is cut at exactly 90 degrees, so that the frame will be square when assembled. Without the square, even a small deviation from 90 degrees could result in a frame that’s skewed or uneven, which would be particularly noticeable once the piece is finished.

    The woodworking square also plays a crucial role in joinery. When creating joints, such as mortise and tenon or dovetail joints, the square ensures that the pieces are aligned correctly, resulting in a strong and seamless joint. In complex projects with multiple joints, the cumulative effect of even small errors can be significant, so precision is key.

    6. How to Use a Woodworking Square for Maximum Accuracy

    Using a woodworking square correctly is essential for achieving accuracy in your work. Here’s a detailed guide on how to use different types of squares in various woodworking tasks:

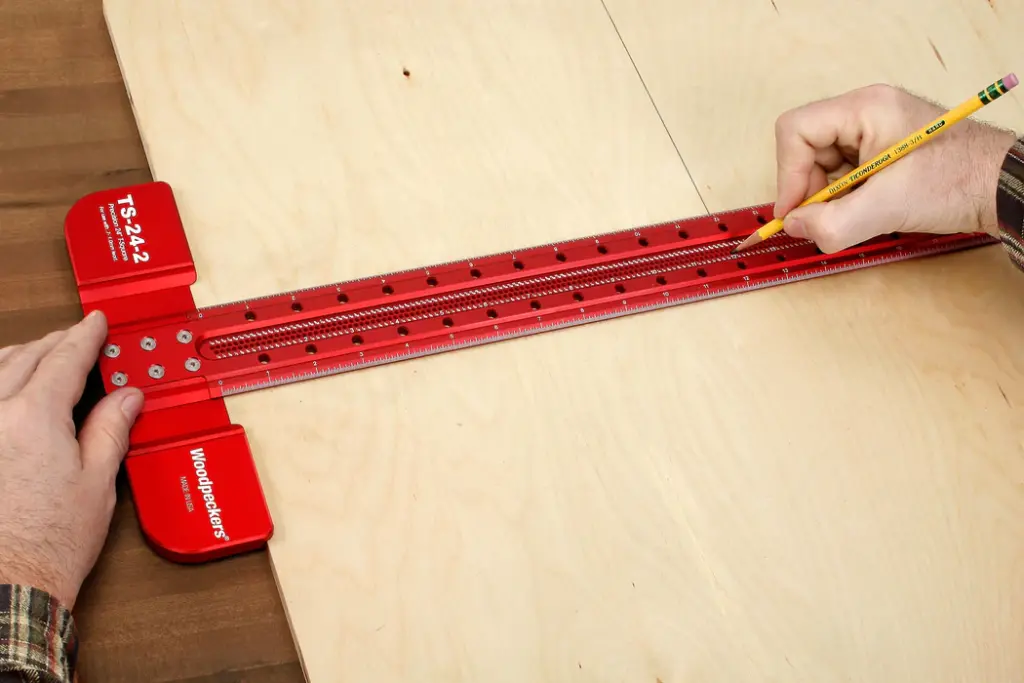
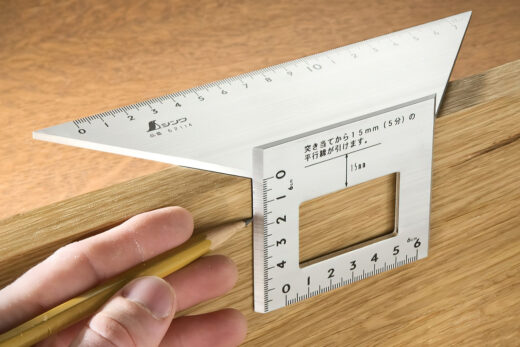
    1. Aligning and Marking: Place the square’s body against the edge of your workpiece. The blade should rest flat on the surface. For marking, use a sharp pencil or marking knife to draw a line along the blade’s edge. This line will be your reference for cutting.
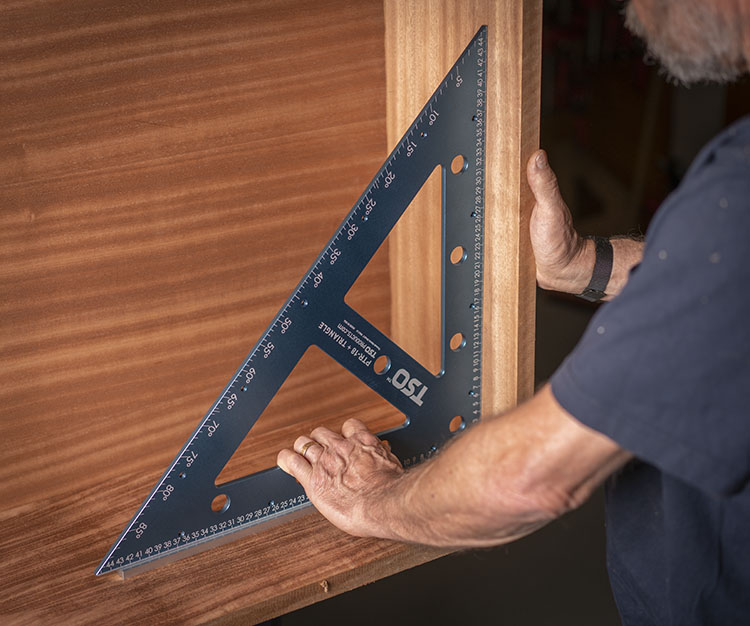
    2. Checking for Squareness: To check if a piece is square, place the square’s body against one edge and the blade against the adjacent edge. If the blade lies flat along the entire edge without gaps, the piece is square. This is particularly important when checking the squareness of frames, cabinets, or other structures.
    3. Measuring Angles: When using a combination or speed square, you can measure angles by aligning the pivot point of the square with the corner of the workpiece and rotating the blade or ruler to the desired angle. Mark the line for cutting. This method is especially useful for cutting rafters, stairs, or other pieces that require precise angles.
    4. Transferring Angles: For transferring an angle from one piece to another, a bevel square is ideal. Set the bevel square to the angle you want to replicate, then place it on the second piece and mark the angle. This is especially helpful when working with non-standard angles.
    5. Checking Joints: When assembling joints, use the square to ensure that the pieces are aligned correctly. For example, when assembling a frame, check that each corner is square by placing the square in the corner and checking for any gaps.

    7. Common Mistakes to Avoid When Using a Woodworking Square

    Even though the woodworking square is a straightforward tool, there are common mistakes that can lead to inaccurate results. Here are some pitfalls to avoid:

    • Assuming All Squares are Perfect: Not all squares are perfectly square out of the box. It’s important to check the accuracy of your square before using it. You can do this by drawing a line along the edge of the square, flipping the square over, and drawing another line from the same starting point. If the lines align, your square is accurate.
    • Not Maintaining the Tool: Over time, even the best woodworking squares can become worn or damaged. Regular maintenance, such as cleaning and checking for squareness, is essential to ensure that your square remains accurate.
    • Using the Wrong Type of Square: Each type of square is designed for specific tasks. Using the wrong type of square can lead to errors. For example, using a try square for large framing work might not give you the accuracy you need. Make sure to use the appropriate square for the task at hand.
    • Improper Marking Technique: When marking, it’s important to use the square correctly. Ensure that the square is firmly held against the edge of the workpiece and that you’re marking along the entire length of the blade. A light, steady hand will produce the best results.

    8. The Importance of Maintenance and Calibration

    Maintaining your woodworking square is essential for ensuring that it remains accurate and reliable. Here’s how to keep your square in top condition:

    • Cleaning: After each use, clean your square to remove any dust, wood chips, or debris that could affect its accuracy. Use a soft cloth to wipe down the blade and handle. For metal squares, applying a light coat of oil can prevent rust.
    • Checking for Squareness: Regularly check your square for accuracy. This can be done using the method described earlier (drawing two lines and checking for alignment). If your square is out of true, it may need to be recalibrated or replaced.
    • Storage: Store your woodworking square in a dry, safe place where it won’t be subjected to heavy impacts or pressure. Hanging it on a tool rack or storing it in a dedicated case will protect it from damage.
    • Calibration: If your square becomes slightly out of true, some types, like combination squares, can be recalibrated. This typically involves adjusting the blade or tightening the screws that hold it in place. Follow the manufacturer’s instructions for calibration to ensure accuracy.

    9. Advanced Techniques for Precision with a Woodworking Square

    Once you’ve mastered the basics of using a woodworking square, there are advanced techniques that can help you achieve even greater precision in your work:

    • Using a Square as a Saw Guide: A speed square can be used as a guide for making straight cuts with a hand saw or circular saw. Simply align the square along the cutting line, and use the edge as a guide for the saw blade. This technique ensures a perfectly straight cut every time.
    • Laying Out Complex Angles: For projects that require compound angles, such as roof rafters or stair stringers, a combination square or speed square is invaluable. By using the square’s built-in protractor, you can accurately layout angles that are otherwise difficult to measure.
    • Creating Precision Joints: When making joints such as dovetails or box joints, the accuracy of your square is crucial. Use the square to mark out the joint and to check that each cut is square and true. This ensures that the joint fits together perfectly without gaps.
    • Verifying Machine Settings: Use a woodworking square to verify the settings on your saws and other machines. For example, you can use a square to check that the blade of your table saw is perpendicular to the table, ensuring that your cuts are accurate.

    10. Choosing the Right Woodworking Square for Your Projects

    Selecting the right woodworking square depends on the types of projects you typically work on. Here are some tips for choosing the best square for your needs:

    • For Fine Woodworking: If you’re focused on furniture making or other fine woodworking projects, a high-quality try square or combination square is essential. Look for squares made from durable materials with a high level of precision.
    • For Construction and Framing: If you’re working on larger projects, such as framing a house or building outdoor structures, a framing square and speed square are your best options. These tools are designed for larger workpieces and are ideal for ensuring that everything is square and true.
    • For Versatility: If you need a square that can handle a variety of tasks, a combination square is a great choice. It combines multiple functions into one tool, making it suitable for everything from marking and measuring to checking angles.
    • For Beginners: If you’re new to woodworking, start with a try square. It’s simple to use and will cover most of your basic needs. As you gain more experience, you can add other types of squares to your collection.

    11. The Role of a Woodworking Square in Joinery

    Joinery is the art of connecting pieces of wood to create structures like furniture, cabinetry, and more. Precision is crucial in joinery, and the woodworking square plays a vital role in achieving that precision. Here’s how:

    • Ensuring Straight Cuts: In joinery, each piece must be cut perfectly to fit together without gaps. The square ensures that each cut is straight and at the correct angle, which is particularly important in joints like dovetails and mortise and tenon.
    • Aligning Components: When assembling joints, the square helps you align each piece correctly. For example, when creating a mortise and tenon joint, the square ensures that the tenon is perfectly aligned with the mortise, resulting in a tight, strong joint.
    • Checking Joint Accuracy: After cutting and assembling a joint, use the square to check that it’s accurate. If the joint is not square, it may not fit together properly, or it could weaken over time. The square helps you catch these errors before they become a problem.

    12. Practical Tips for Using a Woodworking Square

    Here are some additional tips to help you get the most out of your woodworking square:

    • Use a Sharp Pencil or Knife: For the most accurate markings, use a sharp pencil or marking knife. This ensures that your lines are precise and easy to follow.
    • Double-Check Your Measurements: Before making any cuts, double-check your measurements and marks with the square. It’s better to take a few extra seconds to ensure accuracy than to make a mistake that could ruin your project.
    • Practice on Scrap Wood: If you’re new to using a woodworking square, practice on scrap wood before working on your actual project. This will help you get comfortable with the tool and ensure that your measurements and markings are accurate.

    13. The Future of Woodworking Squares: Innovations and Technology

    As with many tools, woodworking squares have seen innovations and improvements over the years. Advances in materials and manufacturing processes have led to more accurate and durable squares. Some modern squares incorporate digital technology, providing electronic readouts for even greater precision.

    Digital squares can measure angles with incredible accuracy and display the results on a screen, making it easier than ever to achieve perfect measurements. While these advanced tools can be more expensive, they offer unmatched precision and are becoming increasingly popular among professional woodworkers.

    14. Conclusion: The Woodworking Square as an Indispensable Tool

    The woodworking square is more than just a tool—it’s a woodworker’s best friend. Whether you’re a seasoned professional or just starting in the craft, this simple yet powerful tool is essential for achieving the precision and accuracy that high-quality woodworking demands. By ensuring that every cut, joint, and angle is perfectly aligned, the woodworking square helps you create beautiful, durable, and professional-quality projects.

    FAQs

    1. What is the most commonly used woodworking square? The most commonly used woodworking square is the try square. It’s simple, reliable, and perfect for checking and marking right angles.

    2. Can I use a woodworking square for metalworking? While primarily designed for woodworking, some squares can be used in metalworking, particularly the combination square. However, it’s essential to ensure the tool is suitable for the material you’re working with.

    3. How do I check if my woodworking square is accurate? You can check the accuracy of your woodworking square by placing it against a straight edge and marking a line. Then, flip the square and draw another line from the same starting point. If the lines align, your square is accurate.

    4. What materials are woodworking squares made from? Woodworking squares are typically made from steel, aluminum, or plastic. Steel squares are the most durable and precise, but plastic squares can be a good choice for beginners or light-duty use.

    5. Do I need more than one type of woodworking square? Yes, having multiple types of woodworking squares allows you to tackle different tasks more effectively. Each square has its specific use, and having a variety can greatly enhance your woodworking precision and versatility.

    This expanded guide should provide you with the comprehensive insights needed to understand and effectively use a woodworking square in all your projects. By mastering this tool, you’ll be well on your way to creating precise, professional-quality work every time.

  • Best Woodworking Chisels: Top Picks and Expert Tips for Precision

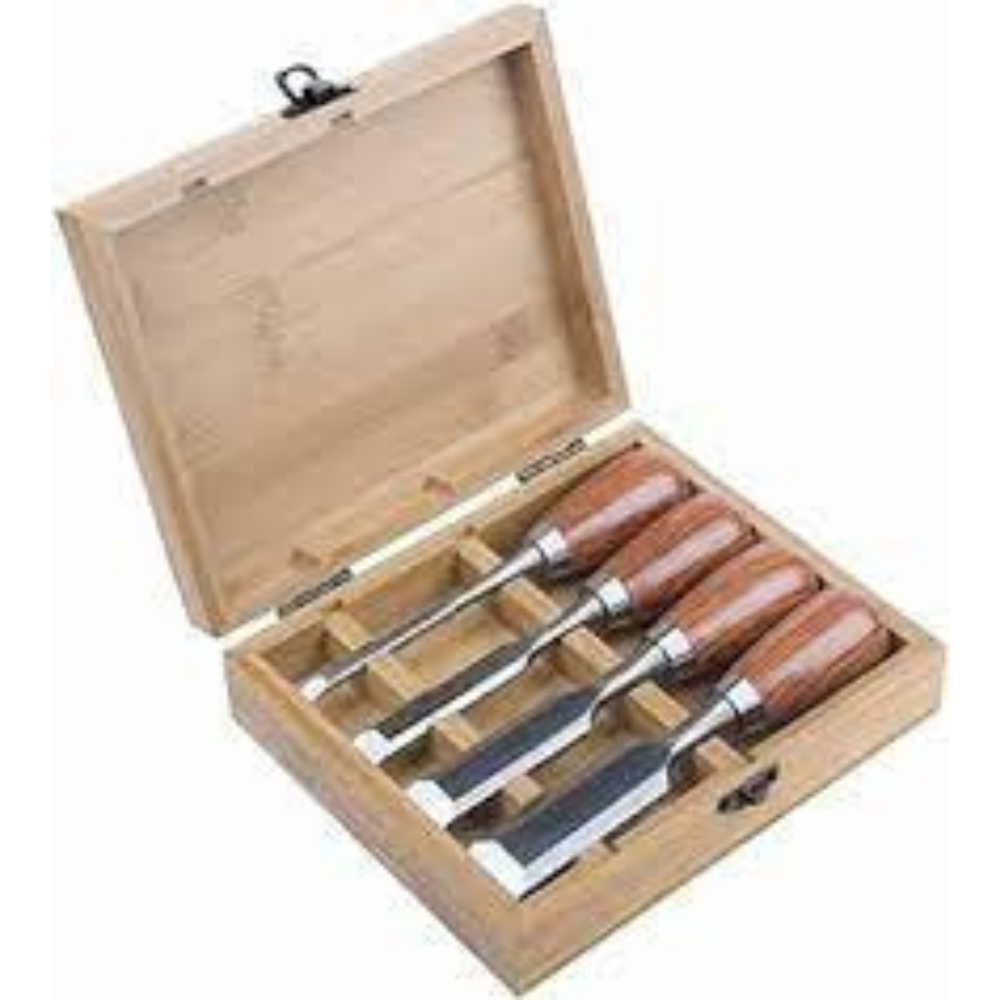
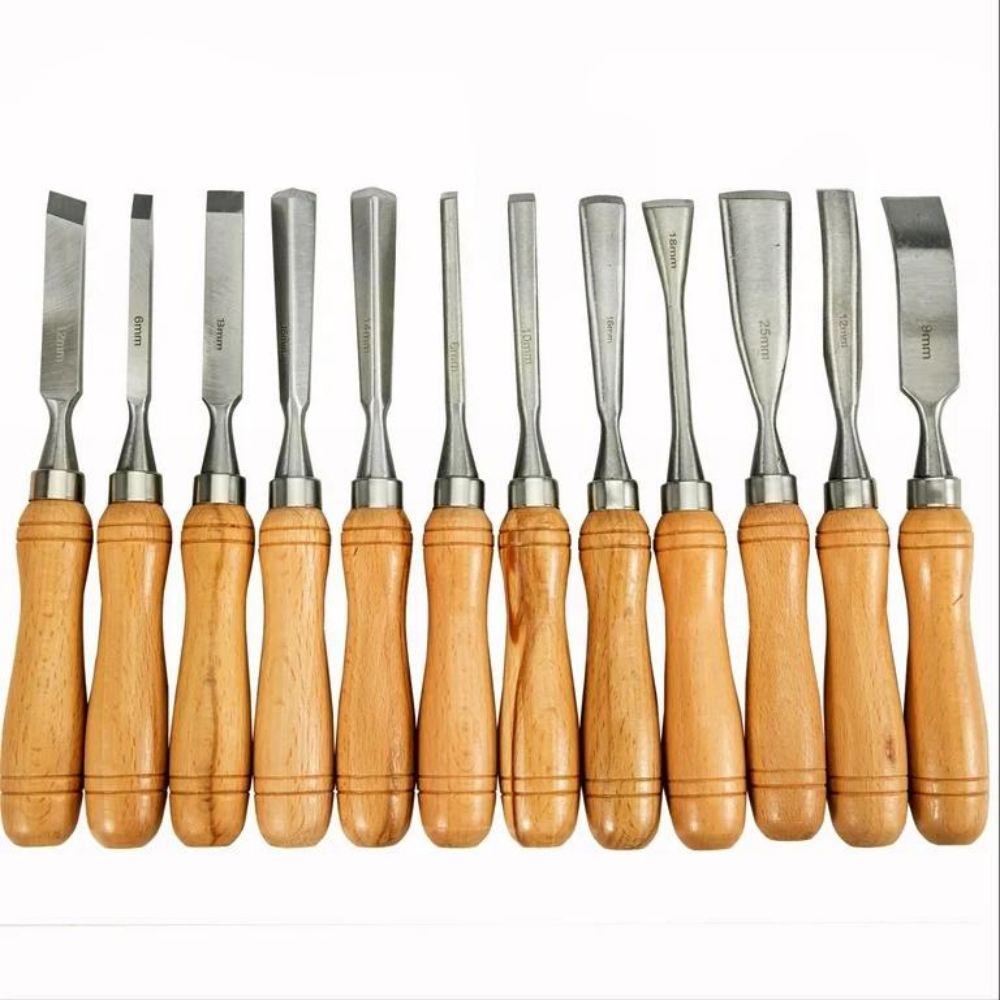
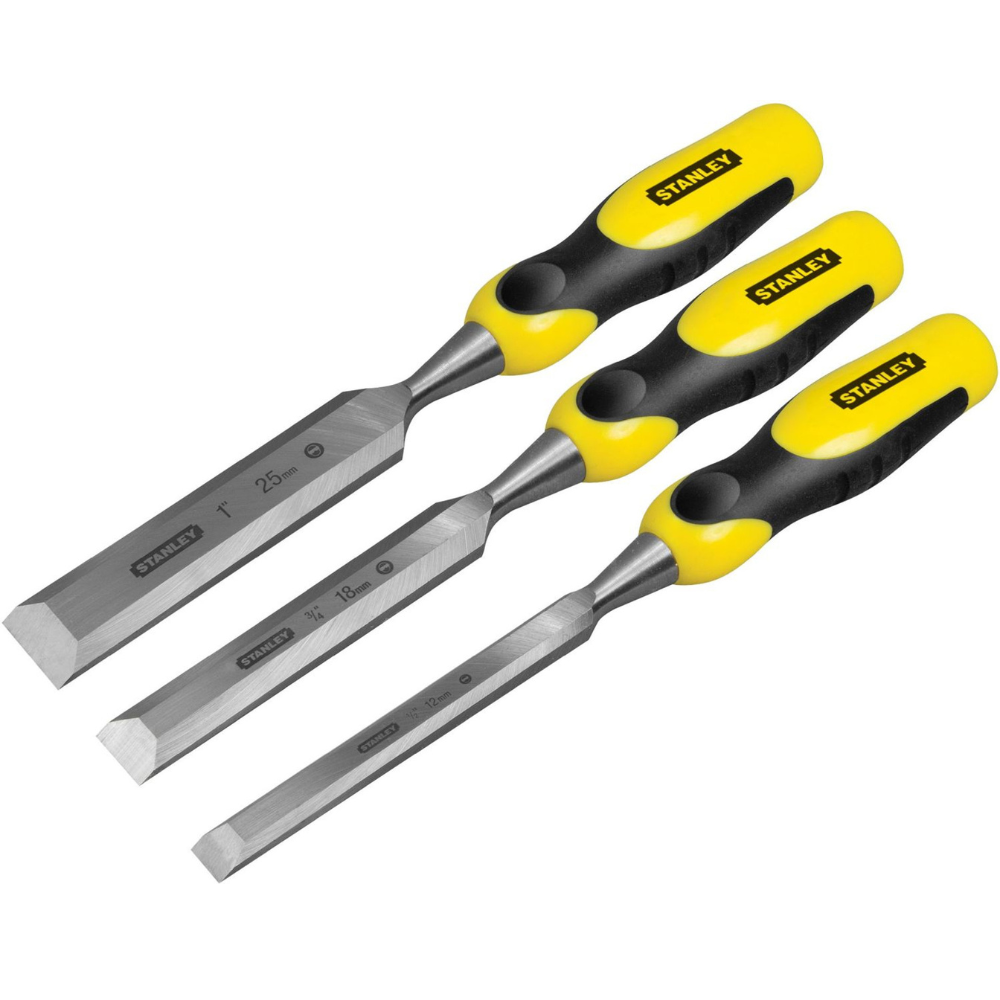
    Best Woodworking Chisels: Top Picks and Expert Tips for Precision

    Woodworking is an art that requires precision, skill, and the right tools. One of the essential tools in a woodworker’s arsenal is the chisel. In this comprehensive guide, we will explore the best woodworking chisels available on the market, their uses, and how to choose the right ones for your projects. Whether you are a beginner or an experienced woodworker, this article will provide valuable insights to help you enhance your craft.

    For your “Free” 2 in 1 Folding Picnic Table Bench Plan – Click Here.

    Table of Contents

    1. Introduction to Woodworking Chisels
    2. Types of Chisels
    3. Bench Chisels: The Workhorse of Woodworking
    4. Paring Chisels: Precision at Its Finest
    5. Mortise Chisels: For Heavy-Duty Tasks
    6. Butt Chisels: Compact and Handy
    7. Japanese Chisels: A Blend of Tradition and Innovation
    8. Materials Used in Chisels
    9. Choosing the Right Handle for Your Chisel
    10. Caring for Your Chisels
    11. Sharpening Your Chisels: Techniques and Tips
    12. Top Brands for Woodworking Chisels
    13. Affordable vs. Premium Chisels: Which to Choose?
    14. Using Chisels Safely and Effectively
    15. Conclusion: Elevate Your Woodworking with the Best Chisels
    16. FAQs About Woodworking Chisels

    Introduction to Woodworking Chisels

    When it comes to woodworking, having the best tools is crucial for achieving top-quality results. Among these tools, chisels hold a special place. The best woodworking chisels not only make your work easier but also allow you to achieve the precision and detail required for fine craftsmanship. In this guide, we will delve into everything you need to know about woodworking chisels, from the different types available to how to care for and use them effectively.

    Types of Woodworking Chisels

    Chisels come in various shapes and sizes, each designed for specific tasks. Understanding the different types of chisels will help you select the right tool for your needs. Here are some of the most common types:

    • Bench Chisels
    • Paring Chisels
    • Mortise Chisels
    • Butt Chisels
    • Japanese Chisels

    Bench Chisels: The Workhorse of Woodworking

    Bench chisels are the most versatile and commonly used chisels in woodworking. They are perfect for general-purpose tasks, such as chopping and paring wood. Bench chisels typically have a beveled edge, making them suitable for both heavy-duty work and fine detailing.

    Paring Chisels: Precision at Its Finest

    Paring chisels are designed for delicate work where precision is paramount. They are long and thin, allowing you to pare away thin shavings of wood without applying too much force. Paring chisels are ideal for fine joinery and detailed carving.

    Mortise Chisels: For Heavy-Duty Tasks

    Mortise chisels are robust tools used for cutting deep mortises, which are rectangular holes in wood. These chisels have thick blades and are built to withstand the heavy mallet blows required to chop out large amounts of wood.

    Butt Chisels: Compact and Handy

    Butt chisels are shorter than other chisels, making them perfect for working in tight spaces. They are commonly used for fitting hinges and other hardware where precision and control are crucial.

    Japanese Chisels: A Blend of Tradition and Innovation

    Japanese chisels, known as “nomi,” combine traditional craftsmanship with modern materials. These chisels are renowned for their sharpness and durability, making them a favorite among many woodworkers. Japanese chisels typically have a laminated blade, which combines a hard steel cutting edge with a softer steel body.

    Materials Used in Woodworking Chisels

    The material of the chisel blade plays a significant role in its performance and durability. The best woodworking chisels are made from high-quality steel, which holds a sharp edge and resists wear. Common materials include:

    • High Carbon Steel
    • Alloy Steel
    • A2 Steel
    • O1 Steel

    For your “Free” Outdoor Projects Plan – Click Here.

    Choosing the Right Handle for Your Chisel

    The handle of a chisel is just as important as the blade. A good handle provides comfort and control, reducing fatigue during prolonged use. Chisel handles are typically made from wood or plastic, with wooden handles being favored for their traditional feel and durability. Look for handles that fit comfortably in your hand and provide a secure grip.

    Caring for Your Woodworking Chisels

    Proper care and maintenance of your chisels are essential to keep them in good working condition. Here are some tips for caring for your chisels:

    • Clean your chisels after each use to remove any wood chips and debris.
    • Store your chisels in a dry place to prevent rust.
    • Regularly check the sharpness of your chisels and sharpen them as needed.

    Sharpening Your Chisels: Techniques and Tips

    Sharp chisels are a joy to work with, while dull chisels can be frustrating and dangerous. Here are some techniques and tips for sharpening your chisels:

    • Use a honing guide to maintain a consistent angle while sharpening.
    • Start with a coarse grit stone and progress to finer grits for a sharp edge.
    • Strop your chisels on a leather strop to remove any burrs and polish the edge.

    Top Brands for Woodworking Chisels

    There are many brands of woodworking chisels available, but some stand out for their quality and performance. Here are some of the top brands to consider:

    • Lie-Nielsen
    • Veritas
    • Stanley
    • Narex
    • Sorby

    Affordable vs. Premium Chisels: Which to Choose?

    When choosing woodworking chisels, you may wonder whether to go for affordable or premium options. While premium chisels often offer superior performance and durability, affordable chisels can also be a good choice for beginners or those on a budget. It’s important to balance cost with quality and consider how often you will use the chisels.

    Using Chisels Safely and Effectively

    Safety is paramount when using woodworking chisels. Here are some tips to ensure safe and effective use:

    • Always use a mallet designed for chisels to avoid damaging the handle.
    • Keep your hands behind the cutting edge to prevent injury.
    • Use a firm grip and apply controlled force.
    • Always cut away from your body.

    Conclusion: Elevate Your Woodworking with the Best Chisels

    The best woodworking chisels are indispensable tools that can elevate your woodworking projects to new heights. By choosing the right chisels for your needs and maintaining them properly, you can achieve precise and beautiful results. Whether you’re just starting out or looking to upgrade your toolkit, the right chisels will make all the difference.

    For your “Free” Guide to 13 Wood Joinery Types – Click Here.

    FAQs About Woodworking Chisels

    1. What are the best woodworking chisels for beginners? For beginners, bench chisels are a great starting point. Brands like Stanley and Narex offer affordable and reliable options that are easy to use and maintain.

    2. How often should I sharpen my woodworking chisels? The frequency of sharpening depends on how often you use your chisels and the type of wood you work with. As a general rule, sharpen your chisels whenever you notice a decrease in performance or difficulty in cutting.

    3. Can I use woodworking chisels for carving? Yes, you can use chisels for carving, but it’s best to use chisels specifically designed for carving, such as paring chisels, which offer more precision and control.

    4. How do I prevent my chisels from rusting? To prevent rust, store your chisels in a dry place and apply a light coat of oil to the blades after cleaning. Using silica gel packs in your toolbox can also help absorb moisture.

    5. Are Japanese chisels better than Western chisels? Japanese and Western chisels each have their strengths. Japanese chisels are known for their sharpness and durability, while Western chisels are versatile and widely available. The choice depends on personal preference and the specific needs of your projects.

    By understanding the different types of chisels and their uses, you can make informed decisions and invest in the tools that will best suit your woodworking needs. Happy woodworking!

  • Best Drill Press for Woodworking: Your Ultimate Guide

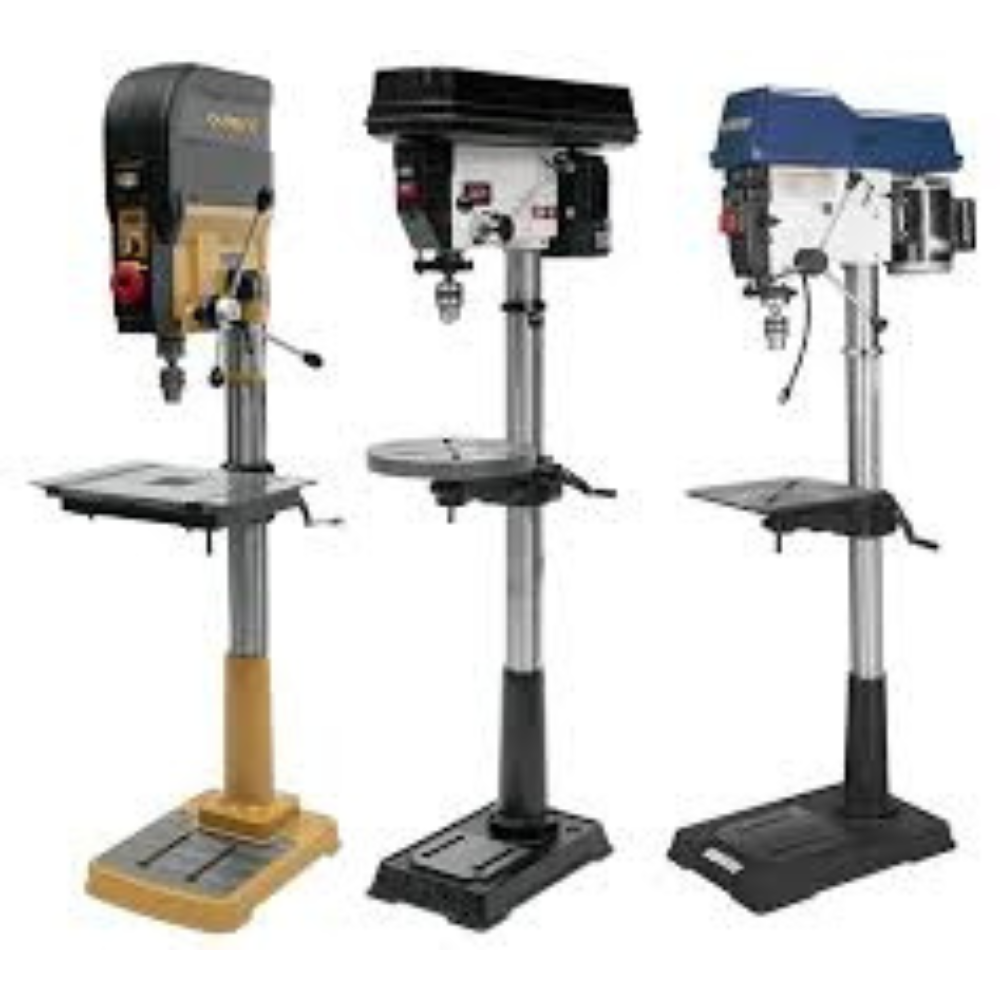
    Best Drill Press for Woodworking: Your Ultimate Guide

    When it comes to woodworking, having the right tools can make all the difference. One of the most essential tools for any woodworker is a drill press. In this guide, we’ll dive deep into the world of drill presses, helping you find the best drill press for woodworking. Whether you’re a seasoned professional or a beginner, you’ll find valuable insights here to make an informed decision.

    For your “Free” 2 in 1 Folding Picnic Table Bench Plan – Click Here.

    Table of Contents

    1. Introduction to Drill Presses
    2. Why a Drill Press is Essential for Woodworking
    3. Types of Drill Presses
    4. Key Features to Look for in a Drill Press
    5. Top Brands for Woodworking Drill Presses
    6. How to Choose the Right Drill Press for Your Workshop
    7. Bench vs. Floor Drill Presses
    8. Best Drill Press for Woodworking: Our Top Picks
    9. Maintaining Your Drill Press
    10. Safety Tips When Using a Drill Press
    11. Upgrading Your Drill Press: Accessories and Add-ons
    12. Conclusion: Making the Best Choice
    13. FAQs about the Best Drill Press for Woodworking

    Introduction to Drill Presses

    When you think about woodworking, a drill press might not be the first tool that comes to mind. However, it’s one of the most versatile and essential pieces of equipment in any workshop. Whether you’re drilling precise holes, sanding, or even mortising, a drill press can handle it all. In this guide, we’ll explore what makes a drill press the best, ensuring you can tackle any project with confidence.

    Why a Drill Press is Essential for Woodworking

    Imagine trying to drill perfectly straight holes with a handheld drill. It’s challenging and often leads to mistakes. A drill press eliminates these issues by providing stability and precision. But that’s not all. With the best drill press, you can also enjoy consistent depth control, angled drilling, and the ability to handle larger bits for more extensive projects. It’s like having a multitool dedicated to drilling – efficient and precise.

    Types of Drill Presses

    There are several types of drill presses, each suited to different needs and preferences:

    • Bench Drill Press: Compact and perfect for small workshops.
    • Floor Drill Press: Larger, more powerful, and suitable for heavy-duty projects.
    • Radial Drill Press: Offers flexibility with its adjustable arm for wider workpieces.

    Choosing the right type depends on your workspace and the projects you typically undertake. Consequently, it’s important to consider your specific needs.

    Key Features to Look for in a Drill Press

    Selecting a drill press for woodworking requires understanding what features matter most. Here are key considerations:

    1. Power: More horsepower means more capability to handle tough materials.
    2. Speed Range: Variable speed settings allow for precision and adaptability.
    3. Table Size and Adjustability: A larger, adjustable table provides better support and versatility.
    4. Depth Stop: Ensures consistent drilling depths for repetitive tasks.
    5. Ease of Adjustment: Quick and easy adjustments save time and effort.

    Top Brands for Woodworking Drill Presses

    Several brands stand out in the woodworking community for their quality and reliability. These include:

    • JET
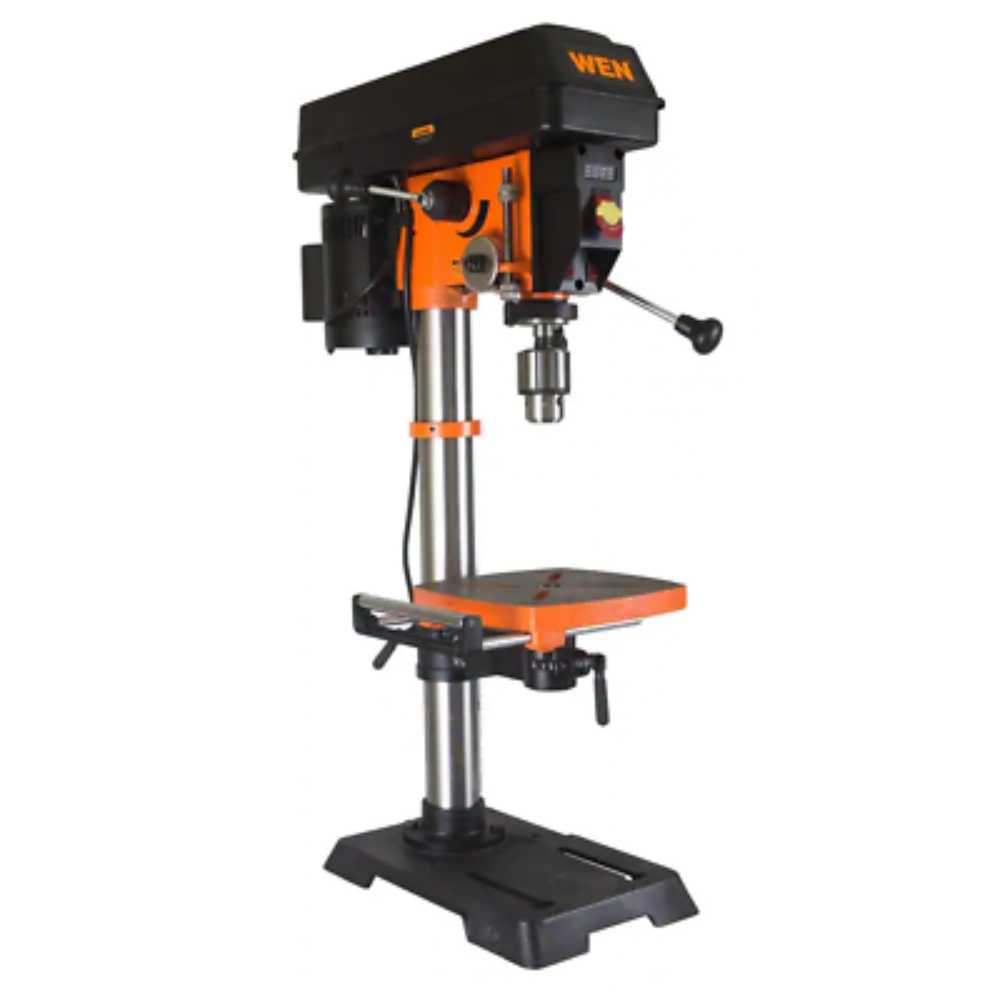
    • WEN
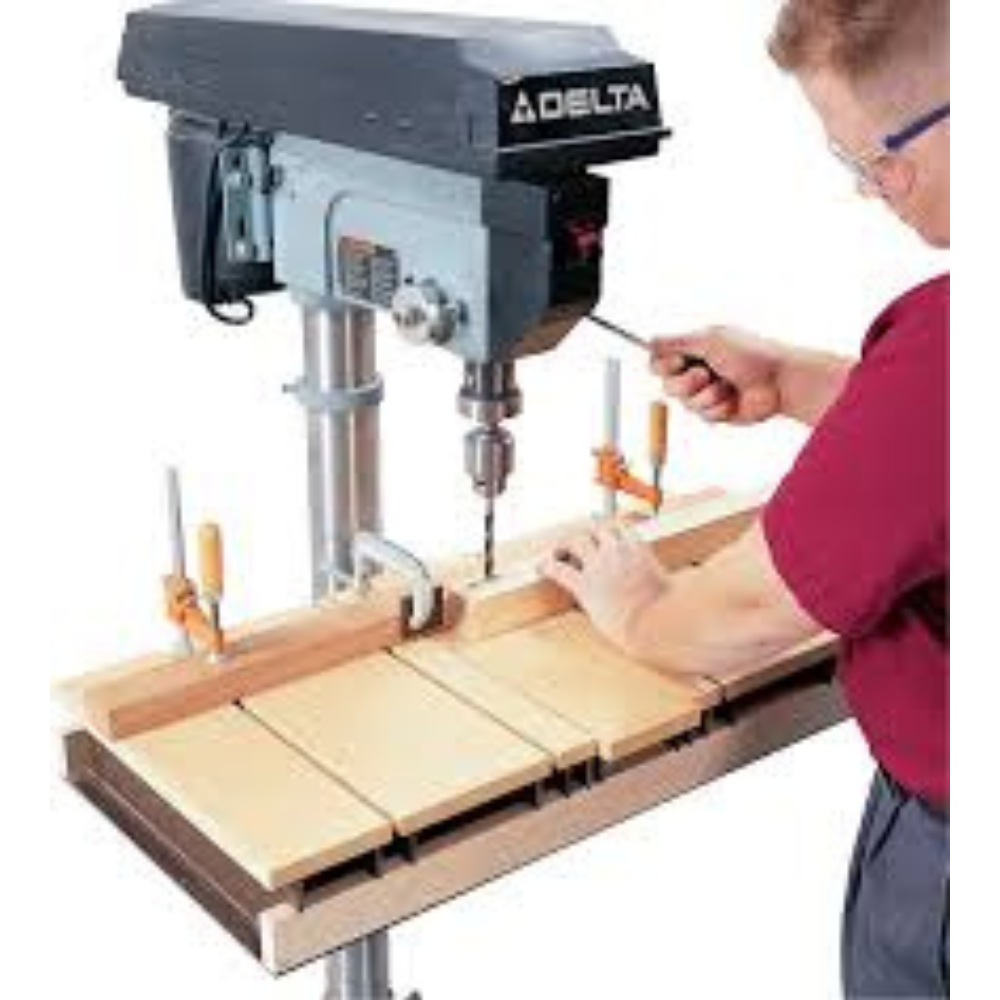
    • Delta
    • Powermatic
    • Shop Fox

    Each of these brands offers models that could be considered the best drill press for woodworking, depending on your specific needs. Therefore, it’s worth exploring each brand’s offerings.

    How to Choose the Right Drill Press for Your Workshop

    Choosing the right drill press involves considering your workshop’s space, the types of projects you handle, and your budget. Think about the drill press’s footprint and whether you need a benchtop or floor model. Evaluate the features that will best serve your needs, such as speed settings and table adjustments. Additionally, consider future projects that might require more advanced features.

    For your “Free” Outdoor Projects Plan – Click Here.

    Bench vs. Floor Drill Presses

    Should you go for a bench or a floor drill press? It depends on your workspace and project requirements. Bench drill presses are ideal for smaller workshops with limited space. They are compact yet powerful. On the other hand, floor drill presses, while taking up more space, offer more power and versatility, making them perfect for larger, more demanding projects. Thus, it’s crucial to match the drill press type with your specific workshop needs.

    Best Drill Press for Woodworking: Our Top Picks

    After extensive research and testing, here are our top picks for the best drill press for woodworking:

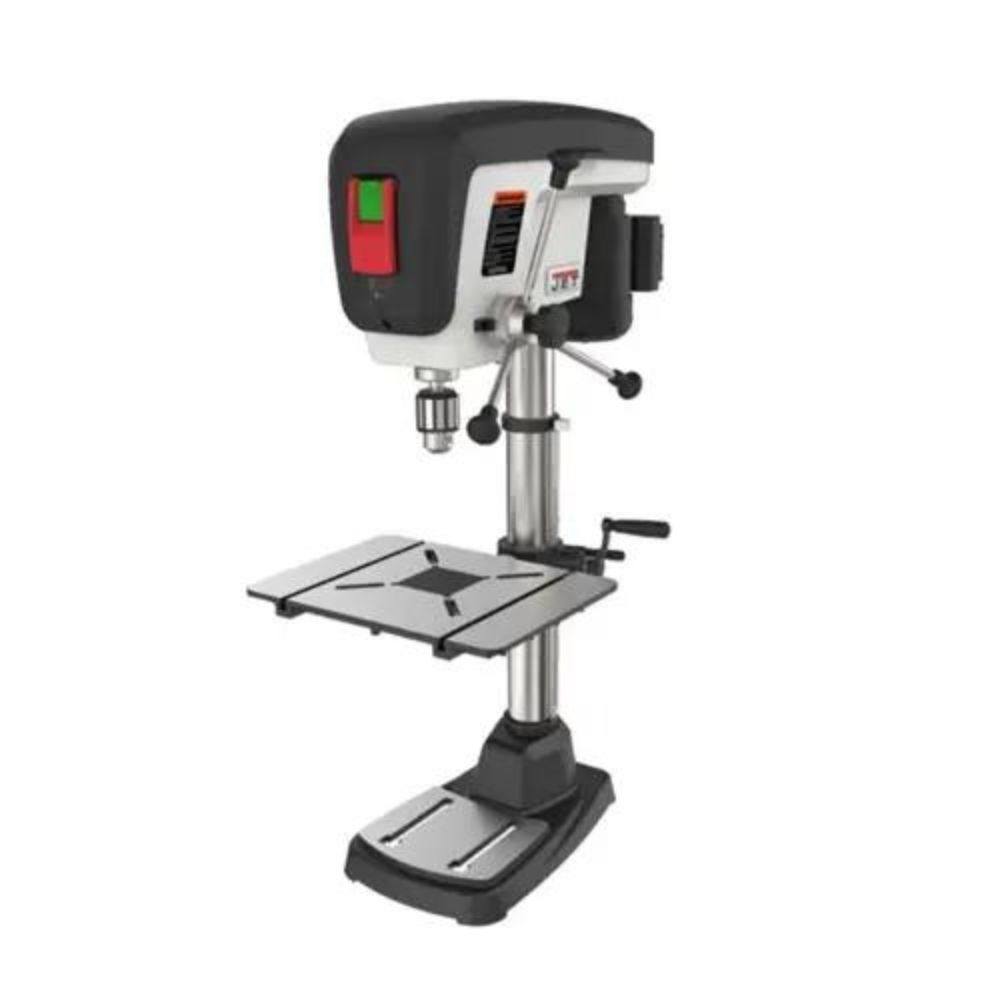
    1. JET JDP-17: Known for its power and precision, this model is a top choice for serious woodworkers.
    2. WEN 4214: Offers excellent value with its variable speed and robust construction.
    3. Delta 18-900L: This floor drill press stands out with its auto-tensioning belt drive system.
    4. Powermatic PM2800B: A premium choice with digital RPM readout and laser guides.
    5. Shop Fox W1848: Combines affordability with features like oscillating spindle for sanding.

    Maintaining Your Drill Press

    Maintaining your drill press is crucial for its longevity and performance. Regularly clean the machine, lubricate moving parts, and check for any loose components. Replacing worn-out parts and keeping the machine covered when not in use can also extend its lifespan. Consequently, these practices ensure your drill press remains in top condition.

    Safety Tips When Using a Drill Press

    Safety should always be a priority when using a drill press. Here are some tips to ensure you stay safe:

    • Wear Safety Gear: Always use safety glasses and hearing protection.
    • Secure Your Workpiece: Use clamps or a vice to hold the workpiece firmly.
    • Keep Hair and Clothing Away: Avoid loose clothing and tie back long hair.
    • Check the Machine Before Use: Ensure all parts are tight and the machine is in good working condition.
    • Stay Focused: Avoid distractions and never leave the drill press running unattended.

    By following these safety tips, you can prevent accidents and ensure a safe working environment.

    Upgrading Your Drill Press: Accessories and Add-ons

    Enhance your drill press’s functionality with various accessories. Consider adding a laser guide for precision, a mortising attachment for woodworking joints, or a sanding drum kit for versatile finishing options. These upgrades can turn your drill press into a multifunctional powerhouse. Moreover, investing in these add-ons can significantly improve your woodworking efficiency.

    Conclusion: Making the Best Choice

    Choosing the best drill press for woodworking boils down to understanding your needs and the features that will make your work more efficient and enjoyable. Whether you opt for a bench model for its compactness or a floor model for its power, ensure it aligns with your projects and workshop space. Investing in a quality drill press is a decision that will pay off in precision, efficiency, and the overall quality of your woodworking. In conclusion, the right drill press can elevate your woodworking projects to a new level.

    For your “Free” Workspace Plans – Click Here.

    FAQs about the Best Drill Press for Woodworking

    1. What makes a drill press better for woodworking compared to other types of drills? A drill press offers stability, precision, and versatility that handheld drills can’t match, making it ideal for woodworking tasks.
    2. Can I use a metalworking drill press for woodworking? Yes, but a woodworking-specific drill press will have features tailored to wood projects, like better dust collection and appropriate speed ranges.
    3. How much should I spend on a good woodworking drill press? Prices can vary widely, but a good quality drill press for woodworking typically ranges from $200 to $1000, depending on features and brand.
    4. What size drill press do I need for my projects? The size depends on the scale of your projects. For most woodworking tasks, a 10 to 15-inch drill press is sufficient.
    5. Is it worth upgrading to a drill press with a digital readout? A digital readout offers precise speed control and easier adjustments, which can be worth the investment for detailed and frequent work.

    By considering these insights and tips, you’re well on your way to finding the best drill press for woodworking that suits your needs perfectly. Happy woodworking!

  • Must Have Woodworking Tools: Your Essential Guide

    Must Have Woodworking Tools: Your Essential Guide

    Woodworking is a craft that combines precision, creativity, and skill. Whether you’re a seasoned carpenter or a beginner, having the right tools is crucial to bringing your projects to life. This article will walk you through the must have woodworking tools that every woodworker should consider adding to their collection. We’ll cover everything from basic hand tools to advanced machinery, ensuring you have all the information you need to get started or upgrade your toolkit.

    For your “Free” 2 in 1 Folding Picnic Table Bench Plan – Click Here.

    Introduction: Why Must Have Woodworking Tools Matter

    When diving into woodworking, the first thing you need to understand is the importance of the right tools. Having the must have woodworking tools in your arsenal can make the difference between a frustrating project and a masterpiece. These tools not only make your work easier but also ensure accuracy and safety, allowing you to focus on the art of woodworking itself.

    1. The Foundation: Measuring and Marking Tools

    Before you even think about cutting or shaping wood, you need to measure and mark your materials accurately. Essential tools in this category include:

    • Tape Measure: An absolute must for any woodworker, providing precise measurements.
    • Combination Square: Useful for marking and measuring right angles and ensuring your cuts are square.
    • Marking Gauge: Ideal for scribing lines parallel to the edge of your workpiece.

    2. Cutting Tools: Precision at Its Best

    Cutting tools are at the heart of woodworking. Without them, turning raw wood into a piece of art would be impossible. Here are some must haves:

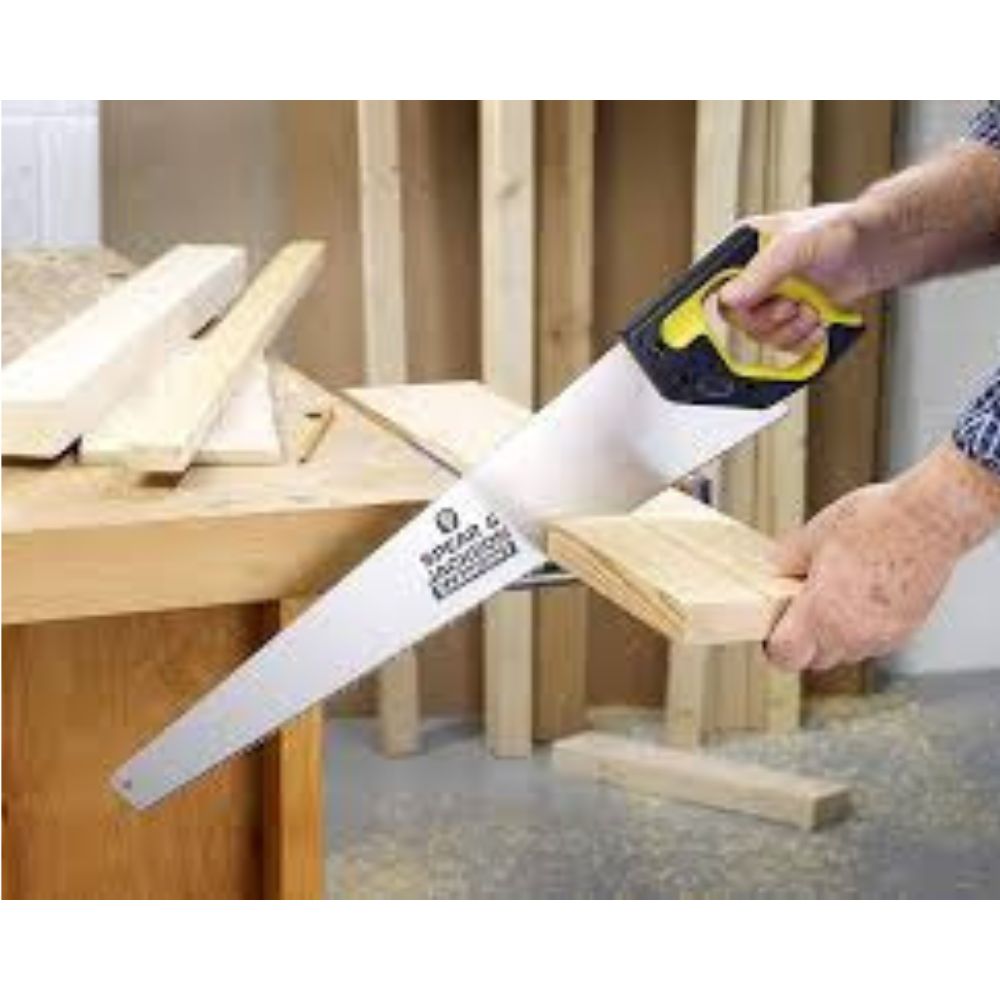
    • Hand Saw: A versatile tool for making quick cuts.
    • Coping Saw: Perfect for intricate cuts and curves.
    • Back Saw: Essential for fine, precise cuts, particularly in joinery.

    3. Power Tools: Taking Your Woodworking to the Next Level

    Power tools can save you time and effort, making complex tasks simpler and quicker. Key power tools include:

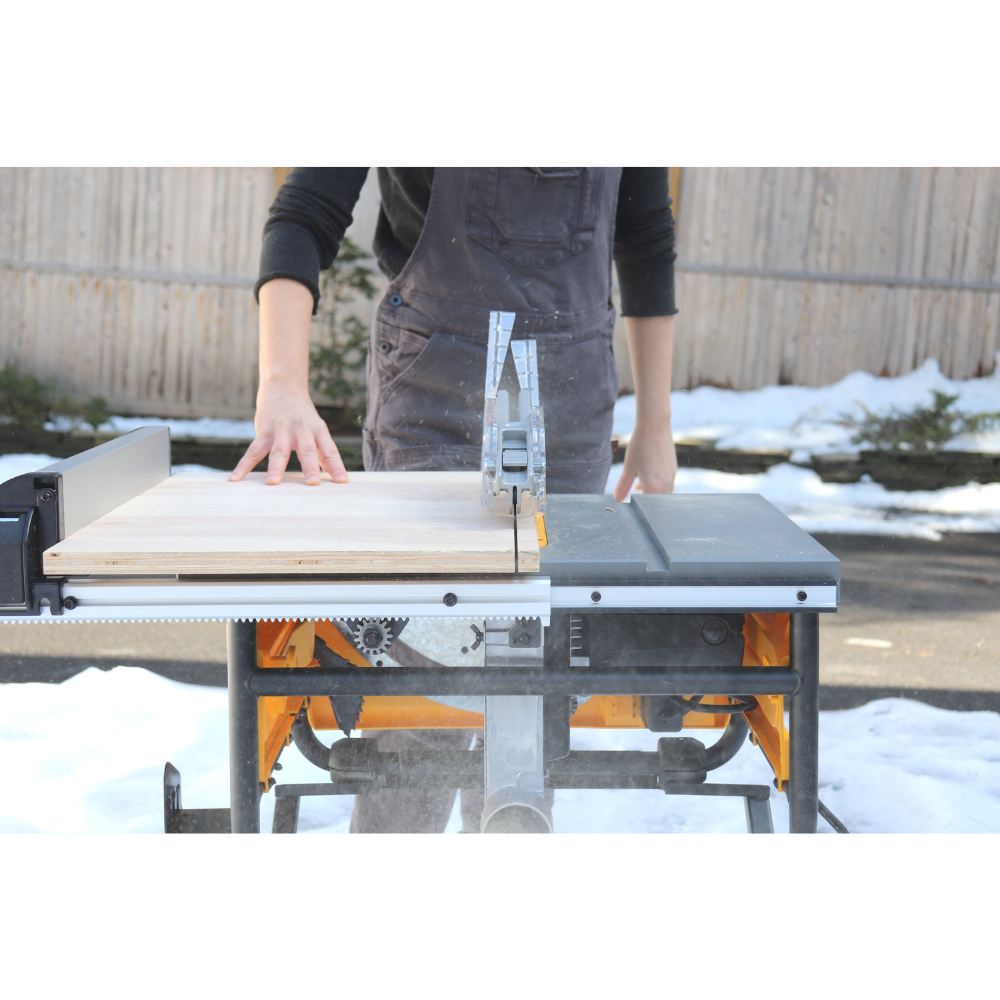
    • Table Saw: The workhorse of any woodworking shop, perfect for ripping large boards.
    • Circular Saw: Great for making long, straight cuts.
    • Jigsaw: Ideal for cutting curves and complex shapes.

    4. Shaping Tools: Sculpting Your Masterpiece

    Once you’ve made your cuts, shaping tools help refine and perfect your pieces. These tools are indispensable for any serious woodworker:

    • Chisels: Essential for detailed carving and joinery work.
    • Rasps and Files: Perfect for smoothing rough edges and shaping wood.
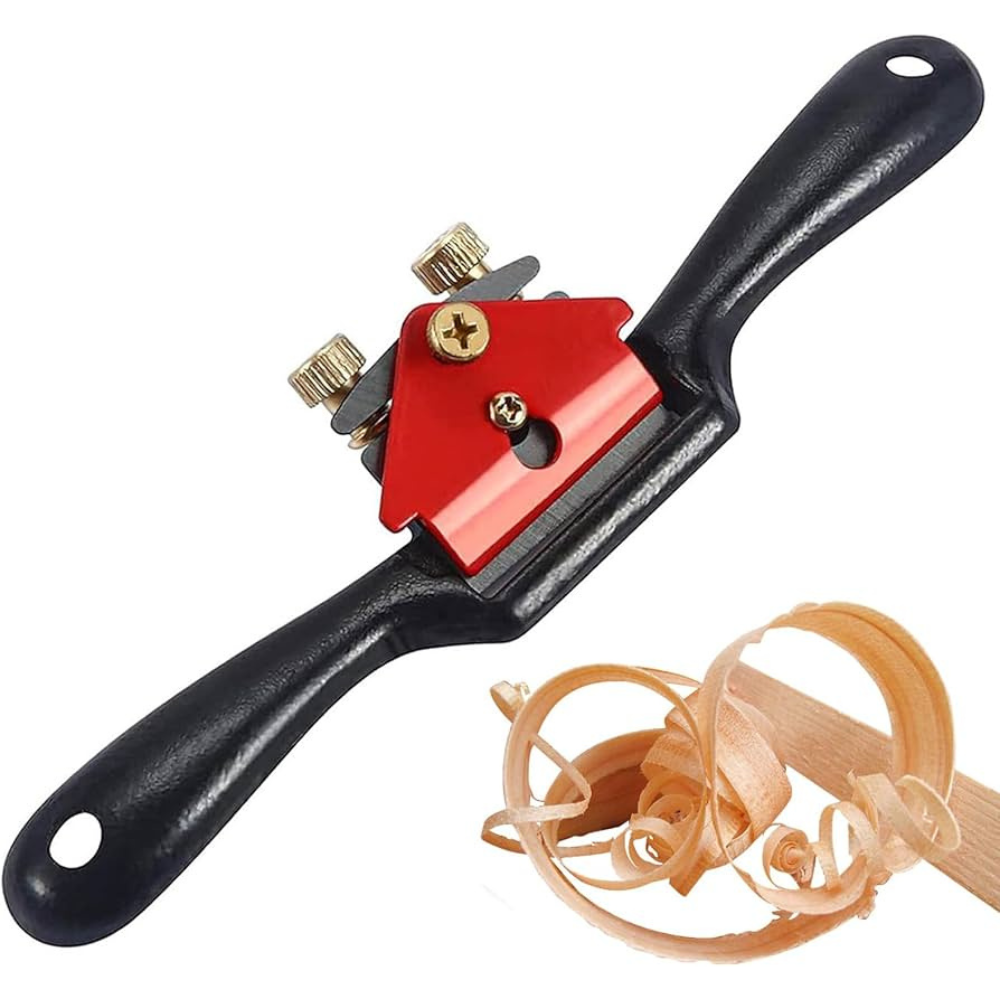
    • Spokeshave: Used for creating smooth, curved surfaces.

    5. Drilling Tools: Creating Holes with Precision

    Drilling tools are necessary for making holes for screws, dowels, and other joinery techniques. Some of the must have drilling tools are:

    • Drill Press: Offers precision and control for drilling accurate holes.
    • Hand Drill: A versatile tool for drilling in tight spaces or for small projects.
    • Countersink Bits: Used to create a recess for screw heads, ensuring a flush finish.

    6. Sanding Tools: Achieving the Perfect Finish

    Sanding is a critical step in woodworking, helping to smooth and finish your pieces. Essential sanding tools include:

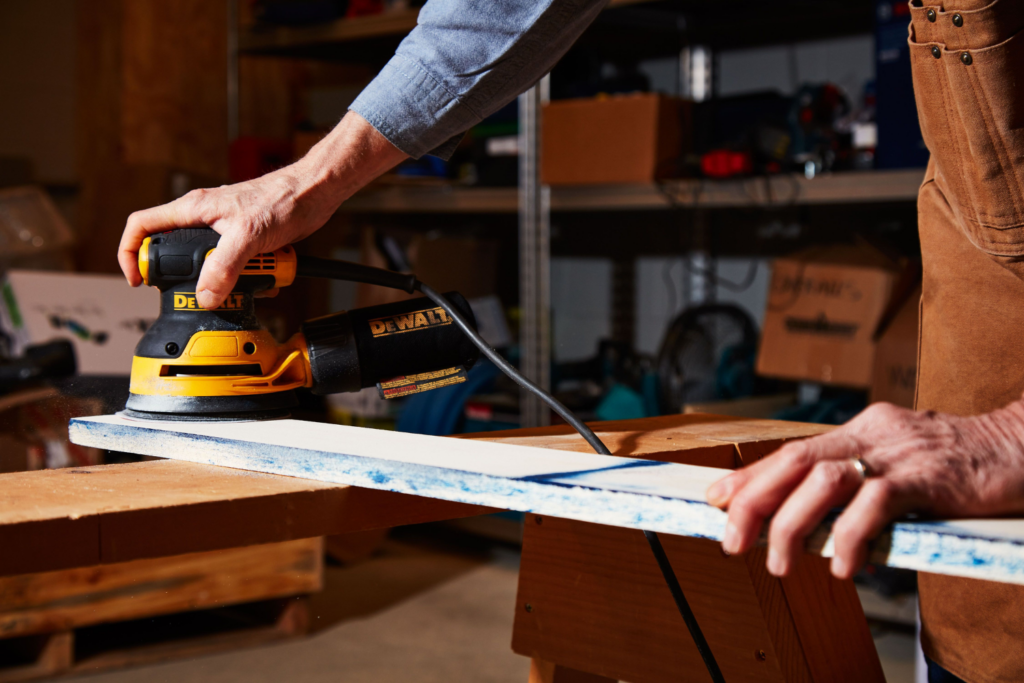
    • Random Orbital Sander: Provides a smooth finish with minimal effort.
    • Belt Sander: Great for removing material quickly and leveling surfaces.
    • Hand Sanding Blocks: Useful for detail work and finishing touches.

    7. Clamping Tools: Holding It All Together

    Clamps are crucial for holding your workpieces in place while you cut, shape, or glue them. Some essential clamping tools are:

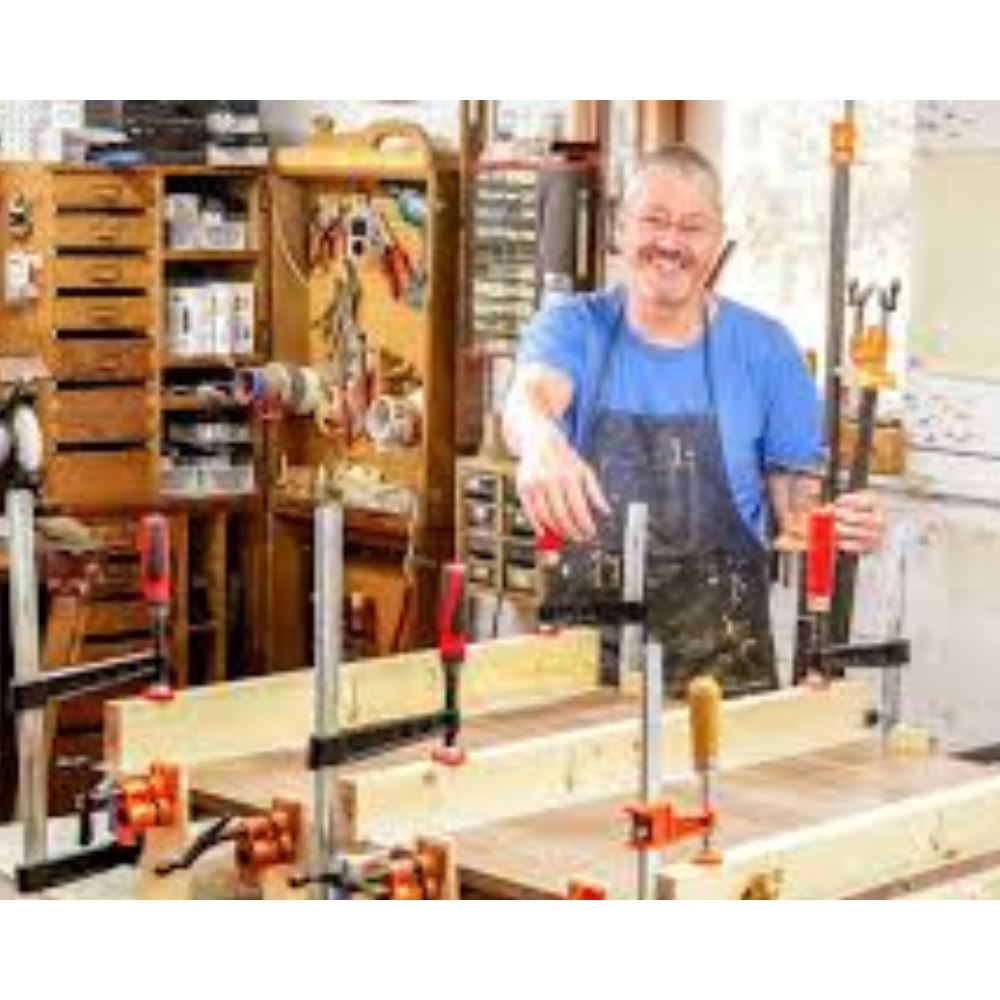
    • Bar Clamps: Versatile and strong, perfect for larger projects.
    • C-Clamps: Ideal for smaller, more detailed work.
    • Spring Clamps: Quick and easy to use for temporary holding.

    8. Joinery Tools: Building Strong Connections

    Joinery is the art of connecting pieces of wood to create a stable structure. Must have woodworking tools for joinery include:

    • Dovetail Jig: Helps create precise dovetail joints.
    • Mortise and Tenon Tools: Essential for traditional joinery techniques.
    • Biscuit Joiner: Makes quick and strong joints using biscuits.

    9. Sharpening Tools: Keeping Your Edge

    Sharp tools are safer and more effective. Keeping your tools sharp is a must for any woodworker. Essential sharpening tools include:

    • Sharpening Stones: Used for sharpening chisels and plane blades.
    • Honing Guide: Ensures a consistent angle while sharpening.
    • Strop: Polishes and hones the edge of your tools.

    For your “Free” Outdoor Projects Plan – Click Here.

    10. Safety Gear: Protecting Yourself

    Safety should always be a priority in woodworking. Essential safety gear includes:

    • Safety Glasses: Protect your eyes from dust and debris.
    • Hearing Protection: Guards against loud power tools.
    • Dust Masks: Prevent inhalation of sawdust and other particles.

    11. Workbench: The Heart of Your Workshop

    A solid workbench is the foundation of any woodworking shop. It provides a stable and reliable surface for all your projects. Features to look for include:

    • Sturdy Construction: Ensure it can handle heavy work.
    • Vices and Clamps: For holding your workpieces securely.
    • Storage: Drawers and shelves for organizing your tools.

    12. Finishing Tools: Adding the Final Touches

    After constructing your project, finishing tools help add the final touches. These tools include:

    • Paint Brushes and Rollers: For applying finishes and paint.
    • Spray Gun: Offers a smooth, professional finish.
    • Buffer and Polisher: Helps achieve a high-gloss finish.

    13. Advanced Tools: For the Experienced Woodworker

    For those looking to take their woodworking to the next level, advanced tools can open up new possibilities. Consider adding these to your collection:

    • Router: Perfect for creating decorative edges and joinery.
    • Planer: Useful for flattening and smoothing rough lumber.
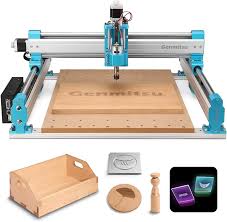
    • CNC Machine: Allows for precision cutting and engraving.

    14. Must Have Woodworking Tools for Beginners

    If you’re just starting out, here are some must have woodworking tools that will help you build a solid foundation:

    • Basic Hand Tools: Start with a good set of chisels, saws, and a hammer.
    • Power Drill: Versatile and essential for drilling and driving screws.
    • Sanding Tools: Begin with a simple sanding block and progress to power sanders as needed.

    15. Must Have Woodworking Tools for Professionals

    For professional woodworkers, having a comprehensive set of tools is essential. Here are some advanced tools to consider:

    • Bandsaw: Ideal for cutting curves and resawing lumber.
    • Drum Sander: Provides a smooth, even finish on large pieces.
    • Edge Jointer: Ensures perfectly straight and square edges.

    16. Maintenance of Must Have Woodworking Tools

    Taking care of your tools is crucial to ensure they last and perform well. Regular maintenance tips include:

    • Cleaning: Keep your tools free of dust and debris.
    • Sharpening: Regularly sharpen blades and bits.
    • Oiling: Prevent rust and ensure smooth operation.

    17. Must Have Woodworking Tools for Specific Projects

    Different projects require different tools. Here are some specialized tools for specific woodworking tasks:

    • Cabinetmaking: Requires precision measuring tools, clamps, and finishing tools.
    • Furniture Building: Needs joinery tools, sanders, and a reliable workbench.
    • Woodcarving: Essential tools include carving knives, gouges, and a mallet.

    18. Budget-Friendly Must Have Woodworking Tools

    You don’t need to break the bank to get started in woodworking. Here are some budget-friendly options:

    • Used Tools: Look for quality used tools at garage sales or online.
    • Starter Kits: Many manufacturers offer starter kits that provide good value.
    • DIY Solutions: Sometimes you can make your own tools or modify existing ones.

    19. Must Have Woodworking Tools for Small Workshops

    If you have limited space, you’ll need to be selective about your tools. Consider these space-saving options:

    • Multi-Function Tools: Tools that serve multiple purposes can save space.
    • Compact Workbench: Look for foldable or wall-mounted options.
    • Portable Tools: Tools like cordless drills and compact saws can be stored easily.

    20. Must Have Woodworking Tools for Outdoor Projects

    Outdoor woodworking projects have unique requirements. Here are some tools that can handle the elements:

    • Cordless Tools: Battery-powered tools are convenient and versatile.
    • Weather-Resistant Materials: Use tools that can work with treated lumber and other outdoor materials.
    • Portable Workbench: A collapsible workbench can be taken to different sites.

    21. Eco-Friendly Must Have Woodworking Tools

    For those interested in sustainability, consider these eco-friendly tools and practices:

    • Hand Tools: Reduce your carbon footprint by using manual tools when possible.
    • Reclaimed Wood: Tools that can work with reclaimed materials help reduce waste.
    • Eco-Friendly Finishes: Look for non-toxic, water-based finishes.

    22. Conclusion: Building Your Collection of Must Have Woodworking Tools

    Embarking on your woodworking journey is exciting, and having the right tools will make all the difference. By investing in these must have woodworking tools, you’ll be well-equipped to tackle any project with confidence and precision. Remember, quality tools are an investment in your craft, and with proper care, they will serve you for many years to come.

    For your “Free”Guide to 13 Wood Joinery Types – Click Here.

    FAQs About Must Have Woodworking Tools

    Q1: What are the most essential woodworking tools for beginners? A: For beginners, essential tools include a tape measure, hand saw, power drill, chisels, and a sanding block.

    Q2: How do I maintain my woodworking tools? A: Regular maintenance involves cleaning, sharpening blades, oiling moving parts, and storing tools properly to prevent rust.

    Q3: Can I start woodworking with a limited budget? A: Yes, you can start with basic, budget-friendly tools and gradually expand your collection. Look for used tools and starter kits to save money.

    Q4: What safety gear should I use in woodworking? A: Essential safety gear includes safety glasses, hearing protection, and dust masks to protect yourself from potential hazards.

    Q5: How do I choose the right tool for a specific project? A: Consider the requirements of your project, such as the type of wood, precision needed, and the specific tasks involved. Research and invest in tools that will best suit your needs.

    By following this guide and investing in the must have woodworking tools, you’ll be well on your way to mastering the art of woodworking. Happy crafting!

  • Tools for Woodworking: A Comprehensive Guide

    Tools for Woodworking: A Comprehensive Guide

    Woodworking is a craft that combines creativity, precision, and skill. Whether you are a beginner or a seasoned woodworker, the right tools are essential to bring your projects to life. In this article, we will delve into the various tools for woodworking that you need to create beautiful, functional pieces. From hand tools to power tools, we’ll cover everything you need to know to set up your woodworking workshop. Let’s get started on this journey into the world of woodworking tools.

    For your “Free” Outdoor Projects Plan – Click Here.

    Introduction to Tools for Woodworking

    Every woodworking enthusiast understands the importance of having the right tools. Tools for woodworking are not just instruments; they are extensions of your hands and imagination. Without the proper tools, even the most creative ideas can be challenging to execute. In this guide, we’ll explore the essential tools for woodworking, helping you understand their uses, benefits, and how they can enhance your craft.

    1. Essential Hand Tools for Woodworking

    Hand tools are the backbone of any woodworking workshop. They offer precision and control, which are crucial for detailed work. Some of the must-have hand tools include:

    • Chisels: Used for carving and cutting wood with precision.
    • Hand Saws: Essential for making straight cuts in wood.
    • Planes: Smoothens and flattens wood surfaces.
    • Clamps: Hold pieces of wood together firmly during gluing or assembly.
    • Mallets: Used to strike chisels or adjust parts without damaging them.

    These tools may seem basic, but they are indispensable for both beginners and experts.

    2. Power Tools for Woodworking

    Power tools have revolutionized woodworking by making tasks faster and easier. Here are some essential power tools for woodworking:

    • Table Saw: Ideal for making precise cuts quickly.
    • Circular Saw: Versatile and portable, perfect for cutting large boards.
    • Jigsaw: Excellent for cutting curves and intricate shapes.
    • Router: Used for hollowing out an area in the surface of wood.
    • Drill Press: Provides accuracy and power for drilling holes.

    These tools are vital for efficiency and precision in modern woodworking.

    3. Measuring and Marking Tools

    Accurate measurement is critical in woodworking. Even a slight error can ruin a project. Essential measuring and marking tools include:

    • Tape Measure: A must-have for measuring lengths.
    • Combination Square: Useful for measuring and marking 90-degree angles.
    • Marking Gauge: Helps in marking out lines parallel to the edge of the wood.
    • Calipers: Measure the thickness and diameter of wood pieces.

    Having these tools ensures that your measurements are spot-on.

    4. Cutting Tools for Woodworking

    Cutting is a fundamental aspect of woodworking. The right cutting tools can make a significant difference in the quality of your work. Some crucial cutting tools are:

    • Japanese Pull Saw: Known for its precision and clean cuts.
    • Coping Saw: Great for intricate cuts and curves.
    • Miter Saw: Perfect for making accurate crosscuts and miters.
    • Band Saw: Versatile tool for making straight and curved cuts.

    Investing in high-quality cutting tools can significantly enhance your woodworking projects.

    5. Sharpening Tools

    Keeping your tools sharp is essential for safety and efficiency. Dull tools can be dangerous and make your work more difficult. Important sharpening tools include:

    • Sharpening Stones: Used for honing the edges of blades and chisels.
    • Honing Guides: Help maintain the correct angle while sharpening.
    • Diamond Plates: Provide a flat surface for sharpening tools.

    Regularly sharpening your tools ensures they perform at their best.

    6. Sanding and Finishing Tools

    The finishing touches can make or break a woodworking project. Sanding and finishing tools help you achieve a smooth, polished look. Key tools include:

    • Random Orbital Sander: Provides a smooth finish with minimal effort.
    • Belt Sander: Removes material quickly, great for rough sanding.
    • Hand Sanding Blocks: Perfect for detailed and precise sanding.
    • Finishing Brushes and Pads: Used for applying stains, varnishes, and finishes.

    These tools help you achieve a professional-quality finish on your projects.

    For your “Free” Guide to 13 Wood Joinery Types – Click Here.

    7. Joinery Tools for Woodworking

    Joinery is the art of connecting wood pieces together. The right joinery tools can ensure strong, durable connections. Essential joinery tools include:

    • Dovetail Jig: Helps create precise dovetail joints.
    • Pocket Hole Jig: Makes strong, hidden joints.
    • Biscuit Joiner: Used for joining pieces of wood with biscuits.
    • Mortise and Tenon Tools: For creating traditional joinery.

    Mastering joinery with these tools can elevate the quality of your woodworking projects.

    8. Safety Equipment for Woodworking

    Safety should always be a priority in woodworking. Using the right safety equipment can prevent accidents and injuries. Important safety gear includes:

    • Safety Glasses: Protect your eyes from dust and debris.
    • Ear Protection: Shields your ears from loud power tool noises.
    • Dust Masks and Respirators: Prevent inhalation of harmful dust particles.
    • Gloves: Protect your hands from sharp tools and splinters.

    Always prioritize safety by using the appropriate protective gear.

    9. Storage Solutions for Woodworking Tools

    Keeping your tools organized and accessible is crucial for efficiency. Effective storage solutions include:

    • Tool Chests and Cabinets: Provide ample storage for various tools.
    • Pegboards: Keep tools visible and easy to reach.
    • Toolboxes: Portable storage for tools on the go.
    • Drawer Organizers: Keep small tools and accessories sorted.

    Investing in good storage solutions can save you time and frustration.

    10. Workshop Setup and Layout

    The layout of your workshop can significantly impact your workflow. Consider the following when setting up your woodworking space:

    • Workbench: A sturdy workbench is essential for any woodworking shop.
    • Lighting: Good lighting helps you see details clearly.
    • Ventilation: Proper ventilation is important for safety and comfort.
    • Tool Placement: Arrange tools for easy access and efficiency.

    A well-organized workshop enhances productivity and safety.

    11. Specialty Tools for Advanced Woodworking

    As you advance in woodworking, you may need specialized tools for complex projects. Some specialty tools include:

    • Lathe: Used for turning wood to create round objects like bowls and spindles.
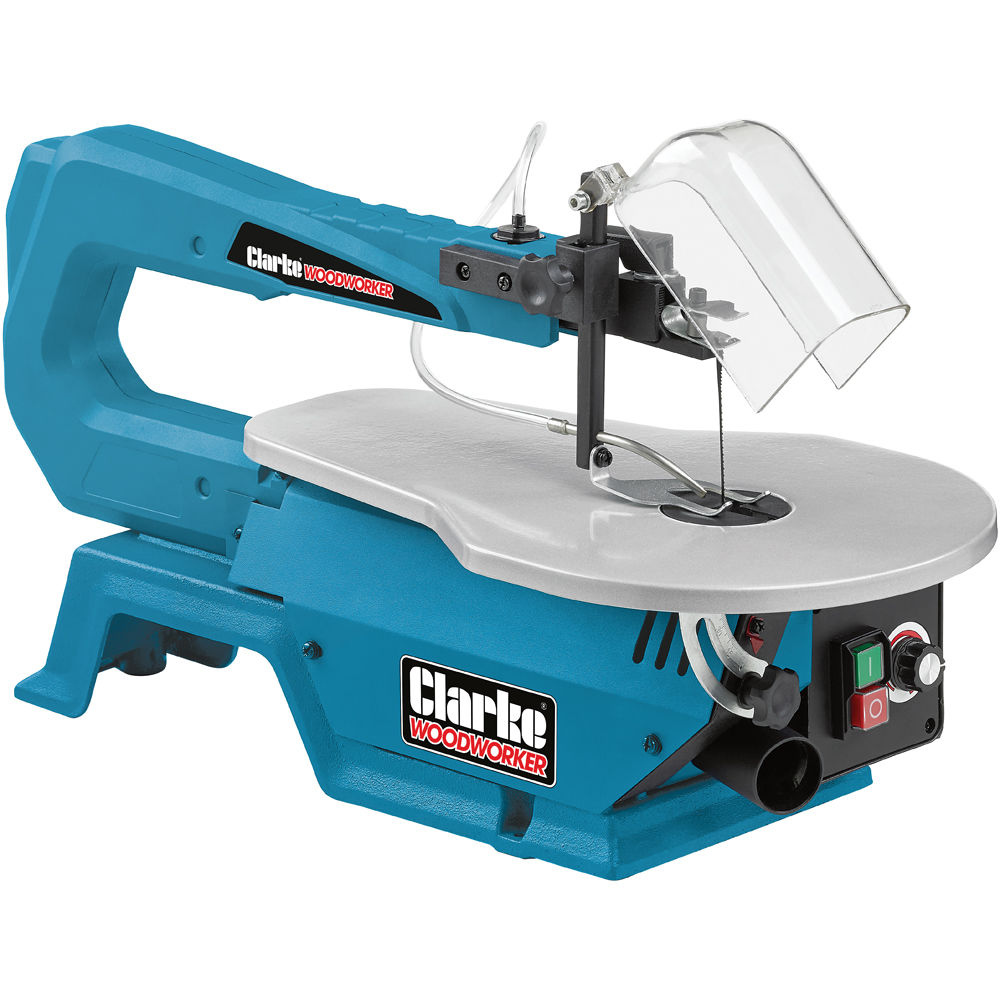
    • Scroll Saw: Perfect for intricate, detailed cuts.
    • Spokeshave: Used for shaping and smoothing curved surfaces.
    • Wood Burning Tools: For adding decorative details to wood.

    These tools can help you tackle more advanced and creative projects.

    12. Maintenance and Care for Woodworking Tools

    Proper maintenance extends the life of your tools and ensures they perform well. Tips for maintaining your tools include:

    • Regular Cleaning: Keep tools free of dust and debris.
    • Lubrication: Apply oil to moving parts to prevent rust and wear.
    • Proper Storage: Store tools in a dry, safe place.
    • Periodic Inspections: Check tools for damage or wear and repair as needed.

    Taking care of your tools will keep them in top condition for years to come.

    Conclusion: Mastering the Tools for Woodworking

    Having the right tools for woodworking is essential for any craftsman. These tools not only make your work easier but also improve the quality of your projects. From hand tools to power tools, measuring instruments to safety gear, each tool has a specific role in the woodworking process. By investing in high-quality tools and taking good care of them, you can enjoy a rewarding and fulfilling woodworking experience.

    For your “Free” 2 in 1 Folding Picnic Table Bench Plan – Click Here.

    FAQs About Tools for Woodworking

    1. What are the most essential tools for a beginner in woodworking? For beginners, the most essential tools include chisels, hand saws, a tape measure, a combination square, and clamps. These tools provide a solid foundation for basic woodworking tasks.

    2. How often should I sharpen my woodworking tools? It depends on the frequency of use and the type of wood you’re working with. However, a general rule is to sharpen your tools whenever you notice a decrease in performance or after every major project.

    3. What safety equipment should I always use in woodworking? Always use safety glasses, ear protection, dust masks or respirators, and gloves. Additionally, ensure your workspace is well-ventilated and free of hazards.

    4. Can I use power tools without any prior experience? While power tools can be used by beginners, it’s essential to read the manuals, understand the safety guidelines, and possibly get some hands-on instruction or training before using them.

    5. How do I maintain my woodworking tools? Regularly clean your tools, lubricate moving parts, store them in a dry place, and inspect them periodically for damage or wear. Proper maintenance will keep your tools in good working condition for a long time.

    Woodworking is a journey of learning and creativity. With the right tools and knowledge, you can create beautiful pieces that are both functional and artistic. Happy woodworking!

  • Best Woodworking Table Saw: Ultimate Guide for Enthusiasts

    Best Woodworking Table Saw: Ultimate Guide for Enthusiasts

    Woodworking is an art that requires precision, patience, and the right tools. Among these tools, the table saw stands out as a quintessential piece for any serious woodworker. Whether you’re crafting intricate designs or working on pallet woodworking projects, a woodworking table saw can make all the difference. This guide aims to help you navigate through the world of table saws, ensuring you find the perfect fit for your needs.

    For your “Free” Guide to 13 Wood Joinery Types – Click Here.

    Introduction to Woodworking Table Saws

    When diving into woodworking, the table saw often becomes the heart of your workshop. But what makes it so essential? Imagine trying to slice a loaf of bread with a dull knife; frustrating, right? Similarly, a subpar table saw can turn a joyful woodworking project into a tedious task. A good table saw provides the precision, power, and versatility needed for a wide range of projects, from cutting large sheets of plywood to intricate joinery.

    Understanding the Basics: What is a Table Saw?

    A table saw is a woodworking tool consisting of a circular saw blade, mounted on an arbor, and driven by an electric motor. The blade protrudes through the surface of a table, which provides support for the material being cut. This design allows for precise cuts, making it a staple in any woodworking shop.

    Why You Need a Table Saw

    Having a woodworking table saw isn’t just about bragging rights; it’s about safety, efficiency, and quality of work. A high-quality table saw ensures clean, accurate cuts, which are essential for any project. It also reduces the risk of kickback, a common cause of injuries in the workshop. Moreover, a reliable table saw can handle a variety of materials and cuts, making your projects smoother and more enjoyable.

    Types of Table Saws

    There are several types of table saws available, each with its own advantages and best-use scenarios:

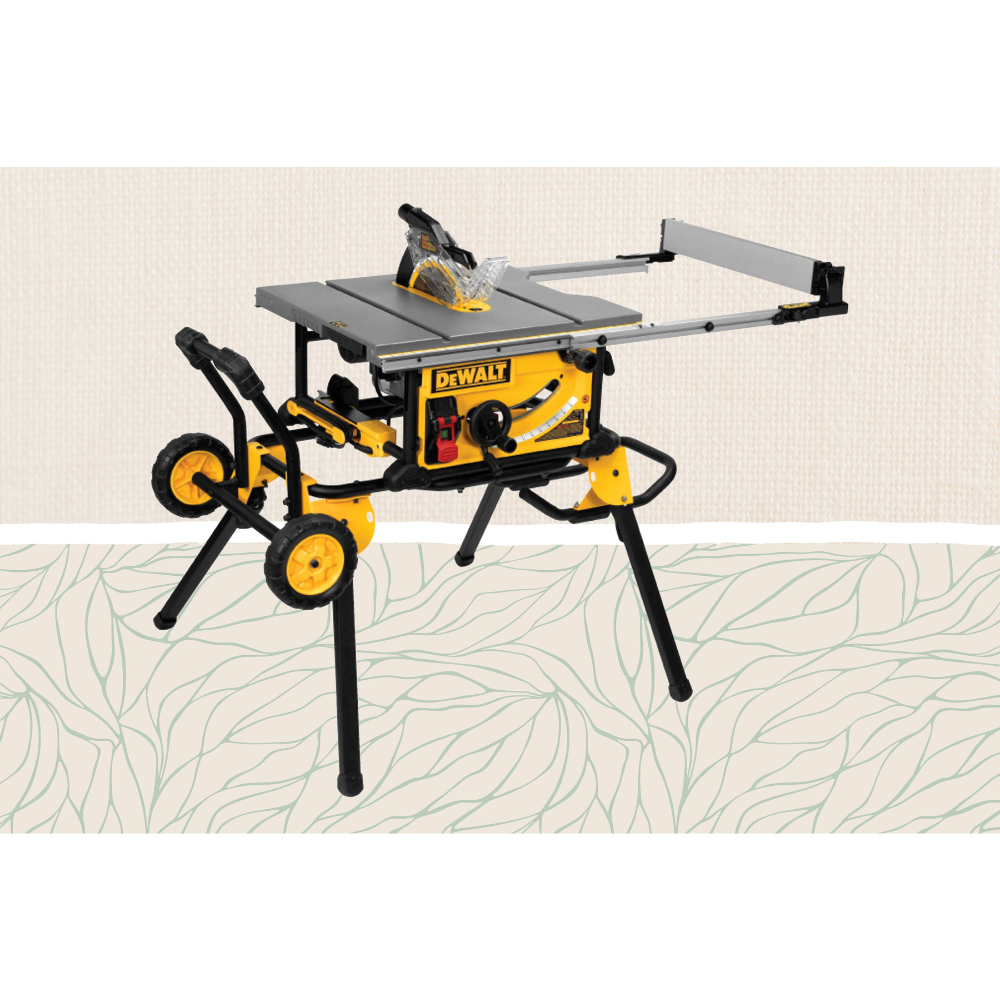
    1. Portable Table Saws: Also known as jobsite saws, these are lightweight and easy to transport. They’re perfect for contractors and those who need to move their saws frequently.
    2. Contractor Table Saws: These are larger and more powerful than portable saws, ideal for heavy-duty woodworking.
    3. Cabinet Table Saws: These are the heavyweights of the table saw world. They offer superior power, precision, and durability, making them perfect for professional woodworkers.
    4. Hybrid Table Saws: These combine features of contractor and cabinet saws, providing a balance of performance and cost.

    Top Features to Look for in a Table Saw

    When searching for a woodworking table saw, consider the following features:

    1. Motor Power: The motor’s power, measured in horsepower (HP), determines how easily the saw can cut through dense materials. More HP means more cutting power.
    2. Blade Size: Common blade sizes are 10-inch and 12-inch. Larger blades can make deeper cuts.
    3. Fence System: A good fence system ensures accurate, straight cuts. Look for a saw with a sturdy, easy-to-adjust fence.
    4. Dust Collection: Efficient dust collection keeps your workspace clean and improves visibility and safety.
    5. Safety Features: Look for features like riving knives, blade guards, and anti-kickback pawls to minimize the risk of injury.
    6. Table Size and Extension Wings: A larger table provides better support for large materials. Extension wings can further increase the workspace.

    What are the Top Brands in the Table Saw Market

    Several brands are renowned for producing high-quality woodworking table saws:

    1. SawStop: Known for their innovative safety features, Saw Stop table saws are a favorite among professionals.
    2. DeWalt: DeWalt offers a range of reliable, high-performance table saws suitable for both professionals and hobbyists.
    3. Bosch: Bosch table saws are known for their precision and portability, making them ideal for jobsite use.
    4. Jet: Jet provides durable, powerful table saws perfect for heavy-duty woodworking.
    5. Grizzly: Grizzly table saws are popular for their robust build and competitive pricing.

    What is the best choice of a Table Saw for beginners

    For beginners, a portable or contractor table saw is often the best choice. These saws are typically easier to use and less expensive than cabinet saws. The DeWalt DWE7485 is a great option for beginners. It offers a good balance of power, precision, and safety features, making it ideal for learning the ropes of woodworking.

    Best choice of a Table Saw for Professionals

    Professional woodworkers often require a more powerful and versatile saw. The Saw Stop PCS31230 is a top choice among pros. With its advanced safety features, robust construction, and precise cutting capabilities, it’s perfect for demanding woodworking tasks.

    Setting Up Your Table Saw for Optimal Performance

    Once you’ve chosen the a woodworking table saw for your needs, setting it up correctly is crucial. Start by ensuring the saw is on a flat, stable surface. Align the blade parallel to the miter slot and fence for accurate cuts. Adjust the blade height and angle according to your project requirements. Regular maintenance, such as cleaning the blade and lubricating moving parts, will keep your saw in top condition.

    For your “Free” Modern Table Plan – Click Here.

    Safety Tips for Using a Table Saw

    Safety should always be a priority when using a table saw. Here are some tips to keep in mind:

    1. Read the Manual: Familiarize yourself with your saw’s features and safety instructions.
    2. Wear Safety Gear: Always wear safety glasses, hearing protection, and appropriate clothing.
    3. Use Push Sticks: Push sticks and push blocks keep your hands away from the blade when making narrow cuts.
    4. Keep the Workspace Clean: A cluttered workspace can lead to accidents. Keep the area around your saw clear.
    5. Avoid Distractions: Focus on your work and avoid distractions that could lead to mistakes or injuries.

    Common Mistakes to Avoid with Your Table Saw

    Even experienced woodworkers can make mistakes. Here are some common ones to avoid:

    1. Incorrect Blade Height: Setting the blade too high or too low can lead to poor cuts and increased risk of kickback.
    2. Ignoring Maintenance: Regular maintenance is essential for keeping your saw in good working order.
    3. Rushing: Take your time with each cut to ensure accuracy and safety.
    4. Using Dull Blades: A dull blade can cause burns, tear-out, and kickback. Keep your blades sharp.

    Maintaining Your Table Saw

    Proper maintenance is key to the longevity and performance of your table saw. Clean the blade regularly to remove pitch and resin buildup. Check the alignment of the blade, fence, and miter slot periodically. Lubricate moving parts to reduce friction and wear. Replace worn or damaged parts promptly to prevent accidents.

    Advanced Techniques for Using a Table Saw

    Once you’ve mastered the basics, you can explore advanced techniques to enhance your woodworking skills:

    1. Dado Cuts: Use a dado blade to cut grooves and slots for joinery.
    2. Taper Cuts: A taper jig allows you to make precise angled cuts.
    3. Bevel Cuts: Adjust the blade angle to make bevel cuts for decorative edges and joints.
    4. Resawing: Use the table saw to thin down thick boards for veneer or other projects.

    Choosing the Right Blade for Your Table Saw

    The blade you use can significantly impact your work quality. Here are some blade types to consider:

    1. Rip Blades: Designed for cutting along the grain, rip blades have fewer teeth and larger gullets.
    2. Crosscut Blades: With more teeth and smaller gullets, crosscut blades are ideal for cutting across the grain.
    3. Combination Blades: These blades offer a balance between rip and crosscut capabilities, making them versatile for various cuts.
    4. Specialty Blades: For specific tasks like dado cuts or cutting non-wood materials, specialty blades are available.

    Budget-Friendly Options for a Table Saw

    Not everyone needs a high-end table saw. There are budget-friendly options that still offer excellent performance. The Bosch 4100XC-10 is a great example. It provides reliable power, precision, and portability without breaking the bank. For hobbyists and those on a budget, it’s a solid choice.

    Pallet Woodworking Projects and Your Table Saw

    Pallet woodworking projects are a fantastic way to repurpose old wood and create something new and beautiful. With a woodworking table saw, you can easily break down pallets into usable wood for various projects. Whether you’re making furniture, garden planters, or decorative items, a table saw ensures your cuts are precise and clean, making the assembly process much smoother.

    For your “Free” Outdoor Projects Plan – Click Here.

    FAQs about a Woodworking Table Saw

    1. What is the best woodworking table saw for small workshops?
      • The DeWalt DWE7491RS is a great option for small workshops. It’s compact, powerful, and has excellent portability.
    2. Can I use a table saw for cutting metal?
      • While some table saws can cut thin metal sheets with the right blade, it’s generally recommended to use a saw specifically designed for metal cutting.
    3. How often should I sharpen the blade on my table saw?
      • The frequency of sharpening depends on usage. For regular use, sharpening every few months should suffice. Always inspect the blade for dullness and wear.
    4. Is it worth investing in a high-end table saw?
      • If you’re a professional or serious hobbyist, investing in a high-end table saw like the SawStop PCS31230 can be worth it for the enhanced precision, power, and safety features.
    5. What safety gear is essential when using a table saw?
      • Essential safety gear includes safety glasses, hearing protection, and push sticks. Consider a dust mask if you’re working with materials that produce a lot of dust.

    Conclusion

    Choosing a woodworking table saw can transform your woodworking projects, making them more enjoyable and precise. Whether you’re a beginner embarking on your first pallet woodworking project or a seasoned professional, the right table saw is an invaluable tool. By understanding the different types, features, and brands, you can make an informed decision that meets your specific needs. Remember, safety and maintenance are just as important as choosing the right saw. With the right approach, your table saw will serve you well for years to come.

  • Woodworking Hand Planes: Essential Tools for Every Woodworker

    Woodworking Hand Planes: Essential Tools for Every Woodworker

    Woodworking hand planes are one of the most essential tools in a woodworker’s arsenal, making woodworking a timeless craft. Whether you’re a seasoned woodworker or a beginner, understanding the various types of hand planes and their uses can significantly enhance your craftsmanship. This comprehensive guide will delve into everything you need to know about woodworking hand planes, ensuring you’re well-equipped to tackle any project with confidence.

    For your “Free” Guide to 13 Wood Joinery Types – Click Here.

    Introduction to Woodworking Hand Planes

    Hand planes have been around for centuries, helping woodworkers achieve smooth, flat surfaces on their projects. These tools come in various shapes and sizes, each designed for specific tasks. By mastering the use of woodworking hand planes, you can achieve a level of precision and quality that power tools often can’t match.

    The History of Hand Planes

    Hand planes have a rich history, dating back to ancient civilizations. The earliest versions were simple tools made from stone and wood. Over time, they evolved into the sophisticated metal and wooden planes we use today. Understanding their history gives us a greater appreciation for their role in woodworking. The Egyptians, Romans, and medieval craftsmen all contributed to the development of hand planes. Each culture improved upon the design and functionality, leading to the diverse range of planes available today.

    Types of Woodworking Hand Planes

    There are several types of hand planes, each serving a unique purpose. Let’s explore some of the most common ones:

    1. Block Plane
    2. Bench Plane
    3. Shoulder Plane
    4. Router Plane
    5. Rabbet Plane
    6. Scrub Plane
    7. Joinery Plane

    The Essential Block Plane

    The block plane is a small, versatile tool perfect for trimming and fine-tuning. It’s easy to handle and is ideal for tasks that require precision, such as fitting joints or smoothing edges. Block planes typically have their blades set at a lower angle compared to other planes, making them excellent for end grain work. They come in standard and low-angle versions, each suited for different tasks. The compact size of block planes makes them easy to carry and use, even in tight spaces.

    Bench Planes: The Workhorses

    Bench planes are larger and more robust, making them perfect for flattening and smoothing large surfaces. They come in various sizes, with the number indicating the plane’s length. Common bench planes include the No. 4 smoothing plane, the No. 5 jack plane, and the No. 7 jointer plane. Each type of bench plane serves a specific purpose:

    • Smoothing Plane (No. 4): Ideal for final smoothing before finishing.
    • Jack Plane (No. 5): A versatile plane used for rough work and initial flattening.
    • Jointer Plane (No. 7): Perfect for jointing edges and flattening large surfaces.

    Shoulder Planes for Precision Work

    Shoulder planes are designed for trimming tenons and other joinery. Their narrow bodies allow them to fit into tight spaces, making them indispensable for detailed work. The blade extends the full width of the tool, allowing you to cut right up to the edge of a workpiece. This makes shoulder planes perfect for fine-tuning the fit of joints and ensuring a clean, precise finish.

    Router Planes for Consistency

    Router planes are used to create consistent, precise grooves and recesses. They are perfect for tasks like creating dados or inlays. The blade of a router plane is mounted vertically and can be adjusted to different depths, providing control over the cut. Router planes are often used in conjunction with templates or guides to achieve accurate, repeatable results.

    Rabbet Planes for Specialized Cuts

    Rabbet planes are designed for cutting rabbets (or rebates), which are recesses along the edge of a piece of wood. They are essential for joinery and can also be used to create decorative elements. Rabbet planes feature a blade that extends to the edge of the plane body, allowing you to cut right up to a shoulder or corner. They can be adjusted to cut different widths and depths, making them versatile tools for various woodworking tasks.

    Scrub Planes for Heavy Stock Removal

    Scrub planes are designed for quick, aggressive stock removal. They are used to rough out shapes and prepare rough-sawn lumber for further refinement. Scrub planes have a heavily cambered blade, which allows them to take thick shavings and quickly reduce the thickness of a workpiece. They are particularly useful for initial flattening of rough stock and preparing boards for planing with finer tools.

    Joinery Planes for Fine Work

    Joinery planes, such as plow planes and shoulder planes, are used for precise joinery work. These planes are designed for creating grooves, dados, and other detailed cuts that require accuracy and precision. Plow planes are adjustable and come with various cutters, allowing you to create different widths and depths of grooves. Joinery planes are essential for tasks like fitting joints, creating moldings, and adding decorative details to your workpieces.

    Choosing the Right-Hand Plane

    Selecting the right hand plane depends on the task at hand. For general smoothing and flattening, a bench plane is your best bet. For detailed work, a block or shoulder plane is ideal. Understanding the strengths of each type will help you choose the right tool for your project. Consider factors such as the size of the workpiece, the type of wood, and the desired finish when selecting a hand plane. Investing in a quality hand plane will pay off in the long run, as a well-made tool will provide better results and last longer.

    Maintaining Your Hand Planes

    Proper maintenance is crucial for keeping your hand planes in top condition. This includes regular sharpening, cleaning, and storing them correctly. A well-maintained hand plane can last a lifetime and provide years of reliable service. Regular maintenance not only ensures optimal performance but also prevents damage to the tool and extends its lifespan. Here are some tips for maintaining your hand planes:

    • Cleaning: After each use, clean your hand plane to remove any wood shavings, dust, and debris. Use a brush or compressed air to clean hard-to-reach areas. Wipe down the plane with a soft cloth to remove any moisture and prevent rust.
    • Sharpening: A sharp blade is essential for achieving clean, smooth cuts. There are various methods for sharpening hand plane blades, including using sharpening stones, honing guides, and power sharpeners. Regular sharpening will keep your planes performing at their best.
    • Lubrication: Apply a light coat of oil or wax to the metal parts of your hand plane to prevent rust and ensure smooth operation. This is especially important for planes that are used infrequently or stored in humid environments.
    • Storage: Store your hand planes in a dry, cool place to prevent rust and damage. Keep them in a protective case or tool chest to prevent dust and debris from accumulating. Avoid storing hand planes on their blades to prevent damage to the cutting edge.

    For your “Free” Workspace Plans – Click Here.

    Sharpening Your Hand Planes

    A sharp blade is essential for achieving clean, smooth cuts. There are various methods for sharpening hand plane blades, including using sharpening stones, honing guides, and power sharpeners. Regular sharpening will keep your planes performing at their best. Here are some tips for sharpening your hand plane blades:

    • Sharpening Stones: Use sharpening stones to maintain a sharp edge on your hand plane blades. Start with a coarse grit stone to remove any nicks or damage, then progress to finer grit stones for a razor-sharp edge. Water stones, oil stones, and diamond stones are popular choices for sharpening hand plane blades.
    • Honing Guides: A honing guide helps maintain a consistent angle while sharpening your blade. This ensures an even, sharp edge and reduces the risk of damaging the blade. Honing guides are available in various styles and can be adjusted to accommodate different blade widths and angles.
    • Stropping: After sharpening, use a leather strop to remove any burrs and polish the edge of the blade. Stropping helps achieve a mirror-like finish and ensures a razor-sharp cutting edge. Apply a small amount of honing compound to the strop for optimal results.

    Tuning Your Hand Planes

    Tuning your hand planes involves adjusting them for optimal performance. This includes setting the blade depth, aligning the blade, and ensuring the sole is flat. Proper tuning will enhance the accuracy and ease of use of your hand planes. Here are some steps for tuning your hand planes:

    • Blade Depth: Adjust the blade depth to control the thickness of the shavings. A shallow blade setting produces thin shavings for fine smoothing, while a deeper setting removes more material for rough shaping. Use the depth adjustment knob to set the blade to the desired depth.
    • Blade Alignment: Ensure the blade is parallel to the sole of the plane for even cutting. Use the lateral adjustment lever to align the blade if necessary. A misaligned blade can cause uneven cuts and reduce the quality of your work.
    • Sole Flatness: Check the sole of the plane for flatness using a straightedge. A flat sole ensures consistent contact with the workpiece and prevents the plane from rocking or digging into the wood. If the sole is not flat, use a flat surface and sandpaper to flatten it.

    Using Woodworking Hand Planes Safely

    Safety is paramount when using hand planes. Always wear protective gear, such as safety glasses, and use proper technique to avoid injuries. Keep your work area clean and free of obstacles to ensure a safe working environment. Here are some safety tips for using hand planes:

    • Proper Technique: Use smooth, controlled strokes when planning to prevent accidents and ensure accurate results. Avoid applying excessive force, as this can cause the plane to slip or dig into the wood. Maintain a firm grip on the plane and keep your hands away from the blade.
    • Sharp Blades: Keep your blades sharp to reduce the risk of accidents and improve cutting performance. Dull blades require more force and are more likely to slip, increasing the risk of injury. Regularly inspect and sharpen your blades to maintain optimal performance.
    • Protective Gear: Wear safety glasses to protect your eyes from flying debris and dust. Consider wearing hearing protection if you are working in a noisy environment or using power tools in conjunction with hand planes. Use gloves to protect your hands from sharp edges and splinters.

    Common Mistakes to Avoid

    Even experienced woodworkers can make mistakes when using hand planes. Common errors include using a dull blade, applying too much pressure, or failing to maintain the tool properly. Avoiding these mistakes will improve your results and extend the life of your hand planes. Here are some common mistakes to watch out for:

    • Dull Blades: Using a dull blade can result in tear-out, uneven cuts, and a rough finish. Regularly sharpen your blades to ensure clean, smooth cuts and reduce the risk of damage to your workpiece.
    • Excessive Pressure: Applying too much pressure can cause the plane to dig into the wood, resulting in uneven cuts and gouges. Use smooth, controlled strokes and let the sharp blade do the work.
    • Improper Maintenance: Neglecting to clean, sharpen, and tune your hand planes can lead to poor performance and damage to the tool. Regular maintenance is essential for keeping your hand planes in top condition and ensuring optimal results.

    Advanced Techniques with Hand Planes

    Once you’ve mastered the basics, you can explore advanced techniques with hand planes. This includes creating custom profiles, using jigs and guides, and incorporating hand planes into complex joinery. These techniques will elevate your woodworking skills to new heights. Here are some advanced techniques to try:

    • Custom Profiles: Use molding planes or profile cutters to create custom profiles and decorative details. This allows you to add unique elements to your projects and showcase your creativity and skill.
    • Jigs and Guides: Use jigs and guides to achieve precise, repeatable results. Jigs can help you maintain consistent angles and depths, while guides ensure straight, accurate cuts. Experiment with different jigs and guides to expand your capabilities and improve your results.
    • Complex Joinery: Incorporate hand planes into complex joinery tasks, such as dovetail joints, mortise and tenon joints, and finger joints. Hand planes can help you achieve tight, precise fits and smooth, clean surfaces for your joints.

    The Joy of Woodworking with Hand Planes

    There’s something deeply satisfying about working with hand planes. The tactile feedback, the sound of the blade slicing through wood, and the smooth finish they leave behind make woodworking a truly rewarding experience. Hand planes allow you to connect with your work on a deeper level. Here are some reasons to embrace hand plane woodworking:

    • Craftsmanship: Hand planes offer a level of precision and control that power tools often can’t match. Using hand planes allows you to achieve a higher level of craftsmanship and create workpieces with a personal touch.
    • Simplicity: Hand planes are simple tools that require no electricity or complex setups. This makes them accessible and easy to use, even for beginners. The simplicity of hand planes allows you to focus on your technique and the quality of your work.
    • Satisfaction: The process of planing wood by hand is meditative and satisfying. The rhythmic motion, the feel of the wood, and the visible progress make woodworking with hand planes a fulfilling experience.

    Building Your Hand Plane Collection

    As you become more experienced, you may want to expand your collection of hand planes. Each new plane opens up new possibilities and allows you to tackle a wider range of projects. Collecting hand planes can be a lifelong journey, filled with discovery and growth. Here are some tips for building your hand plane collection:

    • Start Small: Begin with a few essential planes, such as a block plane, a smoothing plane, and a jack plane. These versatile tools will cover a wide range of tasks and provide a solid foundation for your collection.
    • Quality Over Quantity: Invest in high-quality hand planes that are well-made and built to last. Quality tools will provide better results and be more enjoyable to use. Look for reputable brands and consider purchasing vintage planes that can be restored.
    • Expand Gradually: Add new planes to your collection as you encounter specific needs and challenges in your woodworking projects. Each new plane should address a specific task or improve your capabilities. Over time, your collection will grow to include a diverse range of tools.

    For your “Free” Guide to 13 Wood Joinery Types – Click Here.

    Conclusion

    Woodworking hand planes are indispensable tools for any woodworker. By understanding their history, types, and uses, you can enhance your craftsmanship and achieve professional-quality results. Whether you’re just starting or looking to refine your skills, mastering the use of hand planes will take your woodworking to the next level. Investing time in learning about and using woodworking hand planes will not only improve your skills but also deepen your appreciation for the art of woodworking.

    FAQs About Woodworking Hand Planes

    1. What is the best hand plane for beginners? The best hand plane for beginners is usually a block plane. It’s versatile, easy to handle, and perfect for a variety of tasks.

    2. How often should I sharpen my hand plane blades? It depends on how frequently you use them. Generally, it’s good practice to sharpen your blades after every few hours of use to maintain optimal performance.

    3. Can I use hand planes on all types of wood? Yes, hand planes can be used on most types of wood. However, some harder woods may require more frequent sharpening and tuning.

    4. What should I do if my hand plane isn’t cutting smoothly? If your hand plane isn’t cutting smoothly, check the blade sharpness, adjust the blade depth, and ensure the sole is flat. Proper tuning and maintenance are key.

    5. Are there any alternatives to hand planes for smoothing wood? While power tools like electric planers and sanders can be used, hand planes offer a level of precision and control that’s hard to match. They are also quieter and don’t require electricity.

    By investing time in learning about and using woodworking hand planes, you’ll not only improve your skills but also gain a deeper appreciation for the art of woodworking. So, pick up a hand plane, and let the shavings fly!

  • Bandsaw for Woodworking: The Ultimate Guide

    Bandsaw for Woodworking: The Ultimate Guide

    Woodworking is an art that combines creativity, precision, and a variety of tools to bring visions to life. Among the many tools available, the bandsaw for woodworking stands out as a versatile and essential machine. Whether you’re a seasoned woodworker or a beginner, understanding how to use a bandsaw effectively can elevate your craft. In this comprehensive guide, we’ll delve into everything you need to know about bandsaws, from their components and uses to maintenance tips and safety practices.

    For your “Free” 2 in 1 Folding Picnic Table Bench Plan – Click Here.

    Introduction to Bandsaws

    A bandsaw is a powerful tool that uses a long, continuous band of toothed metal to cut through wood. This tool is perfect for making precise cuts, intricate curves, and even resawing lumber. If you’re serious about woodworking, a bandsaw can be a game-changer in your workshop.

    Bandsaws come in various sizes and configurations, making them suitable for a wide range of woodworking projects. From hobbyists working in their garages to professional woodworkers in large shops, bandsaws are indispensable for their versatility and precision.

    Why Choose a Bandsaw for Woodworking?

    Why should you invest in a bandsaw for woodworking? The answer lies in its versatility. A bandsaw can handle a wide range of tasks, from cutting thick lumber to crafting delicate patterns. It’s the Swiss Army knife of woodworking tools, offering flexibility and precision.

    One of the standout features of a bandsaw is its ability to make intricate cuts. Unlike other saws that are limited to straight lines or simple curves, a bandsaw can navigate complex patterns and tight radii with ease. This makes it ideal for projects that require a high degree of detail and precision, such as crafting furniture, musical instruments, or decorative woodwork.

    Types of Bandsaws

    There are two main types of bandsaws: bench-top and floor-standing models. Bench-top bandsaws are smaller, making them ideal for hobbyists and those with limited space. Floor-standing models are larger and more powerful, suitable for professional workshops.

    Bench-top bandsaws are portable and relatively affordable, making them a popular choice for beginners. Despite their smaller size, they can handle many of the same tasks as their larger counterparts, though they may struggle with very thick or hard woods.

    Floor-standing bandsaws, on the other hand, offer more power and a larger cutting capacity. They are better suited for heavy-duty tasks and larger projects. These models often come with additional features such as larger tables, more powerful motors, and advanced blade tensioning systems, making them a worthwhile investment for serious woodworkers.

    Key Components of a Bandsaw

    Understanding the parts of a bandsaw is crucial for effective use. Key components include the blade, the table, the motor, and the guide system. Each part plays a vital role in the machine’s operation and your ability to make precise cuts.

    • Blade: The blade is a continuous loop of metal with teeth on one edge. It comes in various widths and tooth configurations, each suited for different types of cuts.
    • Table: The table supports the material being cut. It can be adjusted to different angles for bevel cuts.
    • Motor: The motor powers the blade. More powerful motors can cut through thicker and harder materials.
    • Guide System: The guides keep the blade stable and aligned, ensuring precise cuts. These include upper and lower blade guides and thrust bearings.

    Choosing the Right Blade

    The blade is the heart of the bandsaw. Blades come in various widths, tooth designs, and materials. Choosing the right blade for your project is essential. For instance, a wider blade is better for straight cuts, while a narrower blade excels at cutting curves.

    Blade selection depends on several factors, including the type of wood, the thickness of the material, and the desired finish. For example:

    • Wide Blades (1/2 inch to 3/4 inch): Ideal for straight cuts and resawing. They provide stability and reduce blade drift.
    • Narrow Blades (1/8 inch to 1/4 inch): Best for cutting curves and intricate patterns. They allow for tighter turns and more detailed work.
    • Tooth Count: Blades with fewer teeth per inch (TPI) are better for cutting thick, rough materials, while blades with more TPI produce smoother cuts in thinner materials.

    Setting Up Your Bandsaw

    Setting up your bandsaw correctly is the first step to successful woodworking. Ensure the machine is stable, the blade is tensioned properly, and the guides are adjusted for the thickness of the wood. Proper setup can make a significant difference in the quality of your cuts.

    • Stability: Place the bandsaw on a flat, stable surface. If it’s a bench-top model, secure it to the workbench to prevent movement during use.
    • Blade Tension: Adjust the blade tension according to the manufacturer’s instructions. Proper tension prevents the blade from wandering and ensures straight cuts.
    • Guide Adjustment: Set the upper and lower blade guides close to the blade without touching it. Properly adjusted guides keep the blade stable and reduce vibration.

    Making Straight Cuts when using a bandsaw for woodworking

    One of the primary uses of a bandsaw is making straight cuts. Whether you’re cutting lumber to size or ripping boards, a bandsaw can handle it with ease. Use a fence to guide your material and keep the cuts straight and even.

    To make straight cuts:

    1. Set the Fence: Attach the fence to the bandsaw table and adjust it to the desired width of the cut.
    2. Position the Material: Place the material against the fence, ensuring it is flat and stable.
    3. Start the Saw: Turn on the bandsaw and let it reach full speed before beginning the cut.
    4. Feed the Material: Slowly feed the material into the blade, keeping it flush against the fence. Maintain a consistent feed rate to prevent binding or burning.

    Cutting Curves and Patterns when using a bandsaw for woodworking

    The bandsaw’s ability to cut curves is one of its standout features. This makes it ideal for creating intricate designs and patterns. Practice controlling the feed rate and steering the wood to achieve smooth, accurate curves.

    To cut curves:

    1. Choose the Right Blade: Select a narrow blade suitable for cutting curves.
    2. Draw the Pattern: Mark the desired pattern on the wood using a pencil or template.
    3. Position the Material: Place the material on the bandsaw table, ensuring it is stable.
    4. Start the Saw: Turn on the bandsaw and let it reach full speed.
    5. Cut the Curve: Slowly feed the material into the blade, steering it along the marked line. Take your time to avoid over-cutting or straying from the pattern.

    Resawing with a Bandsaw

    Resawing involves cutting a piece of wood along its thickness, creating thinner boards from a thicker one. This is a great way to make veneers or bookmatched panels. A bandsaw for woodworking is particularly well-suited for this task, thanks to its deep throat and powerful motor.

    To resaw wood:

    1. Set the Fence: Adjust the fence to the desired thickness of the cut.
    2. Position the Material: Place the wood vertically against the fence.
    3. Start the Saw: Turn on the bandsaw and let it reach full speed.
    4. Feed the Material: Slowly feed the wood into the blade, maintaining a consistent feed rate. Use push sticks or a feather board to keep your hands safe and the material stable.

    For your “Free” Workspace Plans – Click Here.

    Bandsaw Safety Tips

    Safety should always be a priority when using any power tool. Wear safety goggles, keep your fingers away from the blade, and use push sticks for small pieces. Regularly check the machine for any signs of wear or damage to ensure it operates safely.

    • Personal Protective Equipment (PPE): Always wear safety goggles to protect your eyes from flying debris. Hearing protection is also recommended due to the noise level of the saw.
    • Blade Guards: Ensure the blade guards are in place and functioning correctly. These protect your hands from accidental contact with the blade.
    • Push Sticks: Use push sticks to feed small or narrow pieces of wood into the saw. This keeps your hands at a safe distance from the blade.
    • Regular Inspections: Frequently inspect the bandsaw for signs of wear or damage. Check the blade, guides, and table for any issues that could affect safety or performance.

    Maintaining Your Bandsaw

    Regular maintenance keeps your bandsaw in top condition. Clean the blade and the table after each use, check the blade tension, and lubricate moving parts. Keeping your bandsaw well-maintained will extend its lifespan and improve its performance.

    • Blade Cleaning: Remove sawdust and resin buildup from the blade using a brush or compressed air. A clean blade cuts more efficiently and lasts longer.
    • Table Cleaning: Wipe down the table after each use to remove sawdust and debris. A clean table ensures smooth material movement and accurate cuts.
    • Lubrication: Lubricate moving parts, such as the blade guides and bearings, to reduce friction and wear.
    • Blade Tension: Regularly check and adjust the blade tension to prevent drift and ensure straight cuts.

    Troubleshooting Common Issues

    Even with proper maintenance, you may encounter issues with your bandsaw. Common problems include blade drift, uneven cuts, and excessive noise. Understanding how to troubleshoot these issues can save you time and frustration.

    • Blade Drift: If the blade wanders from the cut line, check the blade tension and guide adjustment. Ensure the fence is parallel to the blade.
    • Uneven Cuts: Uneven cuts can result from a dull blade, improper tension, or misaligned guides. Replace the blade if it is worn and adjust the tension and guides as needed.
    • Excessive Noise: Excessive noise can indicate a problem with the motor, bearings, or blade. Inspect these components for wear or damage and replace as necessary.

    Upgrading Your Bandsaw

    Over time, you might want to upgrade your bandsaw to enhance its capabilities. Upgrades can include adding a better fence, installing a more powerful motor, or upgrading to a higher-quality blade. These enhancements can improve precision and efficiency.

    • Fence Upgrade: A high-quality fence provides better stability and accuracy for straight cuts. Consider an aftermarket fence system for improved performance.
    • Motor Upgrade: A more powerful motor allows for smoother, faster cuts and the ability to handle thicker materials. Upgrading the motor can significantly enhance your bandsaw’s capabilities.
    • Blade Upgrade: Investing in high-quality blades can improve cutting performance and extend blade life. Consider specialty blades for specific tasks, such as resawing or cutting metal.

    Advanced Techniques with a Bandsaw for Woodworking

    Once you’ve mastered the basics, you can explore advanced techniques like making bandsaw boxes, cutting intricate joinery, or creating decorative elements. These projects can challenge your skills and expand your woodworking repertoire.

    • Bandsaw Boxes: Bandsaw boxes are small, intricate boxes made from a single piece of wood. They require precise cuts and careful planning but are a great way to showcase your skills.
    • Intricate Joinery: Use your bandsaw to cut dovetails, tenons, and other types of joinery. This can add a high level of craftsmanship to your projects.
    • Decorative Elements: Create decorative elements such as scrollwork, appliqués, and inlays. These details can add a unique touch to your woodworking projects.

    Incorporating a Bandsaw into Your Workflow

    Integrating a bandsaw into your regular workflow can streamline your woodworking process. Whether you’re preparing stock, making precision cuts, or crafting detailed pieces, a bandsaw can enhance your efficiency and creativity.

    • Stock Preparation: Use your bandsaw to resaw lumber and prepare stock for your projects. This can save you time and material compared to purchasing pre-cut wood.
    • Precision Cuts: Rely on your bandsaw for making precise, intricate cuts that other saws can’t handle. This can improve the accuracy and quality of your work.
    • Creative Projects: Explore new creative possibilities with your bandsaw. From unique furniture designs to artistic wood sculptures, a bandsaw opens up a world of creative potential.

    Choosing the Best Bandsaw for Woodworking

    Selecting the right bandsaw for your needs depends on several factors, including the type of projects you undertake, the space in your workshop, and your budget. Research different models, read reviews, and consider your specific requirements before making a purchase.

    • Project Type: Consider the types of projects you plan to work on. Larger projects may require a more powerful, floor-standing bandsaw, while smaller projects can be handled with a bench-top model.
    • Workshop Space: Evaluate the available space in your workshop. A larger bandsaw may offer more capabilities but requires more space.
    • Budget: Determine your budget and look for a bandsaw that offers the best combination of features and performance within your price range. Remember that investing in quality equipment can pay off in the long run.

    Bandsaw Accessories

    Enhance your bandsaw’s capabilities with various accessories designed to improve performance, accuracy, and safety. Some useful bandsaw accessories include:

    • Rip Fence: A high-quality rip fence helps guide your material for straight cuts and resawing. It ensures consistency and accuracy.
    • Miter Gauge: Use a miter gauge to make precise angled cuts. This accessory is particularly useful for making crosscuts and compound angles.
    • Blade Tension Gauge: A blade tension gauge ensures that your blade is properly tensioned, reducing the risk of blade drift and improving cut quality.
    • Dust Collection System: A dust collection system helps keep your workspace clean and free of sawdust. This not only improves visibility but also prolongs the life of your bandsaw by reducing dust buildup.

    Custom Jigs when using a Bandsaw for Woodworking

    Creating custom jigs can enhance the versatility of your bandsaw and allow you to perform specialized cuts with ease. Some common jigs include:

    • Circle Cutting Jig: This jig helps you cut perfect circles of various diameters. It is particularly useful for making round tabletops or decorative elements.
    • Resawing Jig: A resawing jig provides additional support for tall or uneven pieces of wood, ensuring consistent and accurate resawing cuts.
    • Tapering Jig: Use a tapering jig to create precise, tapered cuts for legs or other furniture components. This jig ensures uniformity and accuracy.

    Innovative Projects with a Bandsaw

    A bandsaw for woodworking can unlock a world of creative possibilities. Here are some innovative projects you can tackle with your bandsaw:

    • Bandsaw Boxes: Craft unique, multi-compartment boxes with intricate designs and shapes.
    • Wooden Gears: Create functional wooden gears for mechanical projects or decorative purposes.
    • Laminated Sculptures: Experiment with laminating different types of wood and cutting them into artistic shapes and forms.
    • Bandsaw Art: Use your bandsaw to carve intricate patterns and designs into wooden panels, turning them into works of art.

    Bandsaw for Professional Woodworking

    For professional woodworkers, a bandsaw is an indispensable tool that can significantly enhance productivity and craftsmanship. Here are some professional applications of a bandsaw:

    • Custom Furniture: Create custom furniture pieces with precision-cut components and intricate designs.
    • Cabinet Making: Use a bandsaw to cut detailed joinery and decorative elements for high-end cabinetry.
    • Musical Instruments: Craft musical instruments such as guitars and violins with intricate shapes and fine details.
    • Architectural Millwork: Produce detailed architectural millwork, including moldings, trims, and custom woodwork for interior design projects.

    Environmental Benefits when using a Bandsaw for woodworking

    Using a bandsaw for woodworking can also have environmental benefits. By resawing lumber and utilizing every piece of wood efficiently, you can reduce waste and make the most of your materials. Additionally, bandsaws are often more energy-efficient than other types of saws, helping to lower your workshop’s overall energy consumption.

    Community and Learning Resources

    Joining a woodworking community or taking advantage of learning resources can help you improve your bandsaw skills and stay updated on the latest techniques. Consider joining woodworking clubs, attending workshops, or participating in online forums and social media groups dedicated to woodworking enthusiasts.

    For your “Free” Guide to 13 Wood Joinery Types – Click Here.

    FAQs About Bandsaws for Woodworking

    Q1: What is the best type of blade for cutting curves?

    A narrow blade, typically 1/8 inch to 1/4 inch wide, is best for cutting curves. The narrow width allows for tighter turns and more intricate patterns.

    Q2: How do I prevent blade drift?

    Blade drift can be minimized by ensuring the blade is properly tensioned and the guides are correctly adjusted. Using a sharp blade and maintaining a consistent feed rate also helps.

    Q3: Can a bandsaw be used to cut metal?

    While bandsaws are primarily designed for wood, there are blades available that can cut through metal. However, using the correct blade and speed settings is crucial to avoid damage.

    Q4: How often should I replace the bandsaw blade?

    The frequency of blade replacement depends on usage. Signs that a blade needs replacing include difficulty cutting, increased noise, and rough or uneven cuts.

    Q5: Is it necessary to use a fence with a bandsaw?

    Using a fence is recommended for making straight cuts. It helps guide the material and ensures accuracy. For freehand cuts and curves, the fence can be removed.

    Summary

    A bandsaw for woodworking is an invaluable tool that can enhance your craftsmanship and open up new possibilities in your projects. From making straight cuts to intricate patterns and resawing, a bandsaw offers versatility and precision. By choosing the right blade, setting up the machine correctly, and following safety and maintenance practices, you can get the most out of your bandsaw. Whether you’re a beginner or an experienced woodworker, incorporating a bandsaw into your workshop can significantly improve your woodworking experience. Happy woodworking!