Category: Woodwork Technique & Materials

Why Do Techniques and Materials Matter in Woodworking?

Every wooden item, from your kitchen table to a simple shelf, reflects the craftsmanship behind it. The techniques used and the materials chosen transform these objects into something special. Consider the variety of wood and joinery methods around you—it’s impressive, right? That’s where we step in, helping you understand the essentials so you can craft with confidence.

What Are the Key Techniques and Materials?

Woodworking isn’t just about building; it’s about selecting the right materials and mastering essential techniques. From choosing between hardwoods and softwoods to perfecting cuts and joints, these decisions define your projects. The right combination of technique and material ensures your work is both beautiful and durable.

Why Should You Care?

Because knowledge enhances creativity. By learning different woodworking methods and understanding various wood types, you can elevate your projects from basic to exceptional. Whether you’re a beginner or experienced, the right tools and techniques empower you to craft with precision.

Get Started Today

Ready to explore more? Dive into our related posts to learn about woodworking techniques and materials. Every new skill and material you discover is a step towards mastering your craft.

  • Double Sided Tape for Woodworking: The Essential Guide

    Double Sided Tape for Woodworking: The Essential Guide

    Double sided tape for woodworking is an essential tool in this intricate and rewarding craft, recognized by both beginner and experienced woodworkers. Often overlooked, this simple yet versatile product has earned a crucial spot in workshops worldwide. Whether you’re securing a template, performing delicate work, or temporarily assembling projects, double-sided tape provides a wide range of uses that can significantly simplify your tasks and improve accuracy.

    In this guide, we’ll walk you through everything you need to know about double-sided tape for woodworking: from what it is, to how to use it effectively, and how to choose the right type. Let’s dive in and explore why this tape could be the unsung hero of your next woodworking project!

    What is Double-Sided Tape?

    Double-sided tape is exactly what it sounds like: a tape that has adhesive on both sides. Unlike single-sided tape, which is often used to seal, bind, or protect surfaces, double-sided tape is designed to bond two surfaces together temporarily but effectively.

    In woodworking, double-sided tape has become a crucial component for tasks where you need to hold wood pieces or templates together without causing damage or leaving residue. Its strength and versatility allow you to keep pieces in place without the need for clamps or other tools. Plus, since it comes in various thicknesses and adhesive strengths, you can find the perfect match for each specific task.

    Why Use Double-Sided Tape?

    You might be wondering, “Why not just use clamps?” While clamps have their place in woodworking, double-sided tape offers flexibility and convenience that clamps cannot always provide. Imagine working with a delicate template or small piece of wood. Using clamps could cause warping or denting, whereas double-sided tape provides a secure hold without damaging your materials.

    Moreover, double-sided tape eliminates the risk of shifting or slipping, allowing for more precise work. Think of it as an extra set of hands—hands that are perfectly still, never tired, and always available.

    Types of Double-Sided Tape

    Not all double-sided tapes are created equal, and different woodworking tasks require specific types. Here are some common varieties you’ll encounter:

    1. Carpet Tape: While primarily designed for securing carpets, this tape is widely used in woodworking for its strong adhesion and ability to hold wood pieces together securely.
    2. Foam Double-Sided Tape: Foam tapes provide a cushioning effect, making them ideal for uneven surfaces or where slight flexibility is needed.
    3. Heavy-Duty Double-Sided Tape: For projects that require maximum holding power, heavy-duty tape can offer long-lasting adherence and support even for larger wood panels.
    4. Thin Double-Sided Tape: When you need a subtle, almost invisible bond between pieces, thin tape is a great option.
    5. Removable Double-Sided Tape: As the name suggests, this tape is designed to be easily removable without leaving a sticky residue, making it perfect for temporary applications.

    How to Choose the Right Double-Sided Tape for Woodworking

    Choosing the right double-sided tape depends on several factors. The first thing you’ll want to consider is the type of project you’re working on. Are you temporarily holding a template in place, or do you need to bond larger, heavier pieces of wood together? For heavier pieces, heavy-duty double-sided tape will provide the extra grip you need.

    Next, think about the material you’re working with. Not all tapes adhere well to every type of wood or surface, so you’ll want to ensure that your tape is compatible. Additionally, for projects requiring temporary holds, removable or low-residue double-sided tape will prevent damage to your materials when you take it off.

    Applications of Double-Sided Tape

    There are numerous ways you can use double-sided tape in woodworking. Some common applications include:

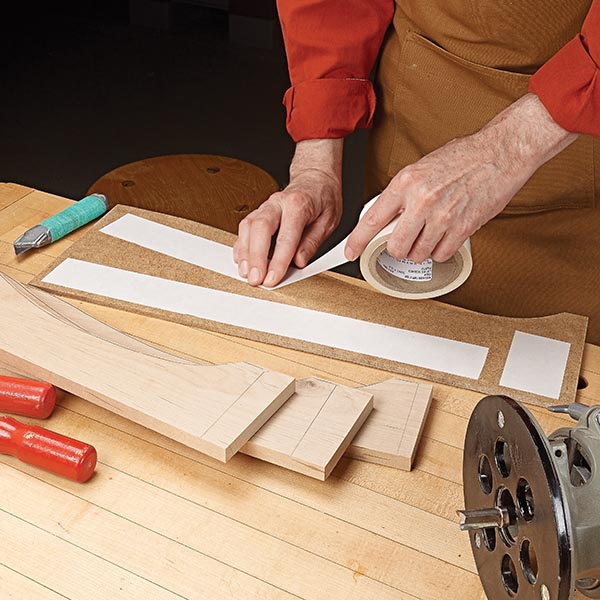
    • Holding Templates: When cutting or routing, you often need to keep a template in place. Clamps may get in the way, but double-sided tape allows you to secure the template without obstructions.
    • Laminating Small Pieces: If you’re working with veneers or small pieces that need temporary adhesion before final assembly, double-sided tape is the perfect solution.
    • Fixing Sandpaper: For tasks like sharpening tools or sanding delicate edges, double-sided tape can secure sandpaper to a flat surface or block, making it easier to handle.
    • Creating Temporary Joints: When you need to see how parts fit together before gluing or screwing, double-sided tape helps you assemble projects temporarily, allowing for adjustments.
    • Jigs and Fixtures: Building jigs or temporary fixtures for your saw or drill press? Double-sided tape holds everything in place with minimal setup time.

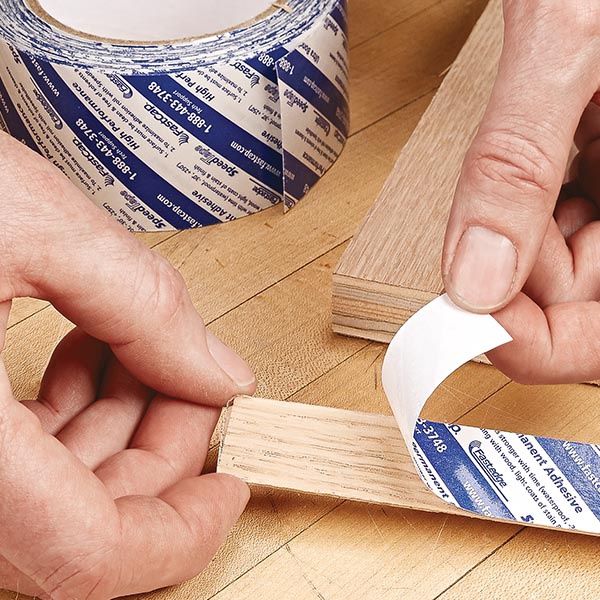
    How to Use Double-Sided Tape in Woodworking

    Using double-sided tape is straightforward, but a few tips can help ensure the best results:

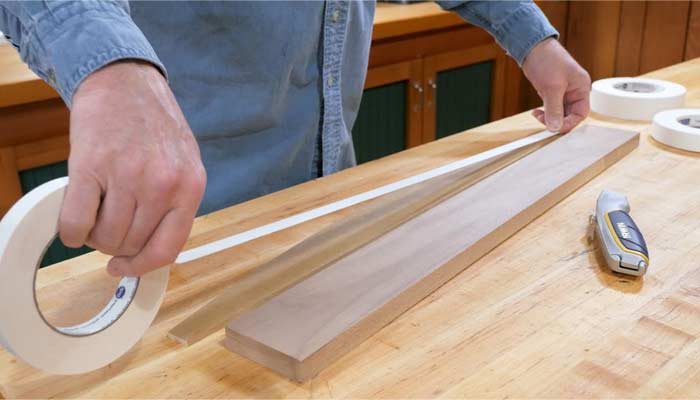
    1. Clean the Surface: Before applying the tape, make sure the wood surface is clean and free from dust or debris. This ensures a stronger bond.
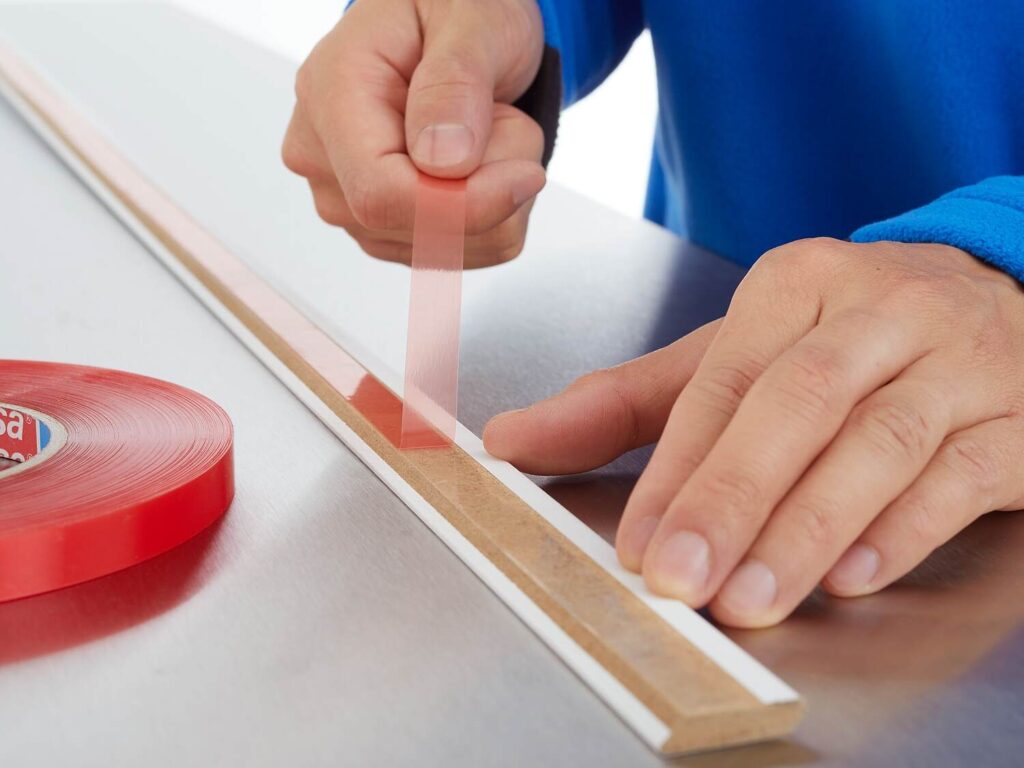
    2. Apply Evenly: Roll out the tape in even, smooth lines. Avoid overlaps or wrinkles as these can create gaps or weak spots in the adhesion.
    3. Press Firmly: After placing the tape on the wood, press it down firmly to ensure it bonds well. Use a roller or your hands to apply even pressure.
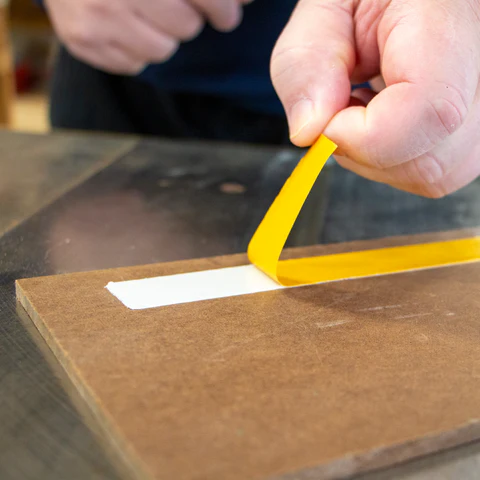
    4. Remove Carefully: When it’s time to remove the tape, do so slowly and carefully to avoid pulling up any wood fibers or damaging the surface.

    The Strengths and Weaknesses of Double-Sided Tape

    As with any tool or product, there are advantages and disadvantages to using double-sided tape for woodworking. Understanding both sides can help you make an informed decision about when and how to use it.

    Strengths:

    • Versatility: Suitable for various applications, from holding templates to securing jigs.
    • Non-Invasive: Unlike clamps, tape won’t leave marks or impressions on your workpieces.
    • Ease of Use: Simply peel and stick—there’s no complex setup required.
    • Precision: Holds objects in place without slipping or movement.

    Weaknesses:

    • Temporary: While great for temporary holds, double-sided tape isn’t a substitute for permanent bonding methods like glue or screws.
    • Residue Risk: Some tapes may leave adhesive residue behind, especially if left on for an extended period.
    • Not Suitable for Heavy Loads: Double-sided tape may struggle to support very heavy or large wood pieces.

    When Not to Use Double-Sided Tape

    Despite its versatility, there are certain situations where double-sided tape may not be the best choice. For example, when working with very heavy or thick wood panels, tape may not provide sufficient strength. In such cases, clamps or screws may be necessary to hold pieces together.

    Additionally, for projects requiring permanent bonding, double-sided tape should not be relied upon. Wood glue, nails, or screws will provide a much stronger and more lasting hold.

    How to Remove Double-Sided Tape Without Damaging Wood

    Removing double-sided tape for woodworking can sometimes be tricky, especially if the tape has been on for a long time or has left residue. To minimize damage, here are some steps you can follow:

    1. Slow and Steady: Peel the tape back slowly, pulling at an angle to minimize the risk of pulling up wood fibers.
    2. Use Heat: A hairdryer or heat gun can soften the adhesive, making it easier to remove.
    3. Adhesive Remover: For stubborn residue, an adhesive remover or rubbing alcohol can help dissolve the glue without damaging the wood.
    4. Sand the Surface: If necessary, gently sand the area where the tape was applied to restore the wood’s smooth finish.

    Alternatives to Double-Sided Tape

    While double-sided tape is an excellent option for many woodworking tasks, there are alternatives that may be better suited for certain projects. Some common alternatives include:

    • Clamps: Ideal for heavy-duty applications or when you need a very strong hold.
    • Hot Glue: Provides quick adhesion and is easily removable, but it may not be suitable for delicate surfaces.
    • Blue Painter’s Tape: Often used for marking or temporary holds without leaving residue.

    Top Brands of Double-Sided Tape

    When choosing a double-sided tape for woodworking, the brand can make a significant difference in terms of quality and reliability. Some of the top brands known for producing high-quality double-sided tape for woodworking include:

    • Scotch: Known for its variety of tape products, Scotch offers durable, strong double-sided tapes that work well in woodworking projects.
    • 3M: A leader in adhesive technologies, 3M tapes are trusted for their strength, durability, and range of applications.
    • XFasten: A more specialized tape brand that focuses on creating durable, woodworking-specific double-sided tapes.
    • Shurtape: Shurtape produces heavy-duty double-sided tapes designed for both temporary and long-term woodworking applications.

    Common Mistakes to Avoid When Using Double-Sided Tape

    While using double-sided tape for woodworking is relatively simple, there are a few common mistakes that can reduce its effectiveness. Here are some things to watch out for:

    1. Applying to Dirty Surfaces: Adhesive tape requires a clean surface to bond effectively. If dust or sawdust is present, the tape won’t stick properly.
    2. Using the Wrong Type of Tape: Not all tapes are created equal. Make sure you choose the right kind for your specific project needs.
    3. Leaving Tape on Too Long: While double-sided tape can be left in place temporarily, leaving it on for too long can cause adhesive residue or damage to the wood.

    How to Store Double-Sided Tape for Longevity

    To ensure your double-sided tape stays in good condition, it’s essential to store it correctly. Keep it in a cool, dry place, away from direct sunlight. Heat can cause the adhesive to degrade, making the tape less effective when you need it. You should also avoid moisture, as it can cause the tape to lose its stickiness or become damaged.

    Conclusion: Why Double-Sided Tape is a Must-Have Tool

    In conclusion, double-sided tape for woodworking is an indispensable tool for anyone looking to improve the precision and ease of their projects. Whether you’re a professional carpenter or a weekend hobbyist, this tape offers a simple solution for temporary holds, template work, jig making, and more. Its versatility, ease of use, and non-invasive nature make it a go-to choice for various woodworking tasks. Keep a few different types of double-sided tape in your toolbox, and you’ll find yourself reaching for it time and time again.

    FAQs About Double-Sided Tape for Woodworking

    1. Can double-sided tape be used for heavy-duty woodworking projects?
    While double-sided tape can handle small to medium-sized woodworking tasks, it’s not designed to hold extremely heavy loads for extended periods. For heavy-duty projects, clamps or screws are better suited.

    2. Will double-sided tape damage wood?
    Generally, double-sided tape for woodworking is designed to be gentle on wood surfaces. However, if left on for too long or if removed incorrectly, it can pull up wood fibers or leave adhesive residue. Always remove it carefully and use the appropriate type of tape for the task.

    3. How do I prevent double-sided tape from leaving a residue?
    To prevent residue, use removable or low-residue double-sided tape. Additionally, avoid leaving the tape on for longer than necessary and clean the wood surface before applying the tape.

    4. Can double-sided tape hold up in humid or hot conditions?
    Certain tapes, especially foam-based or heavy-duty varieties, are designed to withstand higher temperatures or humidity. However, excessive heat and moisture can weaken some tapes, so it’s essential to choose a tape suited for your environment.

    5. How do I remove double-sided tape from wood without damaging the surface?
    The key is to remove the tape slowly and steadily, using heat if necessary. If residue is left behind, rubbing alcohol or a commercial adhesive remover can help clean the surface without causing damage.

  • “Woodworking Classes Near Me: Explore the Craft Nearby”

    “Woodworking Classes Near Me: Explore the Craft Nearby”

    Are you intrigued by the idea of creating beautiful wooden crafts but unsure where to start? Woodworking classes near me could be the perfect solution to kickstart your journey into the world of woodworking. Whether you’re a complete novice or looking to refine your skills, local woodworking classes offer a hands-on learning experience right in your community.

    For your “Free” 2 in 1 Folding Picnic Table Bench Plan – Click Here.

    Understanding Woodworking Classes

    Woodworking classes provide a structured environment where participants can learn and practice essential woodworking techniques under the guidance of experienced instructors. These classes cater to various skill levels, from beginners to advanced craftsmen, ensuring that everyone can find a suitable course.

    Benefits of Enrolling in Woodworking Classes Near Me

    When searching for woodworking classes near me, you’ll discover a range of benefits that make these courses appealing:

    1. Hands-On Learning Opportunities: Unlike online tutorials, woodworking classes offer hands-on experience with tools and materials, allowing you to learn and practice in a real workshop environment.
    2. Guidance from Experienced Instructors: Local woodworking instructors bring years of expertise and knowledge, providing valuable guidance and personalized feedback to help you improve your skills effectively.

    Types of Woodworking Classes Near Me on Offer

    Depending on your interests and skill level, you can choose from various types of woodworking classes available near you:

    • Introductory Woodworking Classes: Perfect for beginners, these classes cover basic techniques such as measuring, cutting, and joining wood.
    • Advanced Woodworking Techniques: For seasoned woodworkers looking to refine their skills, advanced classes delve into intricate joinery, carving, and finishing techniques.

    Finding the Right Woodworking Class Near Me

    Choosing the right woodworking class involves considering several factors to ensure it meets your needs and preferences:

    • Location and Accessibility: Opt for classes conveniently located near your home or workplace to minimize travel time and maximize your learning experience.
    • Class Size and Environment: Smaller class sizes often mean more personalized attention from instructors, while the workshop environment should be well-equipped and conducive to learning.

    Costs and Budgeting

    Before enrolling, it’s essential to understand the cost structure of classes near you:

    • Tuition Fees: These can vary depending on the duration and intensity of the course, with some classes offering payment plans or discounts for early registration.
    • Additional Materials: Factor in costs for wood, tools, and safety gear required for the classes, as these may not always be included in the tuition fees.

    What to Expect in Your First Woodworking Class

    Stepping into your first woodworking class can be both exciting and nerve-wracking. Here’s a glimpse of what you can expect:

    • Introduction to Tools: Familiarize yourself with essential woodworking tools such as saws, chisels, and planes under the supervision of your instructor.
    • Basic Techniques Demonstration: Learn foundational techniques like measuring, marking, and cutting wood accurately to lay the groundwork for your projects.

    Advancing Your Skills Beyond the Basics

    As you progress through classes, you’ll have the opportunity to expand your skill set and tackle more challenging projects:

    • Intermediate Projects: Build confidence by crafting furniture pieces or small woodworking projects that apply the techniques you’ve learned.
    • Specialized Workshops: Explore niche areas such as woodturning, cabinet making, or sculptural woodworking through specialized workshops offered by local artisans.

    For your “Free” Outdoor Projects Plan – Click Here.

    Networking and Community Engagement

    Beyond learning woodworking skills, classes near you provide an opportunity to connect with like-minded individuals and build a supportive community:

    • Collaborative Projects: Engage in group projects or collaborative efforts that foster creativity and camaraderie among participants.

    Finding the Best Woodworking Classes Near Me: Tips and Tricks

    Here are some practical tips for finding the best woodworking classes in your area:

    • Research Online: Use search engines and local directories to find woodworking classes near you. Websites like Meetup or local community center websites often list upcoming classes.
    • Ask for Recommendations: Reach out to friends, family, or colleagues who may have taken woodworking classes locally. Personal recommendations can provide valuable insights.
    • Visit Woodworking Supply Stores: Local woodworking supply stores often have bulletin boards or information about upcoming classes and workshops.

    Benefits of Joining a Woodworking Community

    Joining a woodworking community through local classes offers numerous advantages:

    • Shared Knowledge and Tips: Learn from fellow enthusiasts who share their experiences and tips for improving woodworking techniques.
    • Access to Resources: Gain access to a wider range of tools, materials, and resources through community workshops and shared spaces.

    The Importance of Safety in Woodworking

    Safety should always be a priority in woodworking classes. Before starting any project, ensure you:

    • Understand Tool Safety: Familiarize yourself with the proper use and maintenance of all tools and equipment.
    • Wear Protective Gear: Use safety glasses, ear protection, and dust masks as necessary to protect yourself from potential hazards.

    Taking Your Woodworking Skills to the Next Level

    Once you’ve mastered the basics, consider these steps to further develop your woodworking skills:

    • Advanced Courses: Take advanced courses to learn specialized techniques such as marquetry, veneering, or advanced joinery methods.
    • Attend Workshops and Seminars: Participate in workshops and seminars hosted by renowned woodworkers or industry experts to gain new insights and inspiration.

    Exploring Woodworking as a Career or Business

    If you’re passionate about woodworking, you may consider turning it into a career or business opportunity:

    • Starting a Woodworking Business: Learn about entrepreneurship in woodworking, including market research, pricing strategies, and building a client base.
    • Online Selling Platforms: Explore platforms like Etsy or local craft fairs to showcase and sell your handmade woodworking creations.

    For your “Free”Guide to 13 Wood Joinery Types – Click Here.

    FAQs (Frequently Asked Questions)

    1. How do I find woodworking classes near me?

    • Start by searching online, checking community center bulletin boards, or asking local woodworking supply stores for recommendations.

    2. What should I bring to my first woodworking class?

    • Basic tools like a tape measure, pencil, safety glasses, and comfortable work clothes are often recommended. Check with your instructor for specific requirements.

    3. Can I join woodworking classes if I have no prior experience?

    • Absolutely! Many classes cater to beginners and provide foundational training to help you get started.

    4. Are woodworking classes expensive?

    • Costs vary, but there are often options to fit different budgets, including introductory courses and community center workshops.

    5. How can woodworking classes benefit me beyond learning a new skill?

    • Woodworking promotes problem-solving, enhances creativity, and offers a fulfilling hobby that can lead to practical and artistic accomplishments.

    Conclusion

    Exploring woodworking classes near me opens doors to a rewarding journey of craftsmanship and creativity. Whether you’re interested in crafting furniture, decorative items, or simply honing your DIY skills, these classes provide the guidance and resources you need to succeed. Embrace the opportunity to learn, connect with fellow enthusiasts, and unleash your woodworking potential right in your local community.

  • Woodworking Memes: Crafting Humor in the Workshop

    Woodworking Memes: Crafting Humor in the Workshop

    Woodworking is a timeless craft that blends precision, creativity, and patience. But like any craft, it comes with its own set of quirks and challenges. This is where woodworking memes come into play. They bring a dash of humor to the sawdust-filled days of carpenters and woodworkers worldwide. In this article, we’ll dive into the world of memes, exploring their origins, why they resonate so well with woodworkers, and even sharing some of the most hilarious examples out there. So, grab your favorite chisel, sit back, and let’s carve out some laughs together.

    For your “Free” 2 in 1 Folding Picnic Table Bench Plan – Click Here.

    Table of Contents

    1. What Are Woodworking Memes?
    2. The Origins of Woodworking Memes
    3. Why Woodworking Memes Are So Popular
    4. Memes vs. Reality: The Everyday Struggles of Woodworkers
    5. The Most Common Themes in Woodworking Memes
    6. Hilarious Woodworking Memes That Will Make You Laugh
    7. Woodworking Memes and Social Media
    8. Creating Your Own Woodworking Memes
    9. The Impact of Memes on the Woodworking Community
    10. Woodworking Memes: A Therapeutic Tool?
    11. Memes That Highlight Woodworking Safety
    12. How to Use Woodworking Memes in Your Shop
    13. The Future of Woodworking Memes
    14. Summary
    15. FAQs

    What Are Woodworking Memes?

    Memes are humorous images, videos, or text that poke fun at the various aspects of woodworking. These memes often highlight the funny side of the woodworking experience, from the frustrations of measuring mistakes to the joy of finishing a project. They are shared widely across social media platforms, woodworking forums, and among friends in the community. The key to a good woodworking meme is its relatability—capturing the shared experiences of woodworkers in a way that makes them laugh.

    The Origins of Woodworking Memes

    The origins of memes can be traced back to the early days of the internet, where niche communities began to share inside jokes and humorous observations about their crafts. As social media grew, so did the reach of these memes. Platforms like Facebook, Instagram, and Reddit became breeding grounds for creative, humorous content. Woodworking memes emerged as a way for craftsmen and hobbyists to connect over shared experiences and laugh at the lighter side of their work.

    Why Woodworking Memes Are So Popular

    Why are memes so popular? It’s simple—they speak to the heart of every woodworker. Whether you’re a seasoned carpenter or a weekend hobbyist, the struggles and triumphs depicted in these memes are universally understood. They provide a sense of community and camaraderie, reminding woodworkers that they are not alone in their challenges. Plus, who doesn’t love a good laugh after a long day in the shop?

    Memes vs. Reality: The Everyday Struggles of Woodworkers

    One of the reasons memes resonate so deeply is because they often depict the real-life struggles of woodworkers. Whether it’s the frustration of a project not going as planned or the satisfaction of a perfectly executed joint, these memes capture the highs and lows of the craft. For instance, a meme showing a “measure twice, cut once” mishap can be both humorous and painfully relatable to anyone who has made that mistake.

    The Most Common Themes in Woodworking Memes

    Woodworking memes cover a wide range of themes, each highlighting different aspects of the craft. Some of the most common themes include:

    1. Measuring Mistakes: Jokes about inaccurate measurements are a staple in woodworking memes.
    2. Tool Addiction: Many memes play on the woodworker’s love for acquiring new tools.
    3. Project Disasters: These memes highlight the moments when projects don’t go as planned.
    4. Wood Selection: Humorous takes on the importance of choosing the right type of wood.
    5. Shop Safety: Light-hearted reminders about the importance of safety in the workshop.

    Hilarious Woodworking Memes That Will Make You Laugh

    Here are some classic examples of memes that will bring a smile to your face:

    • A picture of a perfectly organized tool wall with the caption, “If only my projects were as organized as my tools.”
    • An image of a woodworker covered in sawdust with the text, “Saw dust is man glitter.”
    • A meme showing a piece of wood split in half with the caption, “When you try to save a bad cut with glue.”

    Memes and Social Media

    Social media has played a significant role in the spread of memes. Platforms like Instagram and Facebook allow woodworkers to share their favorite memes with a wide audience. Hashtags like #woodworkingmemes and #woodworkerhumor help enthusiasts find and connect with content that resonates with them. These platforms have also enabled woodworkers to create and share their own memes, adding to the growing library of humorous content.

    For your “Free” Outdoor Projects Plan – Click Here.

    Creating Your Own Memes

    Creating your own memes based on woodworking is a fun and creative way to engage with the community. To get started, think about the common experiences and frustrations you face in your woodworking projects. Use a meme generator tool to pair your observations with humorous images. Share your creations on social media and see how many fellow woodworkers relate to your humor. Remember, the best memes are those that are authentic and relatable.

    The Impact of Memes on the Woodworking Community

    Memes have a positive impact on the community. They provide a way for woodworkers to bond over shared experiences and find humor in their daily challenges. Memes can also be educational, offering tips and reminders in a light-hearted way. Overall, they contribute to a sense of camaraderie and support within the woodworking community.

    Memes: A Therapeutic Tool?

    Believe it or not, memes can be therapeutic. Laughter is a great stress reliever, and finding humor in your work can help you maintain a positive attitude. Memes provide a way to vent frustrations and share them with others who understand, making the challenges of woodworking a little more manageable.

    Memes That Highlight Safety

    Safety is paramount in woodworking, and memes can play a role in promoting safe practices. Memes that highlight the importance of wearing safety gear, keeping your workspace clean, and using tools correctly can be both funny and educational. For example, a meme showing a woodworker wearing every piece of safety gear imaginable with the caption, “Better safe than sorry,” can serve as a humorous reminder to prioritize safety.

    How to Use Memes in Your Shop

    Integrating memes into your shop can be a great way to boost morale and keep things light-hearted. Consider posting some of your favorite memes on a bulletin board or sharing them during breaks. You can also use memes as a fun way to kick off a safety meeting or team-building session. The goal is to create a positive and enjoyable environment where everyone can laugh and learn together.

    The Future of Memes

    The future of memes looks bright. As the woodworking community continues to grow online, so will the creation and sharing of memes. New trends and themes will emerge, reflecting the evolving experiences of woodworkers. Whether it’s through new social media platforms or innovative meme formats, woodworking humor will continue to bring joy and laughter to the craft.

    Summary

    Memes are more than just a source of humor—they are a reflection of the shared experiences and challenges faced by woodworkers everywhere. From measuring mishaps to tool addiction, these memes capture the essence of the craft in a way that is both relatable and entertaining. As the woodworking community grows, so does the library of hilarious and insightful memes that bring us all together. So next time you’re in the shop, take a moment to enjoy a good laugh with a woodworking meme.

    For your “Free” Workspace Plans – Click Here.

    FAQs

    1. What are memes?

    Memes are humorous images, videos, or text that highlight the funny aspects of woodworking. They often depict common experiences and frustrations faced by woodworkers in a relatable and entertaining way.

    2. Why are memes popular?

    Memes are popular because they resonate with woodworkers’ shared experiences. They provide a sense of community and camaraderie, making people feel understood and less alone in their challenges.

    3. How can I create my own memes?

    To create your own memes, think about common woodworking experiences and pair them with humorous images using a meme generator tool. Share your creations on social media to connect with other woodworkers.

    4. Can memes be educational?

    Yes, memes can be educational. They often contain tips and reminders about safety practices and techniques in a light-hearted and memorable way.

    5. How can I use memes in my shop?

    You can use memes in your shop to boost morale and create a positive environment. Post them on a bulletin board, share them during breaks, or use them to kick off safety meetings or team-building sessions.

  • Woodworking Screws: Your Ultimate Guide to Fastening Success

    Woodworking Screws: Your Ultimate Guide to Fastening Success

    Woodwork screws are essential components in the world of woodworking, offering strength, durability, and ease of use. Whether you’re a seasoned woodworker or just starting out, understanding the various types of woodwork screws and their applications is crucial for creating high-quality, lasting projects. In this comprehensive guide, we’ll delve into everything you need to know about woodwork screws, from types and materials to tips and tricks for optimal use.

    For your “Free” Outdoor Projects Plan – Click Here.

    Introduction to Woodworking Screws

    When it comes to woodworking, screws are often the unsung heroes. These small but mighty fasteners hold your projects together, ensuring stability and longevity. Moreover, woodwork screws come in various shapes, sizes, and materials, each designed for specific tasks. By choosing the right screw for the job, you can enhance the strength and aesthetics of your work.

    Types of Woodwork Screws

    There are numerous types of woodwork screws, each with its unique features and applications. Here are some of the most common ones:

    1. Wood Screws

    Wood screws are the most commonly used screws in woodworking. They have a sharp, pointed tip that allows them to penetrate wood easily. Additionally, wood screws come in various lengths and diameters, making them versatile for different projects.

    2. Deck Screws

    Deck screws are designed specifically for outdoor projects, such as building decks and fences. They are made from corrosion-resistant materials, such as stainless steel or coated steel, to withstand the elements. Consequently, they are ideal for outdoor use.

    3. Drywall Screws

    Although primarily used for securing drywall, these screws are also handy in woodworking. Drywall screws have a bugle-shaped head that prevents the screw from tearing through the material, making them ideal for thin or delicate wood.

    4. Lag Screws

    Lag screws, also known as lag bolts, are heavy-duty screws used for structural applications. They have a hex head and require a wrench for installation. Therefore, lag screws are perfect for projects that need extra strength, such as securing large beams or posts.

    5. Pocket Hole Screws

    Pocket hole screws are specifically designed for pocket hole joinery. They have a self-tapping tip and a flat washer head, which helps draw the joint tight. Consequently, these screws are essential for creating strong, hidden joints.

    Materials Used when using Woodwork Screws

    The material of the screw is just as important as its type. The right material ensures durability and longevity, especially in challenging environments.

    6. Steel Screws

    Steel screws are the most common and affordable option. They are strong and versatile, suitable for most indoor woodworking projects. However, they may rust if exposed to moisture. Therefore, they are best for indoor use.

    7. Stainless Steel Screws

    Stainless steel screws are highly resistant to corrosion, making them ideal for outdoor and high-moisture environments. They are more expensive than regular steel screws but offer superior durability. Hence, they are a worthwhile investment for long-term projects.

    8. Brass Screws

    Brass screws are known for their aesthetic appeal, often used in decorative woodworking projects. They are softer than steel and stainless steel, so they require pre-drilling to avoid snapping. Nevertheless, their beauty makes them a favorite for fine woodworking.

    9. Zinc-Plated Screws

    Zinc-plated screws are coated with a layer of zinc to prevent rust. They offer a good balance between cost and corrosion resistance, suitable for both indoor and outdoor use. As a result, they are quite versatile.

    Choosing the Right Screw for Your Project

    Selecting the appropriate woodworking screw for your project involves considering several factors, such as the type of wood, the environment, and the load the joint will bear.

    10. Consider the Wood Type

    Different woods have varying densities and properties. For softwoods like pine, use screws with coarse threads to ensure a firm grip. For hardwoods like oak, fine-thread screws are preferable to avoid splitting the wood. Consequently, you’ll achieve better results.

    11. Think About the Environment

    For outdoor projects or high-moisture areas, choose screws made from corrosion-resistant materials like stainless steel or zinc-plated steel. This will prevent rust and ensure the longevity of your project. Thus, your work will withstand harsh conditions.

    12. Assess the Load

    For heavy-duty applications, such as securing structural components, use lag screws or other heavy-duty screws. For lighter tasks, wood screws or drywall screws may suffice. Therefore, always match the screw type to the task.

    Tips for Using Woodworking Screws

    Using woodworking screws effectively can make a significant difference in the quality and durability of your projects. Here are some tips to help you get the most out of your screws:

    13. Pre-Drill Pilot Holes

    Pre-drilling pilot holes helps prevent the wood from splitting and makes it easier to drive the screw. The pilot hole should be slightly smaller than the screw’s diameter. Consequently, this simple step can save you time and frustration.

    14. Use Countersink Bits

    Countersink bits create a recess for the screw head, allowing it to sit flush with or below the wood surface. This not only improves the appearance of your project but also prevents the wood from splitting. Therefore, your finished product will look more professional.

    15. Choose the Right Screw Length

    The length of the screw should be at least twice the thickness of the wood you’re joining. This ensures a strong, secure connection. Hence, always double-check the screw length before starting.

    16. Apply Steady Pressure

    When driving screws, apply steady, even pressure to avoid stripping the screw head. Use a screwdriver or drill with the appropriate bit for the screw type. As a result, you’ll achieve a more secure fit.

    For your “Free”Guide to 13 Wood Joinery Types – Click Here.

    Common Mistakes to Avoid

    Even experienced woodworkers can make mistakes when using screws. Here are some common pitfalls to watch out for:

    17. Over-Tightening Screws

    Over-tightening can strip the screw head or damage the wood. Therefore, tighten the screw just enough to secure the joint without causing damage. This will help maintain the integrity of your project.

    18. Using the Wrong Screw Type

    Using the wrong screw type can lead to weak joints or damaged wood. Always choose the right screw for the specific task and material. Consequently, your work will be stronger and more reliable.

    19. Neglecting Corrosion Resistance

    For outdoor projects, using non-corrosion-resistant screws can lead to rust and failure of the joint. Thus, always consider the environment when selecting screws. This simple step can significantly extend the life of your project.

    The Evolution of Woodworking Screws

    The design and materials of woodworking screws have evolved significantly over time. Modern screws offer improved strength, ease of use, and resistance to environmental factors.

    20. Early Woodworking Screws

    Early screws were handmade and often inconsistent in quality. They were typically made from iron and required pre-drilled holes. As a result, they were less reliable than today’s screws.

    21. Industrial Revolution and Mass Production

    The Industrial Revolution brought mass production techniques, making screws more affordable and consistent in quality. Consequently, the introduction of machine-made screws revolutionized woodworking.

    22. Modern Innovations

    Today’s screws are designed with advanced features, such as self-tapping tips and corrosion-resistant coatings. Consequently, these innovations make woodworking easier and more efficient.

    Woodworking Screws in Different Projects

    Woodworking screws play a crucial role in a variety of projects, from furniture making to large outdoor structures.

    23. Furniture Making

    In furniture making, screws are used to join pieces securely without visible fasteners. Pocket hole screws and dowel screws are popular choices for this purpose. Therefore, they are essential in crafting beautiful and durable furniture.

    24. Cabinetry

    Cabinet makers often use screws for assembling and mounting cabinets. Confirmat screws are specially designed for this task, providing a strong, tight joint. Consequently, they ensure the longevity and stability of cabinetry.

    25. Outdoor Structures

    For outdoor structures like decks and fences, corrosion-resistant screws are essential. Deck screws and lag screws provide the necessary strength and durability. As a result, your outdoor projects will withstand the test of time.

    Maintaining and Storing Woodworking Screws

    Proper maintenance and storage of your woodworking screws can extend their lifespan and keep them ready for use.

    26. Keep Screws Organized

    Organize your screws by type and size in a storage container with labeled compartments. This makes it easy to find the right screw for your project. Consequently, you’ll save time and reduce frustration.

    27. Store in a Dry Place

    Moisture can cause screws to rust, especially if they are not made from corrosion-resistant materials. Therefore, store your screws in a dry, climate-controlled environment. This will help maintain their integrity.

    28. Regularly Inspect Screws

    Inspect your screws regularly for signs of rust or damage. Discard any screws that are bent, stripped, or corroded. Consequently, you’ll ensure that you always have reliable screws on hand.

    For your “Free” Workspace Plans – Click Here.

    Conclusion: The Essential Role of Woodworking Screws

    Woodworking screws are indispensable in any woodworker’s toolkit. By understanding the different types, materials, and applications of these fasteners, you can choose the right screw for each project, ensuring strength, durability, and a professional finish. Remember to pre-drill pilot holes, use the correct screw length, and select screws based on the wood type and environment. With these tips in mind, you’ll be well on your way to mastering the art of using woodworking screws.

    FAQs about Woodworking Screws

    1. What is the best type of screw for outdoor woodworking projects?

    The best type of screw for outdoor projects is a corrosion-resistant screw, such as stainless steel or zinc-plated deck screws. These screws are designed to withstand the elements and prevent rust.

    2. How do I prevent wood from splitting when using screws?

    To prevent wood from splitting, pre-drill pilot holes slightly smaller than the screw’s diameter. Using a countersink bit can also help by allowing the screw head to sit flush with or below the wood surface.

    3. What is the difference between wood screws and drywall screws?

    Wood screws have a sharp, pointed tip and threads designed for wood, while drywall screws have a bugle-shaped head and are primarily used for securing drywall. However, drywall screws can also be used in woodworking for thin or delicate wood.

    4. Can I use brass screws for structural applications?

    Brass screws are generally softer than steel or stainless steel screws and are not recommended for structural applications. They are best suited for decorative projects where appearance is a priority.

    5. How do I choose the right screw length for my project?

    The screw length should be at least twice the thickness of the wood you’re joining. This ensures a strong, secure connection without compromising the integrity of the wood.

  • How to Get into Woodworking: A Beginner’s Guide

    How to Get into Woodworking: A Beginner’s Guide

    Woodworking is a timeless craft that combines creativity and precision, offering endless opportunities to create beautiful and functional pieces. If you’ve ever admired a handcrafted piece of furniture or a detailed wood carving and wondered, “How can I do that?” then this guide is for you. In this comprehensive article, we’ll walk you through how to get into woodworking, covering everything from the basics to advanced tips. Let’s get started on this rewarding journey!

    For your “Free” Outdoor Projects Plan – Click Here.

    Introduction to Woodworking

    Woodworking is more than just a hobby; it’s a way to express your creativity while building something tangible and lasting. Whether you want to create furniture, decor, or even functional items, woodworking offers a satisfying blend of artistry and skill.

    Why Woodworking?

    Why should you consider woodworking as your next hobby or skill to master? For starters, woodworking is incredibly rewarding. It allows you to see the fruits of your labor, turning raw materials into finished products. Plus, it’s a fantastic way to de-stress and focus your mind.

    Understanding the Basics of Woodworking

    Before diving into the practical aspects, it’s essential to understand the basics of woodworking. This includes familiarizing yourself with different types of wood, tools, and techniques. Knowing the fundamentals will give you a solid foundation to build upon as you progress.

    Types of Wood for Beginners

    Not all wood is created equal. As a beginner, you’ll want to start with easy-to-work-with woods like pine or poplar. These woods are relatively soft and forgiving, making them ideal for practice projects. As you gain experience, you can experiment with harder woods like oak or maple.

    Essential Woodworking Tools

    To get started you’ll need a few essential tools. Here’s a list to get you going:

    1. Measuring Tools: Tape measure, square, and marking gauge.
    2. Cutting Tools: Handsaw, jigsaw, and circular saw.
    3. Shaping Tools: Chisels, rasps, and files.
    4. Joining Tools: Hammer, nails, and screws.
    5. Finishing Tools: Sandpaper, brushes, and clamps.

    Setting Up Your Woodworking Space

    A dedicated workspace is crucial for any woodworker. Whether it’s a corner of your garage or a full-fledged workshop, having a well-organized area will make your projects more enjoyable and efficient. Ensure your space is well-lit, ventilated, and equipped with a sturdy workbench.

    Safety First: Safety Tips

    Safety should always be a priority in. Here are some essential tips to keep in mind:

    • Wear Safety Gear: Always wear safety glasses, ear protection, and a dust mask.
    • Keep Your Workspace Clean: A cluttered workspace can lead to accidents.
    • Use Tools Properly: Follow the manufacturer’s instructions for each tool.
    • Stay Focused: Avoid distractions while working with tools.

    Starting Your First Project

    Now that you’re familiar with the basics, it’s time to start your first project. Choose something simple, like a birdhouse or a small shelf. Starting with an easy project will help you build confidence and develop your skills without feeling overwhelmed.

    Understanding Woodworking Plans

    Woodworking plans are detailed guides that show you how to build specific projects. These plans include measurements, materials lists, and step-by-step instructions. As a beginner, following a plan will help you stay organized and ensure you don’t miss any critical steps.

    Mastering Basic Techniques

    There are several fundamental techniques every woodworker should master. These include measuring and marking, cutting, joining, and finishing. Each technique requires practice, so take your time and don’t be afraid to make mistakes.

    For your “Free”Guide to 13 Wood Joinery Types – Click Here.

    How to Improve Your Skills

    As with any craft, the more you practice, the better you’ll become. Here are some tips to help you improve your skills:

    • Take a Class: Local community centers or woodworking stores often offer classes for beginners.
    • Join a Woodworking Club: Connecting with other woodworkers can provide valuable insights and encouragement.
    • Watch Tutorials: Online videos and tutorials can demonstrate techniques and offer project ideas.

    Common Mistakes and How to Avoid Them

    Every woodworker makes mistakes, especially when starting. Some common mistakes include inaccurate measurements, poor tool maintenance, and rushing through a project. By being aware of these pitfalls, you can take steps to avoid them and improve your craftsmanship.

    What Budget will be required to Start off?

    Woodworking can be an expensive hobby, but it doesn’t have to be. Here are some tips for getting started without breaking the bank:

    • Buy Used Tools: Look for second-hand tools at garage sales or online marketplaces.
    • Start Small: Begin with simple projects that require fewer materials.
    • Use Scrap Wood: Many projects can be made from leftover or reclaimed wood.

    How to Find Inspiration for Projects

    Finding inspiration is key to staying motivated in. Look for ideas in magazines, online forums, and social media platforms like Pinterest. Don’t be afraid to put your spin on existing designs and make them your own.

    Advanced Techniques to Explore

    Once you’ve mastered the basics, you might want to explore more advanced techniques. These can include joinery methods like dovetail and mortise-and-tenon joints, woodturning, and carving. Advanced techniques require more skill and precision but can significantly enhance your projects.

    How to Sell Your Projects

    If you find that you love woodworking and want to turn it into a side hustle, selling your projects is a great option. Start by showcasing your work to friends and family, and consider setting up an online store on platforms like Etsy. Attend local craft fairs and markets to reach a wider audience.

    Challenges you will encounter!

    Like any craft, comes with its challenges. Whether it’s dealing with difficult materials, complex designs, or limited tools, perseverance is key. Keep a positive mindset, seek help when needed, and remember that each challenge is an opportunity to learn and grow.

    Maintaining Your Tools

    Proper tool maintenance is essential for safe and efficient woodworking. Regularly clean and sharpen your tools, and store them in a dry, organized space. Well-maintained tools will last longer and perform better, making your projects more enjoyable.

    How this craft can be beneficial when working with Kids

    Woodworking can be a fantastic activity to share with children. It teaches them valuable skills like measuring, planning, and following instructions. Start with simple, child-friendly projects and always supervise them to ensure safety.

    The Community Aspect of Woodworking

    One of the best parts of woodworking is the sense of community it brings. Join online forums, attend local meetups, and participate in woodworking competitions. Sharing your experiences and learning from others will enrich your woodworking journey.

    For your “Free” Modern Table Plan – Click Here

    Conclusion: Your Woodworking Journey Begins Now

    Embarking on your woodworking journey is an exciting and fulfilling adventure. With the right tools, knowledge, and mindset, you can create beautiful and functional pieces that you’ll be proud of. Remember, the key to success in woodworking is practice, patience, and a willingness to learn. Now that you know how to get into woodworking, it’s time to roll up your sleeves and get started. Happy woodworking!

    Frequently Asked Questions (FAQs)

    1. What tools do I need to start woodworking? To start woodworking, you’ll need basic tools such as a tape measure, handsaw, hammer, chisels, and sandpaper. As you progress, you can invest in more specialized tools like a jigsaw or circular saw.

    2. What type of wood is best for beginners? Pine and poplar are excellent choices for beginners due to their softness and ease of workability. These woods are also readily available and affordable.

    3. How can I find woodworking plans? Woodworking plans can be found online, in woodworking magazines, or through community centers that offer woodworking classes. These plans provide step-by-step instructions and materials lists.

    4. How do I ensure my safety while woodworking? Always wear safety gear such as safety glasses, ear protection, and a dust mask. Keep your workspace clean and organized, and follow the manufacturer’s instructions for each tool.

    5. Can I start woodworking with a limited budget? Yes, you can start woodworking on a budget by buying used tools, using scrap wood, and starting with small projects. Look for deals at garage sales or online marketplaces to save money on tools and materials.

  • Dovetail Woodworking: Mastering the Art of Joinery

    Dovetail Woodworking: Mastering the Art of Joinery

    Introduction

    Dovetail woodworking is one of the most admired and respected techniques in the woodworking world. Known for its strength, durability, and beautiful aesthetic, dovetail joinery is a staple in fine furniture making and cabinetry. But what exactly makes dovetail woodworking so special? How can you master this craft to create stunning, lasting pieces? In this comprehensive guide, we’ll delve into the intricacies of dovetail woodworking, providing you with the knowledge and skills to elevate your woodworking projects.

    For your “Free”Guide to 13 Wood Joinery Types – Click Here.

    Understanding Dovetail Woodworking

    1. What is Dovetail Woodworking?

    Dovetail woodworking involves creating interlocking joints between two pieces of wood, often used in drawers, boxes, and furniture corners. These joints are renowned for their resistance to being pulled apart, thanks to the trapezoidal shape of the “tails” and “pins” that fit together perfectly.

    2. History of Dovetail Woodworking

    The art of dovetail joinery dates back thousands of years, with early examples found in ancient Egyptian furniture. Over time, dovetail woodworking has evolved, but the basic principles have remained the same, making it a timeless technique valued by craftsmen across generations.

    3. Types of Dovetail Woodworking Joints

    There are several types of dovetail joints, each with its unique application and aesthetic:

    • Through Dovetails: Visible from both sides of the joint, often used in boxes and carcass construction.
    • Half-Blind Dovetails: Visible from one side only, commonly used in drawer fronts.
    • Secret Mitered Dovetails: Concealed within the miter joint, providing a clean look.
    • Sliding Dovetails: Used to join boards at a right angle, offering both strength and alignment.

    4. Benefits of Dovetail Woodworking Joinery

    Why should you consider dovetail woodworking for your projects? Here are some compelling reasons:

    • Strength and Durability: Dovetail joints are incredibly strong and can withstand significant stress.
    • Aesthetic Appeal: The intricate pattern of dovetails adds a touch of craftsmanship and elegance.
    • Long-Lasting: Properly made dovetail joints can last for generations.

    Tools and Materials for Dovetail Woodworking

    5. Essential Tools

    To begin your journey into dovetail woodworking, you’ll need a few key tools:

    • Dovetail Saw: A fine-toothed saw designed for making precise cuts.
    • Chisels: Sharp chisels are crucial for cleaning up the joints.
    • Marking Gauge: For accurate measurement and marking of your cuts.
    • Mallet: Used in conjunction with chisels for controlled carving.
    • Layout Tools: Such as a square and a ruler for precise measurements.

    6. Choosing the Right Wood for Dovetail Woodworking

    Selecting the appropriate wood is vital for successful dovetail woodworking. Hardwoods like oak, maple, and cherry are popular choices due to their durability and fine grain, which provides a smooth finish.

    7. Preparing Your Workspace

    A well-organized workspace is essential, ensure you have a sturdy workbench, good lighting, and ample space to maneuver your tools and materials.

    Step-by-Step Guide to Making Dovetail Joints

    8. Planning Your Project

    Before you start cutting, plan your project thoroughly. Determine the size and type of dovetail joint you’ll be using, and sketch your design to visualize the final product.

    9. Marking and Measuring dovetail woodworking

    Accuracy is critical. Use your marking gauge to measure and mark the tails and pins on your wood pieces. Double-check your measurements to avoid mistakes.

    10. Cutting the Tails

    Using your dovetail saw, carefully cut along the marked lines for the tails. Maintain a steady hand and follow the lines precisely to ensure a snug fit.

    11. Cutting the Pins

    Align the tails on the second piece of wood and trace their outline. Cut along these lines to create the pins. Precision is key to achieving a perfect fit.

    12. Cleaning Up the Joints on dovetail woodworking

    Use chisels to clean up the cuts, ensuring the tails and pins fit together seamlessly. Patience and attention to detail are crucial at this stage.

    For your “Free” Workspace Plans – Click Here.

    13. Dry Fitting the Joints

    Before applying glue, dry fit the joints to check for any adjustments needed. The pieces should fit together snugly without gaps.

    14. Gluing and Clamping dovetail woodworking

    Apply wood glue to the joints and clamp them together securely. Wipe off any excess glue and allow it to dry according to the manufacturer’s instructions.

    Advanced Techniques in Dovetail Woodworking

    15. Decorative Dovetails

    Once you’ve mastered the basics, experiment with decorative dovetails. This involves varying the size and shape of the tails and pins for a unique, artistic look.

    16. Incorporating Inlays

    Adding inlays to your dovetail joints can enhance their visual appeal. Use contrasting wood or other materials to create striking designs.

    17. Using Dovetail Jigs

    For those looking to streamline the process, dovetail jigs can be a valuable tool. These jigs guide your saw and chisel, ensuring consistent and accurate cuts.

    Common Mistakes and How to Avoid Them

    18. Inaccurate Measurements

    One of the most common pitfalls in dovetail joinery is inaccurate measurements. Always measure twice and cut once to avoid costly mistakes.

    19. Poor Saw Technique

    A steady hand and proper saw technique are crucial. Practice cutting straight lines and maintaining control over your saw.

    20. Rushing the Process

    Patience is essential in dovetail joinery. Take your time with each step to ensure the highest quality joints.

    Applications of Dovetail Joinery

    21. Furniture Making

    Dovetail joinery is a hallmark of fine furniture making. Use it to construct drawers, cabinets, and carcasses for a sturdy and elegant finish.

    22. Box Making

    From jewelry boxes to tool chests, dovetail joinery is ideal for creating durable and beautiful boxes.

    23. Decorative Items

    Beyond functional items, dovetail joints can be used in decorative pieces like picture frames and wall art, showcasing your craftsmanship.

    Maintaining Your Dovetail Joints

    24. Regular Inspection

    Periodically inspect your dovetail joints for any signs of wear or damage. Early detection can prevent more significant issues down the line.

    25. Re-gluing

    If a joint becomes loose, re-glue it promptly to maintain the integrity of the piece.

    26. Finishing Techniques

    Applying a protective finish can enhance the appearance and longevity of your dovetail joints. Consider using varnish, oil, or wax based on your project needs.

    The Future of Dovetail Woodworking

    27. Innovations in Tools and Techniques

    As technology advances, new tools and techniques are emerging in dovetail joinery. Stay updated with the latest trends to continuously improve your skills.

    28. Sustainability and Woodworking

    Embrace sustainable practices by using responsibly sourced wood and minimizing waste in your dovetail woodworking projects.

    Conclusion

    Dovetail woodworking is a rewarding and enriching craft that combines precision, creativity, and skill. By mastering the techniques and understanding the principles behind dovetail joinery, you can create stunning, durable pieces that stand the test of time. Whether you’re a seasoned woodworker or a beginner, there’s always something new to learn and explore in the world of dovetail woodworking.

    For your “Free” 2 in 1 Folding Picnic Table Bench Plan – Click Here.

    FAQs

    1. What wood is best for dovetail joinery?

    Hardwoods like oak, maple, and cherry are ideal for dovetail woodworking due to their durability and fine grain.

    2. Can I use dovetail jigs for all types of joints?

    Dovetail jigs are versatile and can be used for most dovetail joints, though manual techniques might be preferred for more intricate designs.

    3. How long does it take to master dovetail joinery?

    The time to master dovetail woodworking varies based on your dedication and practice. With consistent effort, you can achieve proficiency within a few months.

    4. Are dovetail joints stronger than other types of joinery?

    Yes, dovetail joints are known for their strength and resistance to being pulled apart, making them one of the strongest types of joinery.

    5. Can dovetail joinery be done with power tools?

    While traditional dovetail woodworking is done with hand tools, power tools and jigs can significantly speed up the process and ensure precision.

  • Kinds of Joints in Carpentry: Essential Techniques for Woodworkers

    Kinds of Joints in Carpentry: Essential Techniques for Woodworkers

    Introduction to Kinds of Joints in Carpentry

    Diving into woodworking requires a solid grasp of the kinds of joints in carpentry. These joints are fundamental in constructing both functional and decorative pieces. Whether you’re crafting a simple bookshelf or an elaborate dining room table, the integrity of your work depends heavily on the joints you choose. This article will guide you through the myriad options available, their applications, and tips on selecting the right joint for any project.

    For your “Free” Guide to 13 Wood Joinery Types – Click Here.

    What is a Carpentry Joint?

    A carpentry joint connects two or more pieces of wood. The method of connection ranges from basic mechanical fastenings, like screws and nails, to more complex interlocking designs. Factors such as the project’s aesthetic goals, structural requirements, and the woodworker’s skill level influence the choice of joint.

    Why the Right Kinds of Joints in Carpentry Matter

    The functionality and longevity of a wooden structure greatly depend on the appropriate selection of joint type. A well-chosen joint ensures durability and enhances the piece’s beauty. Conversely, a poor joint choice can lead to structural failures or aesthetic discrepancies that compromise the project’s quality.

    Basic Kinds of Joints in Carpentry Explained

    1. Butt Joint: Simplicity in Action

    The butt joint is the most basic type, where the ends of two pieces of wood are butted together and fixed, usually with nails, screws, or glue. While simple and quick to make, butt joints are relatively weak and often require reinforcement with other joint types for added stability.

    2. Miter Joint: Elegance in Angles

    Miter joints involve cutting two pieces of wood at an angle, most often 45 degrees, so they form a perfect right angle when joined. This type of joint is commonly used for frames and decorative trims, where a seamless appearance is crucial.

    3. Lap Joint: Overlapping Strength

    A lap joint forms by overlapping two pieces of wood, either fully or partially. It provides more strength than a butt joint due to the increased surface area for adhesion and is particularly effective in frame construction.

    Advanced Types of Carpentry Joints

    4. Dovetail Joint: Interlocking Mastery

    The dovetail joint, with its interlocking fingers, resists being pulled apart and offers visual appeal, making it ideal for drawer construction and fine cabinetmaking. This joint is complex to make but provides excellent durability and strength.

    5. Mortise and Tenon Joint: Time-Tested Durability

    One of the oldest and strongest joints in woodworking, the mortise and tenon consists of a tenon fitting snugly into a mortise. It sees widespread use in heavy furniture and structural frames due to its impressive load-bearing capacity.

    6. Dowel Joint: Precision and Strength

    This joint uses small wooden pins known as dowels to connect pieces of wood. Dowel joints are strong and can be nearly invisible, which is ideal for aesthetic projects where visible nails or screws are undesirable.

    Decorative and Specialty Wood Joints

    7. Finger Joint: Complex and Strong

    The finger joint uses a series of interlocking fingers that are glued together. It is extremely strong and often appears in box construction and carpentry where strength is needed without the bulk of other joints.

    8. Bridle Joint: Structural Elegance

    A variation of the mortise and tenon, the bridle joint features a tenon on one piece and a mortise on the other, forming a T- or L-shape. It typically serves frames and general carpentry for its robustness.

    For your “Free” Workspace Plans – Click Here.

    9. Rabbet Joint: Built for Cabinets

    A rabbet joint involves a notch or step cut into the edge of a piece of wood to receive another piece. This type of joint often appears in cabinet and bookcase backings.

    10. Pocket Hole Joint: Quick and Versatile

    The pocket hole joint involves drilling a hole at an angle into one piece of wood and joining it to another with a screw. It’s fast to execute and provides a strong joint with minimal visibility of hardware.

    11. Biscuit Joint: Alignment and Simplicity

    This joint uses small, football-shaped slices of compressed wood, known as biscuits, which are inserted into matching slots in both pieces of wood. Biscuit joints excel at aligning edges during glue-ups, making them ideal for paneling and tabletops.

    Choosing the Right Kinds of Joints in Carpentry for Your Project

    Selecting the appropriate joint involves considering the project’s design, the types and directions of stress it will endure, and the desired aesthetics. Matching the joint’s characteristics with the project’s requirements ensures durability and visual appeal.

    Maintaining Joints in Carpentry

    Maintaining the integrity of carpentry joints over time is crucial for the longevity of the piece. Regular inspections for signs of stress, wear, or failure, particularly in load-bearing areas, can prevent structural damage and extend the item’s life.

    Innovations in Types of Carpentry Joints

    Advancements in woodworking tools and techniques continue to produce new types of joints and improve the ease and efficiency of traditional methods. These innovations often focus on increasing strength, reducing visibility, or speeding up the construction of joints.

    Conclusion: Mastering Kinds of Joints in Carpentry

    Mastering the different kinds of joints in carpentry is essential for any woodworker seeking to enhance the quality and durability of their projects. From simple butt joints to intricate dovetails, each joint has specific advantages and applications. Understanding when and how to use each joint ensures your projects are not only functional but also aesthetically pleasing.

    For your “Free” Outdoor Projects Plan – Click Here.

    FAQs About Kinds of Woodworking Joints in Carpentry

    What is the strongest joint in carpentry?
    The mortise and tenon joint is often considered the strongest due to its extensive surface area and interlocking design.

    Which joint is best for making a wooden box?
    The finger joint offers both strength and a decorative edge, making it ideal for boxes that require durability and aesthetic appeal.

    How do I choose the right joint for outdoor furniture?
    Choose joints that are robust and can withstand weather elements, such as the dovetail or mortise and tenon, which provide excellent strength and durability.

    Can I use multiple types of joints in a single project?
    Absolutely! Combining different joints can optimize both the strength and the appearance of your project.

    What tools do I need to create these joints?
    Depending on the joint, you might need a variety of tools such as saws, chisels, routers, or doweling jigs. Advanced joints like dovetails may require specialized tools for precise cutting and fitting.

    By familiarizing yourself with the various kinds of joints in carpentry, you can select the best joint for any scenario, ensuring your projects are robust, beautiful, and stand the test of time.

  • Woodworking Fasteners: An Expert Guide to Perfecting Joinery

    Woodworking Fasteners: An Expert Guide to Perfecting Joinery

    Woodworking is an ancient craft, and every woodworker, novice or pro, must master the art of joining wood. This is where woodworking fasteners come in. They might seem like minor details, but choosing the right fastener can mean the difference between a well-built, durable piece and a frustrating failure. In this guide, we’ll dive deep into the world of woodworking fasteners, offering essential advice on types, uses, and tips for choosing the best one for your projects.

    For your “Free” Outdoor Projects Plan – Click Here.

    1. What Are Woodworking Fasteners?

    Woodworking fasteners are tools used to join pieces of wood together. They range from simple nails to advanced bolts, helping woodworkers create solid structures or decorative accents. Understanding their uses and differences is crucial to achieving high-quality results.

    Fasteners are often selected based on project requirements and wood types, considering factors like weight-bearing capacity and appearance. Some fasteners are visible, while others remain hidden, giving the piece a clean, unobtrusive look.

    2. Nails: The Classic Woodworking Fasteners

    Nails are perhaps the oldest form of woodworking fasteners. They’re available in various sizes, shapes, and materials to cater to different wood types and applications. Choosing the right nail is essential to avoid wood splitting or insufficient holding power.

    Some popular types of nails include:

    • Common Nails: These have thick shanks and are ideal for framing or rough carpentry.
    • Finish Nails: Thinner and less visible, used for interior trim or finishing work.
    • Box Nails: With a thinner shank, these nails reduce the risk of splitting wood but offer less holding power.
    • Duplex Nails: Easily removable, they’re used for temporary constructions like scaffolding.

    When working with nails, the length should generally be at least three times the thickness of the wood being joined. Too short, and it won’t hold; too long, and it risks splitting the wood.

    3. Screws: A Stronger Alternative in Woodworking Fasteners


    Screws provide a stronger hold than nails and are versatile woodworking fasteners. They come in a dizzying array of sizes, head types, and thread patterns. Most importantly, screws can be removed and reused, making them suitable for furniture projects that may need future adjustments.

    Some common types include:

    • Wood Screws: Designed explicitly for woodworking, they come in various head styles like flat, round, or oval.
    • Drywall Screws: Thin but with deep threads, they are often used for lightweight woodworking projects.
    • Deck Screws: Weather-resistant and suitable for outdoor projects, especially decks.
    • Lag Screws: Heavy-duty and excellent for large projects like fences or structural work.

    When selecting screws, consider their material and coating. Stainless steel or coated screws are better for outdoor projects due to their resistance to rust. For a clean finish, countersink the screw and cover it with wood putty or a wood plug.

    4. Bolts and Nuts: For Heavy-Duty Fastening


    Bolts and nuts are ideal for applications requiring high clamping force or where joints may be under significant stress. Carriage bolts, lag bolts, and machine bolts each have unique properties suited for different woodworking projects.

    • Carriage Bolts: These have a round head and a square section under the head that locks into the wood to prevent rotation.
    • Lag Bolts: Similar to screws but much thicker, often used in heavy timber construction.
    • Machine Bolts: Paired with nuts to create a secure and tight connection.

    Bolts usually require pre-drilled holes, and washers can help distribute the load over a larger surface, preventing the bolt from pulling through the wood.

    5. Dowels: Invisible Strength in Woodworking Fasteners


    Dowels are a clever solution for those seeking nearly invisible woodworking fasteners. They are inserted into drilled holes and glued, creating hidden yet secure joints often used in furniture assembly.

    Dowels offer excellent holding strength when glued correctly, and the alignment of holes is crucial for a perfect fit. Doweling jigs can help align holes precisely. Dowels work exceptionally well for edge-to-edge joints and where a seamless appearance is desired.

    6. Biscuits and Biscuit Joints


    Biscuit joints involve oval-shaped wooden biscuits inserted into slots made by a special tool. The biscuits swell with glue, creating a tight and strong joint, especially popular for edge-to-edge joining like tabletops.

    Biscuit joints offer quick assembly and ensure perfect alignment. However, they’re not ideal for joints bearing high stress or load. The key to success is using the correct biscuit size for the wood’s thickness.

    7. Pocket Hole Screws


    Pocket hole screws are specifically designed for pocket hole joinery, creating angled joints by driving screws into pre-drilled holes at a shallow angle. This technique is often used for hidden, strong connections in cabinetry.

    Pocket hole jigs make it easy to create accurate pocket holes consistently. The special screws have wide heads that firmly grip the pocket’s surface, securing the joint tightly. Pocket hole joinery is versatile, offering strong joints with minimal visible hardware.

    For your “Free” Guide to 13 Wood Joinery Types – Click Here.

    8. Brads and Brad Nails: Delicate and Discreet


    Brads are thinner than traditional nails, making them suitable for more delicate woodworking projects like trim and molding. They provide secure fastening without damaging the material’s surface.

    Brad nails are usually driven using a pneumatic or electric brad nailer, ensuring precise, rapid, and almost invisible fastening. They’re perfect for moldings, picture frames, and small cabinetry details where holding power is crucial without marring the wood.

    9. Staples: Quick and Efficient Fasteners


    Staples are ideal for quick fastening, particularly in upholstery or where multiple layers of wood or other materials are involved. They might not be suitable for structural joints, but they’re indispensable for specific applications.

    Staple guns (manual, electric, or pneumatic) make quick work of fastening wood veneers, fabric, or wiring to wooden frames. They’re also commonly used in cabinet backs, drawer bottoms, and other lightweight applications.

    10. Rivets in Woodworking Fasteners


    Though primarily used in metalworking, rivets find their way into woodworking for their secure fastening properties. They are especially useful in mixed-material projects where both wood and metal need to be connected.

    Blind rivets, or pop rivets, are the most common type used in woodworking because they can be installed from one side. Riveting requires specialized tools, but the result is a tight, long-lasting connection that can withstand vibrations.

    11. Glues as Woodworking Fasteners


    Though not technically fasteners, adhesives are crucial to woodworkers. Wood glues like PVA, epoxy, and cyanoacrylate act as powerful bonding agents, sometimes stronger than nails or screws, depending on the application.

    • PVA Glue: A staple in most shops, PVA glue (also known as carpenter’s glue) is perfect for general-purpose joinery and can be sanded or painted once dry.
    • Epoxy: Excellent for filling gaps and offering superior strength. Ideal for repairing damaged wood.
    • Cyanoacrylate (CA): Also known as super glue, it’s best used for small repairs or temporarily holding pieces before permanent fastening.

    Proper glue application is crucial. Apply evenly across both surfaces, clamp firmly, and allow ample drying time to achieve optimal strength.

    12. Selecting the Right Fastener for Your Project


    Choosing the right woodworking fastener depends on several factors, including the type of wood, stress loads, and project requirements. Delicate projects may require brads or dowels, while heavy-duty builds may need bolts or screws.

    Consider the following factors:

    • Wood Species: Hardwoods may require pre-drilling to prevent splitting, while softwoods are more forgiving.
    • Load Requirements: How much weight will the joint bear? Screws or bolts are often better for high-load applications.
    • Environmental Conditions: Outdoor projects demand fasteners that can resist corrosion.

    A thorough assessment ensures that your chosen fastener will deliver both function and aesthetic appeal.

    13. Pre-Drilling: The Unsung Hero


    Pre-drilling can save your wood from splitting and give screws better grip. It’s a step that many woodworkers skip but can significantly improve joint strength.

    The drill bit size should be slightly smaller than the screw’s core diameter, ensuring the screw threads will bite into the surrounding wood while preventing splitting. Countersinking is equally important when working with hardwoods, providing a smooth surface for screws.

    14. Common Mistakes to Avoid with Fasteners


    Using the wrong fastener or not accounting for wood movement can cause catastrophic failure. Avoid driving screws too close to the edge or using nails that are too long, as both can weaken your joints.

    Other common mistakes include:

    • Overdriving Screws: This can strip the threads or weaken the surrounding wood.
    • Wrong Fastener Size: Fasteners that are too small won’t hold, while those too large can damage the joint.
    • Ignoring Wood Movement: Some fasteners restrict wood movement, leading to cracking.

    When in doubt, test on scrap wood before applying the fastener to your final piece.

    15. Finishing Touches: Making Fasteners Invisible


    Counter-sinking, wood fillers, and plugs can help conceal woodworking fasteners for a clean, professional look. These techniques are often used in fine furniture making to hide screws and nails.

    • Countersinking: Creates a small hole to bury the fastener head below the surface.
    • Wood Filler: Matches the surrounding wood to cover nail or screw heads.
    • Plugs: Use dowels or pre-made wood plugs to cover countersunk screw holes.

    Taking the time to hide fasteners can elevate a project from amateur to artisan.

    16. Creative Fastening Solutions


    Mixing fastener types or using a combination of mechanical and adhesive fasteners can lead to innovative joinery solutions. Experimenting with different types can yield results that are both strong and aesthetically pleasing.

    For instance, a combination of dowels and screws can offer a tight, hidden joint for furniture. Alternatively, using rivets and bolts in tandem can create attractive accents that blend metal and wood seamlessly.

    17. Why Practice Matters in Fastening Techniques


    Woodworking fasteners are only as effective as the skill with which they are applied. Practicing different joinery techniques is vital for mastering the art of fastening, ensuring that each piece you make stands the test of time.

    Consider setting up a small test project where you can try out different fasteners, learn their strengths and limitations, and see how they impact various wood types. Practical experimentation will also reveal which techniques you feel most confident using.

    18. Conclusion: Craftsmanship and Fasteners Go Hand in Hand


    Woodworking fasteners are indispensable to the craft. Whether you’re using traditional nails or innovative biscuits, understanding each type’s strengths and weaknesses is essential for creating long-lasting, beautiful wood projects. Next time you’re planning a woodworking project, take a moment to choose the best fastener for the job – it’s often the key to perfect joinery.

    For your “Free” Workspace Plans – Click Here.

    Frequently Asked Questions About Woodworking Fasteners

    • What is the strongest woodworking fastener?
      The strongest woodworking fastener varies by application. For heavy-duty projects, bolts and nuts are ideal due to their clamping power. Screws also offer significant strength when correctly applied, especially for wood-to-wood connections.
    • Should I use nails or screws for my woodworking project?
      It depends on the project’s requirements. Nails are faster to install and useful for trim and framing, while screws provide a stronger hold and are better for projects needing future adjustments or where additional strength is essential.
    • How do I prevent wood from splitting when using fasteners?
      Pre-drilling is key to preventing wood from splitting, especially when using screws or nails near edges. Selecting the appropriate size and type of fastener and driving it at a moderate speed also helps reduce the risk of splits.
    • Can I mix different fasteners in one project?
      Yes! Mixing fasteners can offer creative and practical solutions. For instance, combining mechanical fasteners like screws with adhesives or dowels can enhance the joint’s strength while providing aesthetic advantages.
    • Are wood glues strong enough to replace mechanical fasteners?
      Wood glues can be stronger than mechanical fasteners in specific applications, particularly when joining edge-to-edge. However, using glues in combination with screws or nails often leads to a more durable and reliable bond.